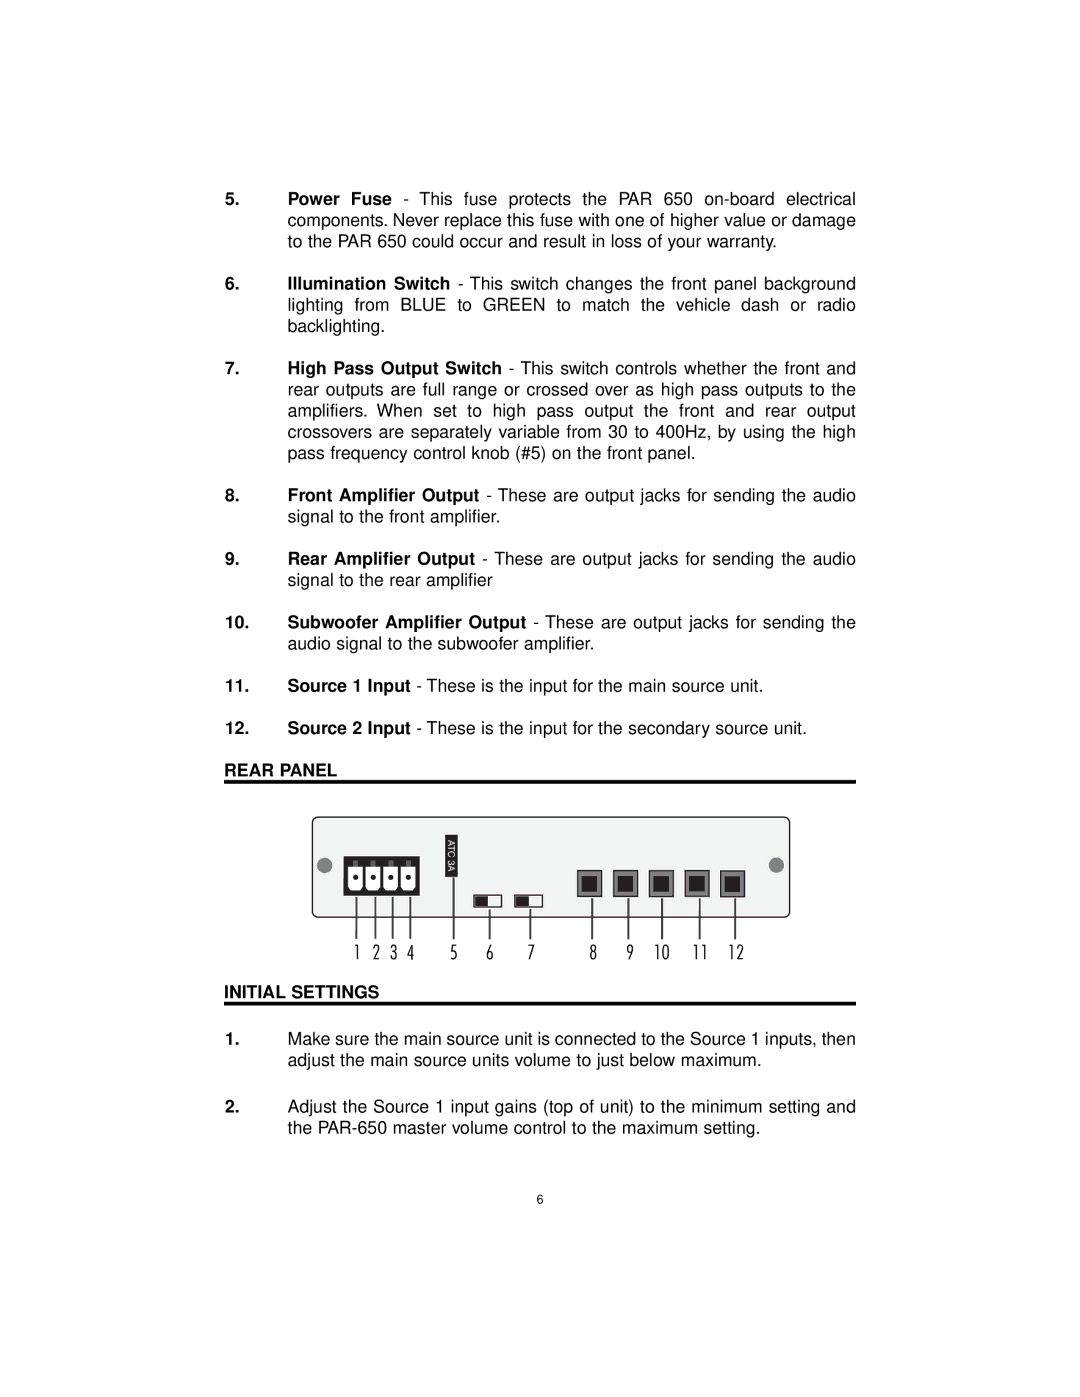
5.Power Fuse - This fuse protects the PAR 650
6.Illumination Switch - This switch changes the front panel background lighting from BLUE to GREEN to match the vehicle dash or radio backlighting.
7.High Pass Output Switch - This switch controls whether the front and rear outputs are full range or crossed over as high pass outputs to the amplifiers. When set to high pass output the front and rear output crossovers are separately variable from 30 to 400Hz, by using the high pass frequency control knob (#5) on the front panel.
8.Front Amplifier Output - These are output jacks for sending the audio signal to the front amplifier.
9.Rear Amplifier Output - These are output jacks for sending the audio signal to the rear amplifier
10.Subwoofer Amplifier Output - These are output jacks for sending the audio signal to the subwoofer amplifier.
11.Source 1 Input - These is the input for the main source unit.
12.Source 2 Input - These is the input for the secondary source unit.
REAR PANEL
ATC 3A |
1 | 2 | 3 | 4 | 5 | 6 | 7 | 8 | 9 | 10 | 11 | 12 |
INITIAL SETTINGS
1.Make sure the main source unit is connected to the Source 1 inputs, then adjust the main source units volume to just below maximum.
2.Adjust the Source 1 input gains (top of unit) to the minimum setting and the
6
