Cardio Theater Integrated Bracket Assembly Instructions
4Attach the LCD Screen
Important: The screen spacer is used only for the Cardio Theater PVS4/5/15 LCD Screen.
1. To protect the LCD Screen for the next few |
steps, place it screen side down on a clean |
work surface. |
Important: Use proper materials to protect the |
LCD Screen while you remove the plastic |
cover and metal mounting bracket from the |
back of the LCD Screen. |
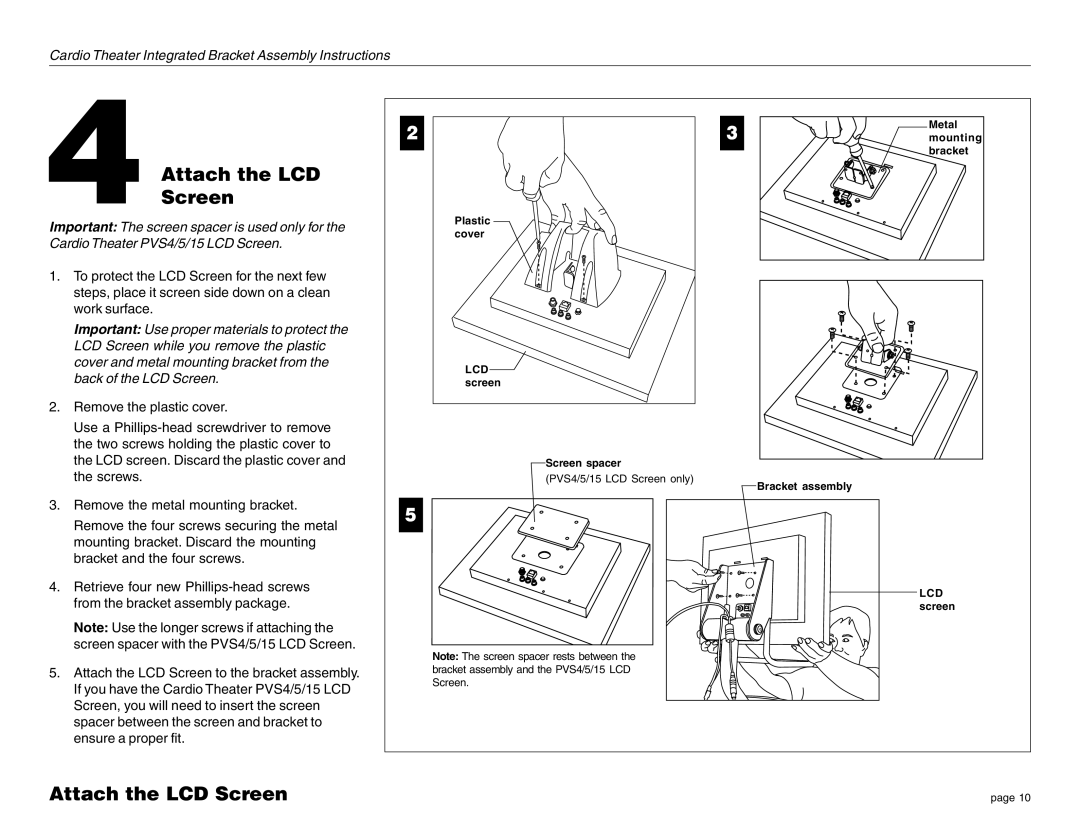
2. Remove the plastic cover. |
Use a |
the two screws holding the plastic cover to |
2 | 3 |
| Plastic |
| cover |
| LCD |
| screen |
Metal |
mounting |
bracket |
the LCD screen. Discard the plastic cover and |
the screws. |
3. Remove the metal mounting bracket. |
Remove the four screws securing the metal |
mounting bracket. Discard the mounting |
bracket and the four screws. |
4. Retrieve four new |
from the bracket assembly package. |
Note: Use the longer screws if attaching the |
screen spacer with the PVS4/5/15 LCD Screen. |
5. Attach the LCD Screen to the bracket assembly. |
If you have the Cardio Theater PVS4/5/15 LCD |
Screen, you will need to insert the screen |
spacer between the screen and bracket to |
ensure a proper fit. |
Screen spacer
(PVS4/5/15 LCD Screen only)
5
Note: The screen spacer rests between the bracket assembly and the PVS4/5/15 LCD Screen.
Bracket assembly
LCD screen
Attach the LCD Screen
page 10
