V I . C O M F O R T A D J U S T M E N T S
SETSCREW
FOOTREST BRACKET
NUTS AND BOLTS
BALL DETENT PIN
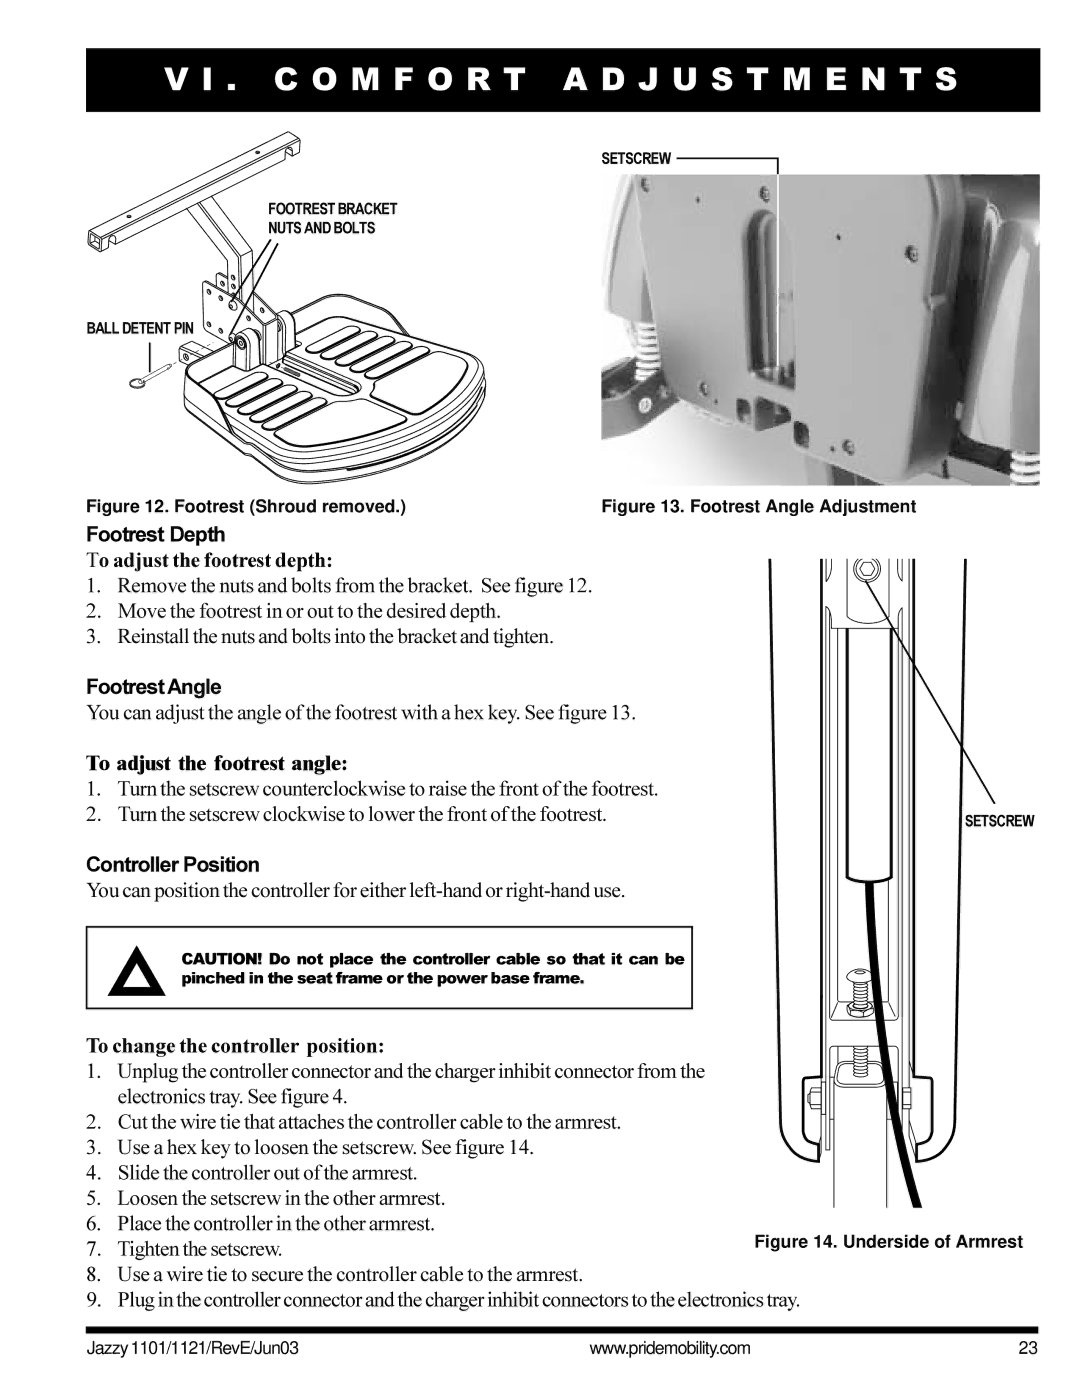
Figure 12. Footrest (Shroud removed.) | Figure 13. Footrest Angle Adjustment |
Footrest Depth
To adjust the footrest depth:
1.Remove the nuts and bolts from the bracket. See figure 12.
2.Move the footrest in or out to the desired depth.
3.Reinstall the nuts and bolts into the bracket and tighten.
Footrest Angle
You can adjust the angle of the footrest with a hex key. See figure 13.
To adjust the footrest angle:
1.Turn the setscrew counterclockwise to raise the front of the footrest.
2.Turn the setscrew clockwise to lower the front of the footrest.
Controller Position
You can position the controller for either
SETSCREW
CAUTION! Do not place the controller cable so that it can be pinched in the seat frame or the power base frame.
To change the controller position:
1.Unplug the controller connector and the charger inhibit connector from the electronics tray. See figure 4.
2.Cut the wire tie that attaches the controller cable to the armrest.
3.Use a hex key to loosen the setscrew. See figure 14.
4.Slide the controller out of the armrest.
5.Loosen the setscrew in the other armrest.
6.Place the controller in the other armrest.
7.Tighten the setscrew.
8.Use a wire tie to secure the controller cable to the armrest.
9.Plug in the controller connector and the charger inhibit connectors to the electronics tray.
Jazzy 1101/1121/RevE/Jun03 | www.pridemobility.com | 23 |
