I V . A S S E M B L Y
To install the seat:
1.Set the trapeze bars to the desired height. To change the trapeze bar height, see V. "Comfort Adjustments."
2.Tilt the seat back and slide the rear extrusion onto the rear trapeze bar. See figure 10.
3.Lower the front extrusion onto the front trapeze bar until the seat locks into place.
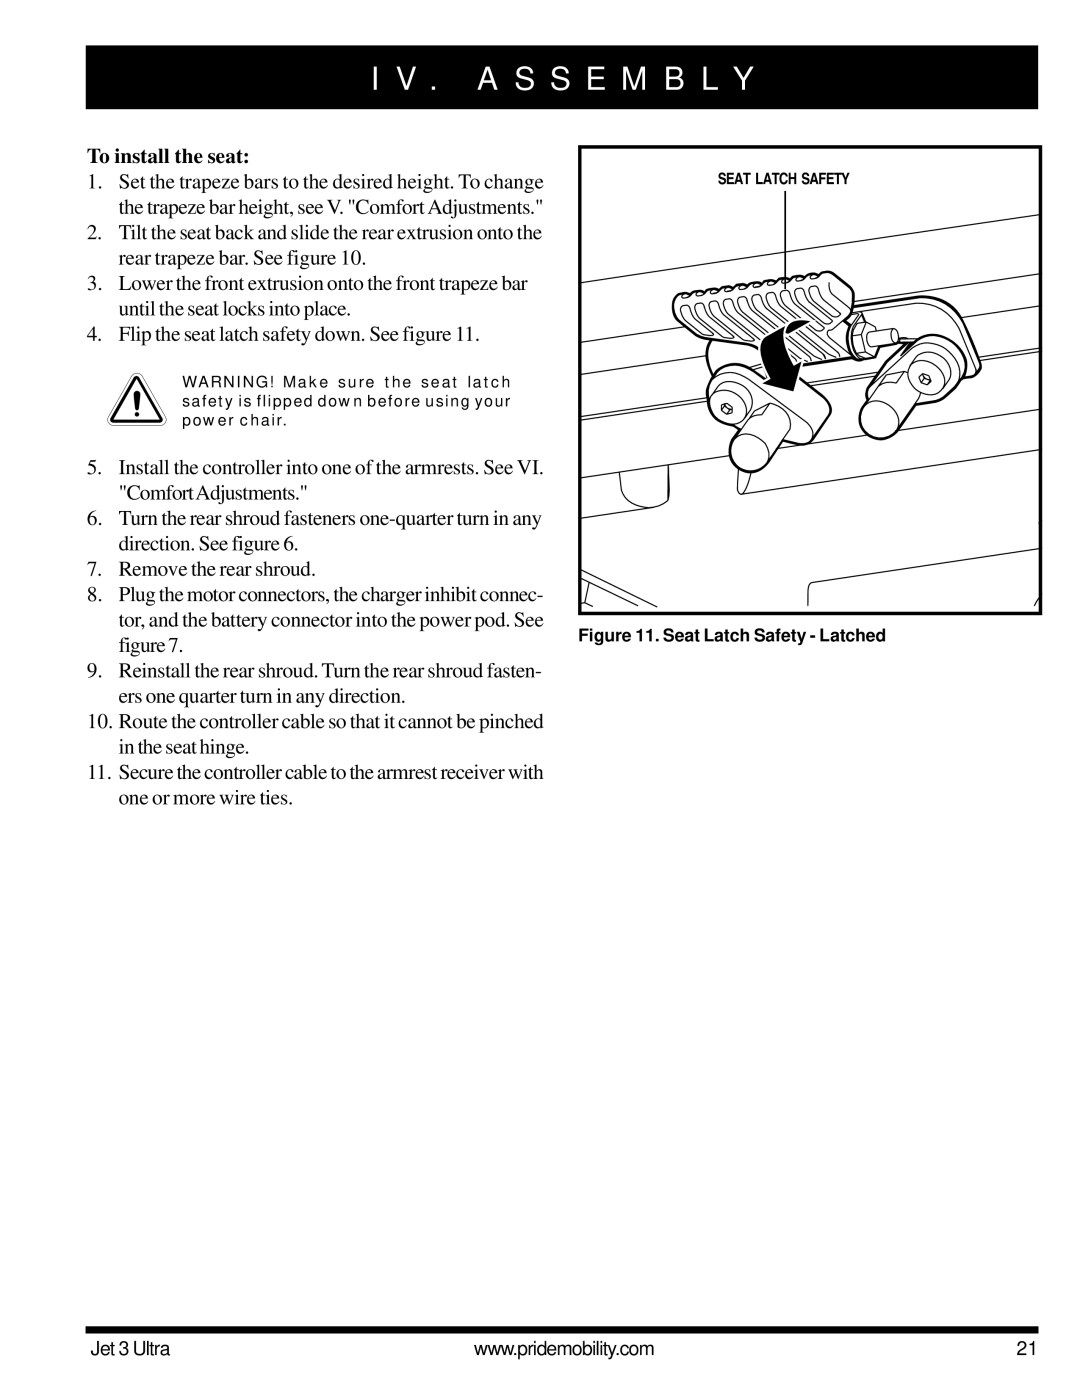
4.Flip the seat latch safety down. See figure 11.
WARNING! Make sure the seat latch safety is flipped down before using your power chair.
5.Install the controller into one of the armrests. See VI. "ComfortAdjustments."
6.Turn the rear shroud fasteners
7.Remove the rear shroud.
8.Plug the motor connectors, the charger inhibit connec- tor, and the battery connector into the power pod. See figure 7.
9.Reinstall the rear shroud. Turn the rear shroud fasten- ers one quarter turn in any direction.
10.Route the controller cable so that it cannot be pinched in the seat hinge.
11.Secure the controller cable to the armrest receiver with one or more wire ties.
SEAT LATCH SAFETY |
Figure 11. Seat Latch Safety - Latched
Jet 3 Ultra | www.pridemobility.com | 21 |
