V I . C O M F O R T A D J U S T M E N T S
Seatback Height
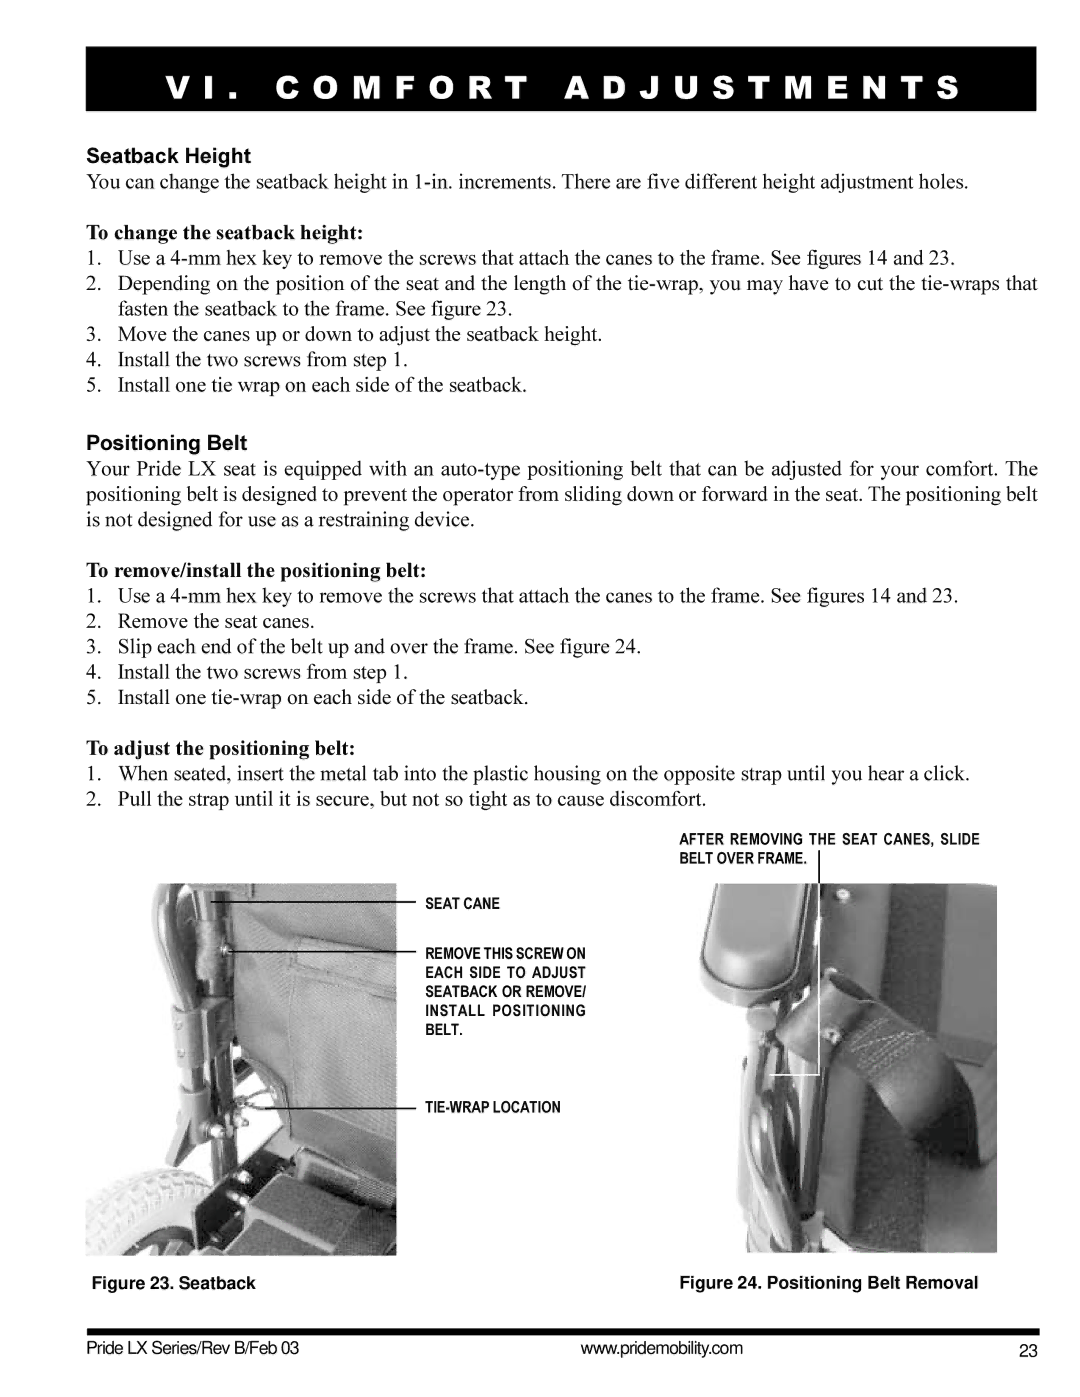
You can change the seatback height in
To change the seatback height:
1.Use a
2.Depending on the position of the seat and the length of the
3.Move the canes up or down to adjust the seatback height.
4.Install the two screws from step 1.
5.Install one tie wrap on each side of the seatback.
Positioning Belt
Your Pride LX seat is equipped with an
To remove/install the positioning belt:
1.Use a
2.Remove the seat canes.
3.Slip each end of the belt up and over the frame. See figure 24.
4.Install the two screws from step 1.
5.Install one
To adjust the positioning belt:
1.When seated, insert the metal tab into the plastic housing on the opposite strap until you hear a click.
2.Pull the strap until it is secure, but not so tight as to cause discomfort.
AFTER REMOVING THE SEAT CANES, SLIDE
BELT OVER FRAME.
SEAT CANE
REMOVE THIS SCREW ON
EACH SIDE TO ADJUST
SEATBACK OR REMOVE/
INSTALL POSITIONING
BELT.
Figure 23. Seatback | Figure 24. Positioning Belt Removal |
Pride LX Series/Rev B/Feb 03 | www.pridemobility.com | 23 |