
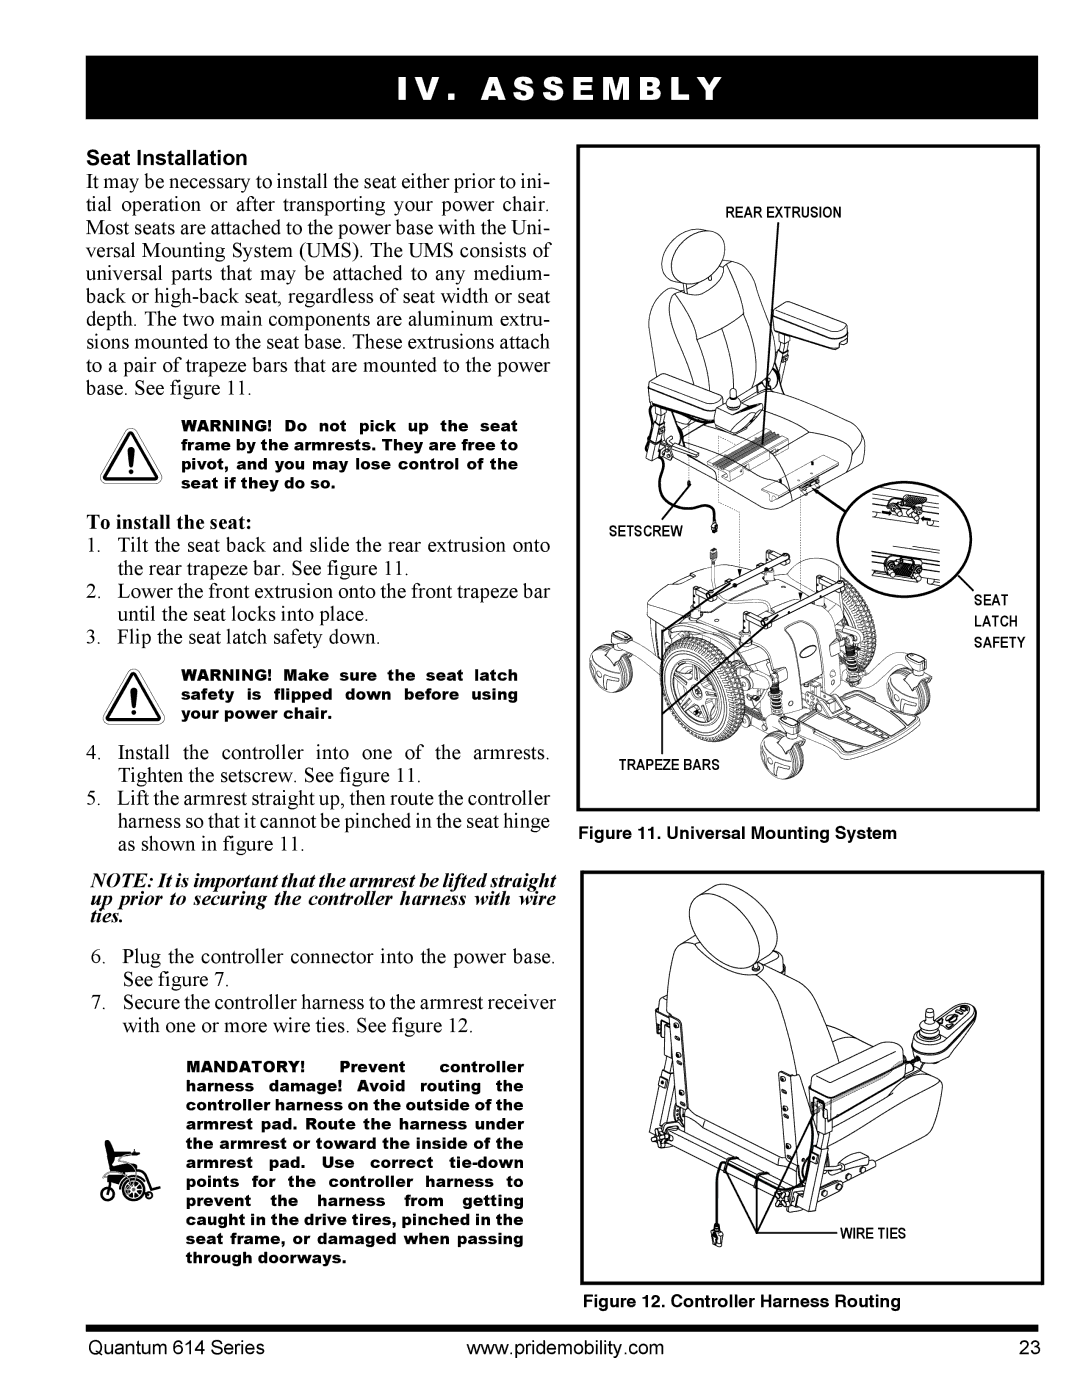
614 3MP, Quantum 614, 614 3S, 614 3SP specifications
Pride Mobility is a leading brand in the mobility scooter and power wheelchair market, and its Quantum 614 series continues this tradition of innovation and quality. The Quantum 614 3MP, 614 3S, 614, and 614 3SP models are designed to meet the needs of individuals requiring mobility assistance without compromising on independence or comfort.The Quantum 614 3MP is equipped with advanced power tilt and recline functions, allowing users to adjust their seating position easily for maximum comfort throughout the day. With a weight capacity of up to 450 lbs, it provides an accommodating experience for users of varying sizes. The spacious seating and ergonomic design also enhance user experience, significantly reducing fatigue during extended use.
The Quantum 614 3S model offers similar features, but with a focus on additional stability and safety. This model incorporates a robust suspension system that allows for smoother rides even over uneven terrains. The 3S version is perfect for individuals who require a reliable mobility solution for both indoor and outdoor use. The enhanced traction and stability systems ensure users feel secure, whether navigating a shopping mall or rural pathways.
The standard Quantum 614 model retains many features from its variants while providing a simpler option for users who may not require additional functionalities. It still boasts a powerful motor and battery system that allows it to reach high speeds while maintaining efficiency and reliability. The user-friendly joystick control offers precision steering, making navigation hassle-free.
For those seeking further advancements, the Quantum 614 3SP model adds more technology-driven capabilities. It is integrated with advanced electronics and power seating options that enable users to adjust their position with ease. Additionally, the 614 3SP comes equipped with LED lighting that enhances visibility and safety during nighttime use.
All models in the Quantum 614 series feature a sleek, modern design, with durable construction that ensures longevity. The customizable color options allow users to personalize their mobility device to reflect their style. With a range of advanced features and varying models, the Quantum 614 series by Pride Mobility is designed to cater to the diverse needs of mobility-challenged individuals, promoting independence and comfort in daily life.