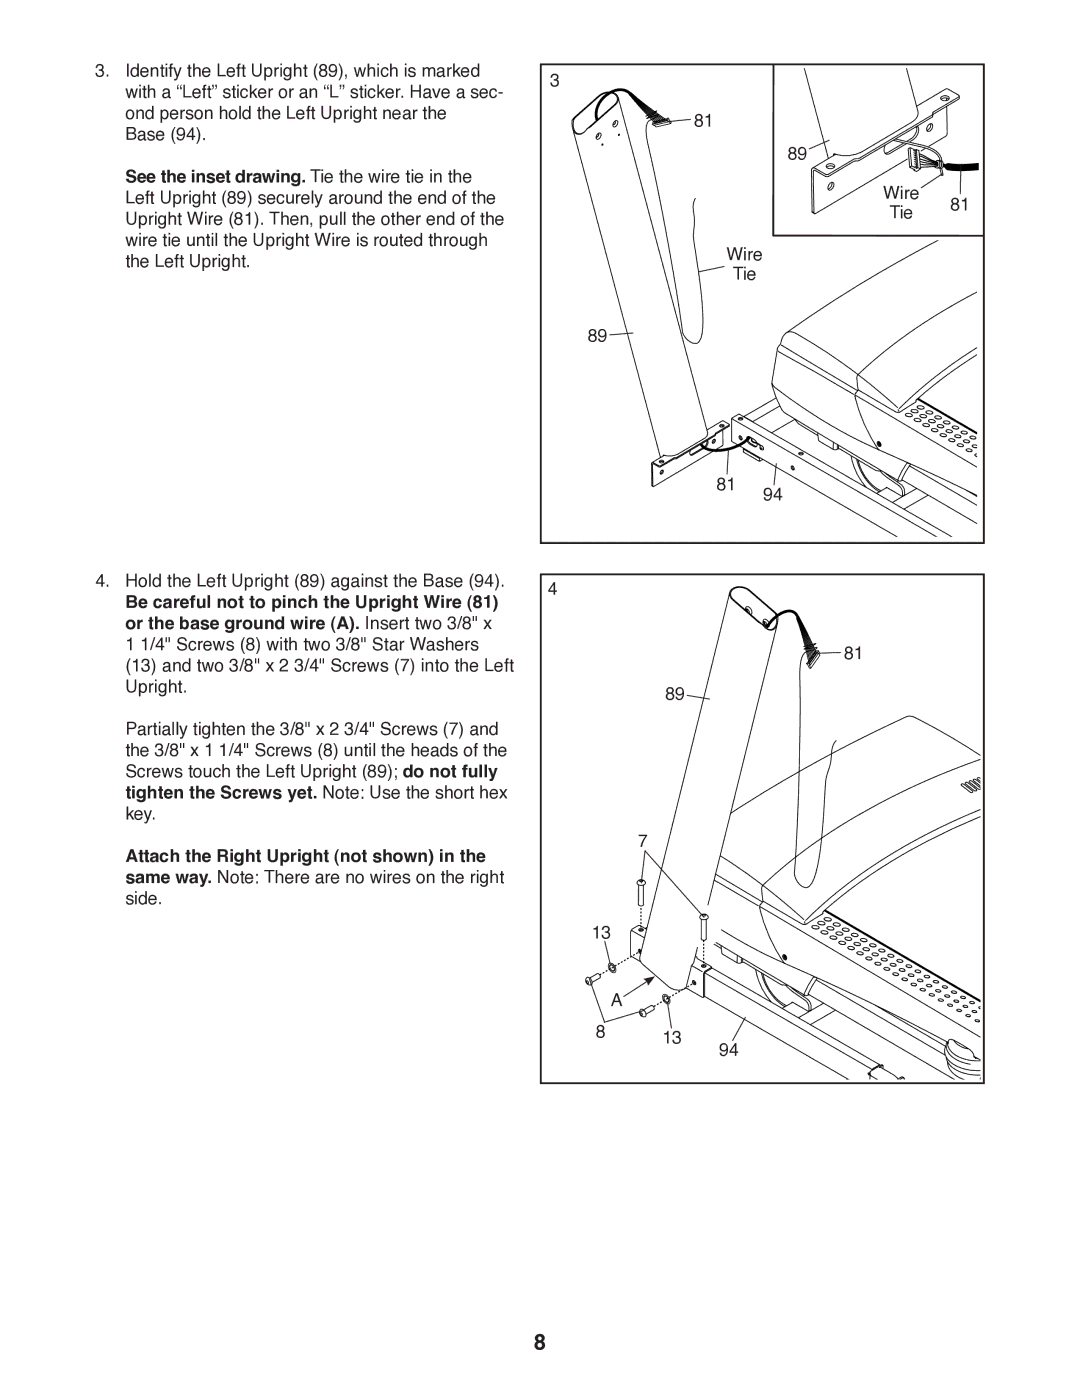
3. Identify the Left Upright (89), which is marked | 3 |
|
|
|
|
with a “Left” sticker or an “L” sticker. Have a sec- |
|
|
|
| |
|
|
|
|
| |
ond person hold the Left Upright near the |
|
| 81 |
|
|
Base (94). |
|
|
|
| |
|
|
| 89 |
| |
See the inset drawing. Tie the wire tie in the |
|
|
|
| |
|
|
| Wire | 81 | |
Left Upright (89) securely around the end of the |
|
|
| ||
Upright Wire (81). Then, pull the other end of the |
|
|
| Tie |
|
wire tie until the Upright Wire is routed through |
|
| Wire |
|
|
the Left Upright. |
|
|
|
| |
|
|
| Tie |
|
|
| 89 |
|
|
|
|
|
|
| 81 | 94 |
|
|
|
|
|
| |
4. Hold the Left Upright (89) against the Base (94). | 4 |
|
|
|
|
Be careful not to pinch the Upright Wire (81) |
|
|
|
| |
|
|
|
|
| |
or the base ground wire (A). Insert two 3/8" x |
|
|
|
|
|
1 1/4" Screws (8) with two 3/8" Star Washers |
|
|
| 81 |
|
(13) and two 3/8" x 2 3/4" Screws (7) into the Left |
|
|
|
| |
|
|
|
|
| |
Upright. |
| 89 |
|
|
|
|
|
|
|
| |
Partially tighten the 3/8" x 2 3/4" Screws (7) and |
|
|
|
|
|
the 3/8" x 1 1/4" Screws (8) until the heads of the |
|
|
|
|
|
Screws touch the Left Upright (89); do not fully |
|
|
|
|
|
tighten the Screws yet. Note: Use the short hex |
|
|
|
|
|
key. |
| 7 |
|
|
|
Attach the Right Upright (not shown) in the |
|
|
|
| |
|
|
|
|
| |
same way. Note: There are no wires on the right |
|
|
|
|
|
side. |
|
|
|
|
|
| 13 |
|
|
|
|
| A |
|
|
|
|
| 8 | 13 | 94 |
|
|
|
|
|
|
| |
| 8 |
|
|
|
|