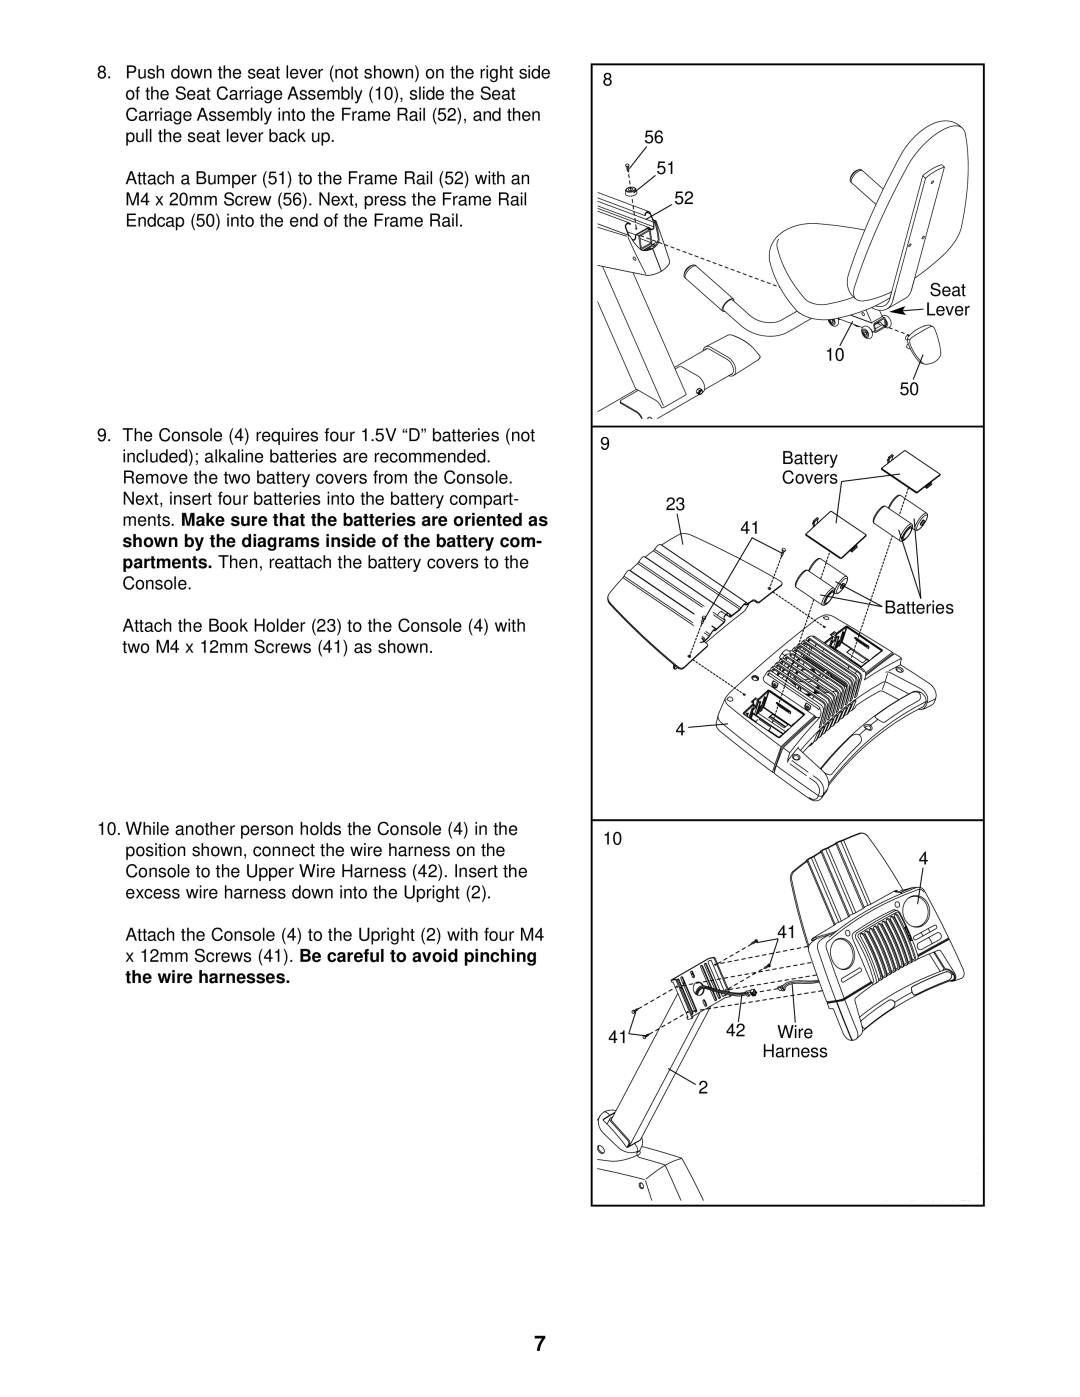
8. Push down the seat lever (not shown) on the right side | 8 |
|
|
of the Seat Carriage Assembly (10), slide the Seat |
|
| |
|
|
| |
Carriage Assembly into the Frame Rail (52), and then |
|
|
|
pull the seat lever back up. |
| 56 |
|
Attach a Bumper (51) to the Frame Rail (52) with an |
| 51 |
|
|
|
| |
M4 x 20mm Screw (56). Next, press the Frame Rail |
| 52 |
|
Endcap (50) into the end of the Frame Rail. |
|
|
|
|
|
| Seat |
|
|
| Lever |
|
|
| 10 |
|
|
| 50 |
9. The Console (4) requires four 1.5V “D” batteries (not | 9 |
|
|
included); alkaline batteries are recommended. |
| Battery | |
|
| ||
Remove the two battery covers from the Console. |
|
| Covers |
Next, insert four batteries into the battery compart- |
| 23 |
|
ments. Make sure that the batteries are oriented as |
|
| |
| 41 |
| |
shown by the diagrams inside of the battery com- |
|
| |
|
|
| |
partments. Then, reattach the battery covers to the |
|
|
|
Console. |
|
|
|
Attach the Book Holder (23) to the Console (4) with |
|
| Batteries |
|
|
| |
two M4 x 12mm Screws (41) as shown. |
|
|
|
|
| 4 |
|
10. While another person holds the Console (4) in the | 10 |
|
|
position shown, connect the wire harness on the |
| 4 | |
|
| ||
Console to the Upper Wire Harness (42). Insert the |
|
| |
|
|
| |
excess wire harness down into the Upright (2). |
|
|
|
Attach the Console (4) to the Upright (2) with four M4 |
|
| 41 |
x 12mm Screws (41). Be careful to avoid pinching |
|
|
|
the wire harnesses. |
|
|
|
| 41 | 42 | Wire |
|
| Harness | |
|
|
| |
|
| 2 |
|
7