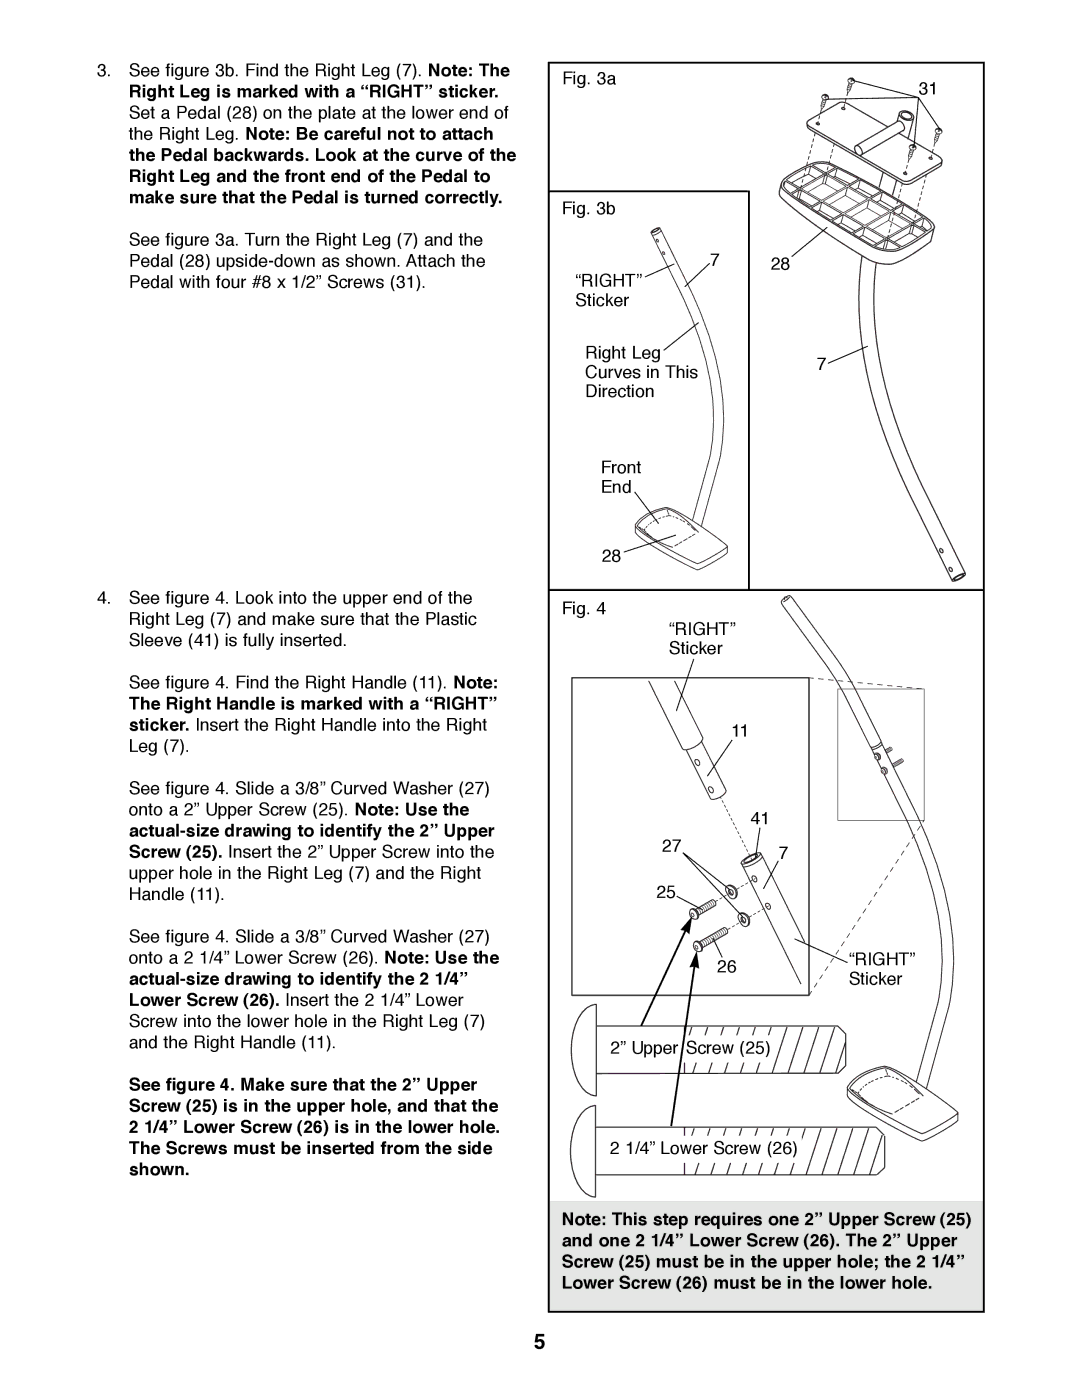
3.See figure 3b. Find the Right Leg (7). Note: The
Right Leg is marked with a ÒRIGHTÓ sticker. Set a Pedal (28) on the plate at the lower end of the Right Leg. Note: Be careful not to attach the Pedal backwards. Look at the curve of the Right Leg and the front end of the Pedal to make sure that the Pedal is turned correctly.
See figure 3a. Turn the Right Leg (7) and the Pedal (28)
4.See figure 4. Look into the upper end of the Right Leg (7) and make sure that the Plastic Sleeve (41) is fully inserted.
See figure 4. Find the Right Handle (11). Note:
The Right Handle is marked with a ÒRIGHTÓ sticker. Insert the Right Handle into the Right Leg (7).
See figure 4. Slide a 3/8Ó Curved Washer (27) onto a 2Ó Upper Screw (25). Note: Use the
See figure 4. Slide a 3/8Ó Curved Washer (27) onto a 2 1/4Ó Lower Screw (26). Note: Use the
See figure 4. Make sure that the 2Ó Upper Screw (25) is in the upper hole, and that the 2 1/4Ó Lower Screw (26) is in the lower hole. The Screws must be inserted from the side shown.
Fig. 3a | 31 | |
| ||
Fig. 3b |
| |
7 | 28 | |
ÒRIGHTÓ |
| |
Sticker |
| |
Right Leg | 7 | |
Curves in This | ||
| ||
Direction |
| |
Front |
| |
End |
| |
28 |
|
Fig. 4
ÒRIGHTÓ
Sticker
11
41
277
25
26 | ÒRIGHTÓ | |
Sticker | ||
|
2Ó Upper Screw (25)
2 1/4Ó Lower Screw (26)
Note: This step requires one 2Ó Upper Screw (25) and one 2 1/4Ó Lower Screw (26). The 2Ó Upper Screw (25) must be in the upper hole; the 2 1/4Ó Lower Screw (26) must be in the lower hole.
5