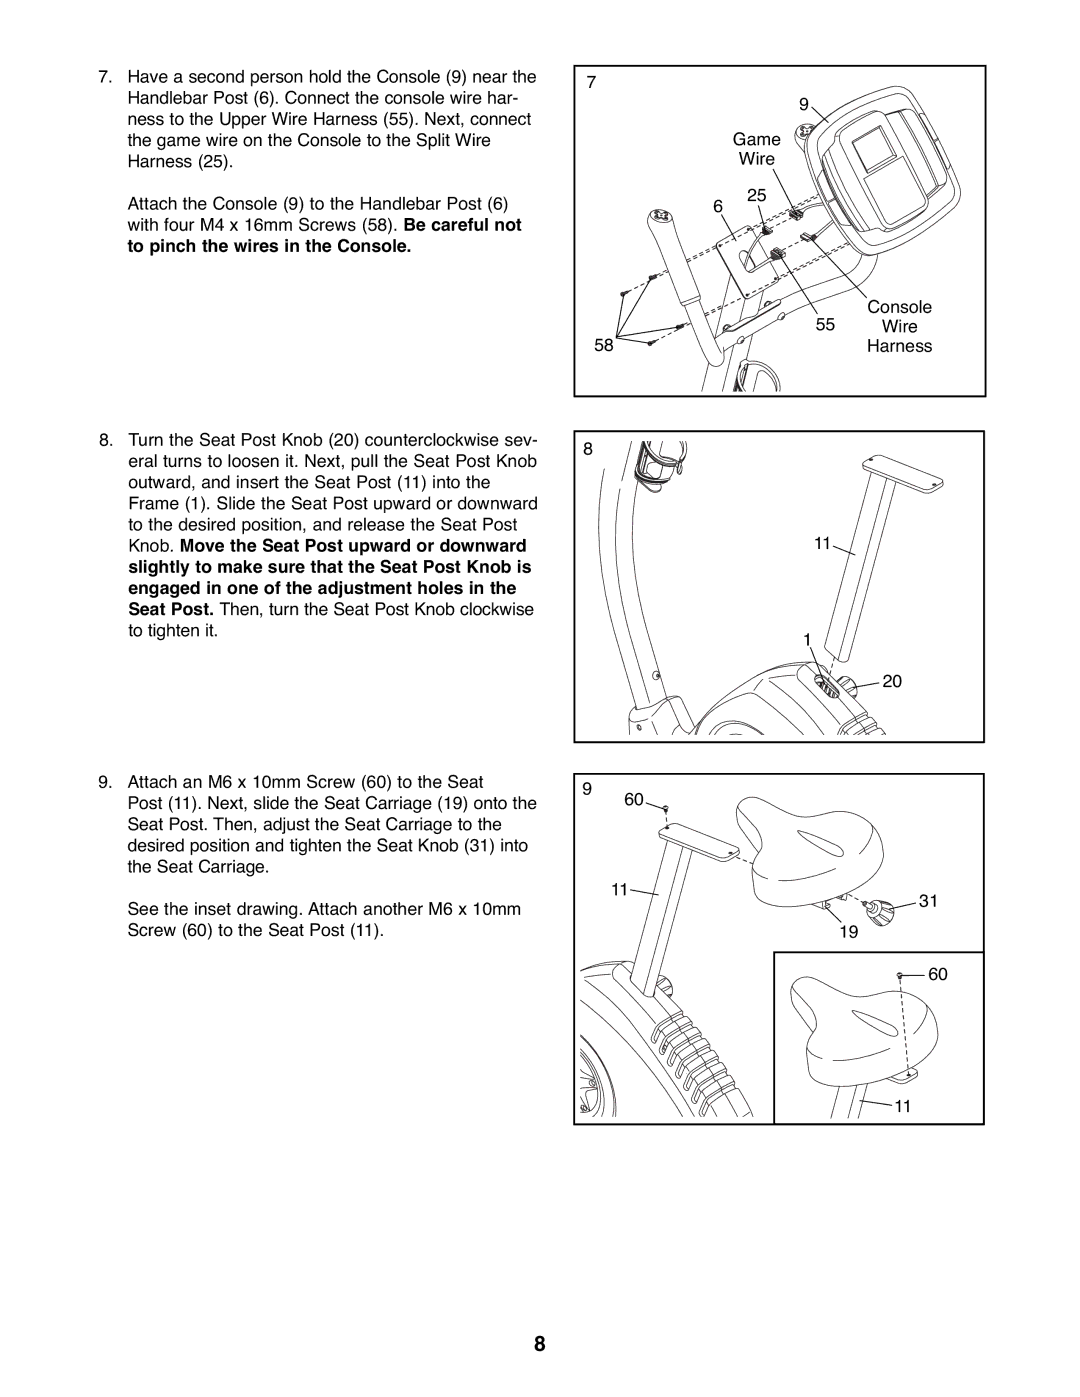
7.Have a second person hold the Console (9) near the Handlebar Post (6). Connect the console wire har- ness to the Upper Wire Harness (55). Next, connect the game wire on the Console to the Split Wire Harness (25).
Attach the Console (9) to the Handlebar Post (6) with four M4 x 16mm Screws (58). Be careful not to pinch the wires in the Console.
8.Turn the Seat Post Knob (20) counterclockwise sev- eral turns to loosen it. Next, pull the Seat Post Knob outward, and insert the Seat Post (11) into the Frame (1). Slide the Seat Post upward or downward to the desired position, and release the Seat Post Knob. Move the Seat Post upward or downward slightly to make sure that the Seat Post Knob is engaged in one of the adjustment holes in the Seat Post. Then, turn the Seat Post Knob clockwise to tighten it.
9.Attach an M6 x 10mm Screw (60) to the Seat
Post (11). Next, slide the Seat Carriage (19) onto the Seat Post. Then, adjust the Seat Carriage to the desired position and tighten the Seat Knob (31) into the Seat Carriage.
See the inset drawing. Attach another M6 x 10mm Screw (60) to the Seat Post (11).
7 |
|
| |
|
| 9 |
|
|
| Game |
|
|
| Wire |
|
| 6 | 25 |
|
|
|
| |
|
| 55 | Console |
| 58 | Wire | |
|
| Harness | |
8 |
|
|
|
|
| 11 |
|
|
| 1 |
|
|
|
| 20 |
9 | 60 |
|
|
|
|
| |
| 11 |
| 31 |
|
|
| |
|
|
| 19 |
|
|
| 60 |
|
|
| 11 |
8
