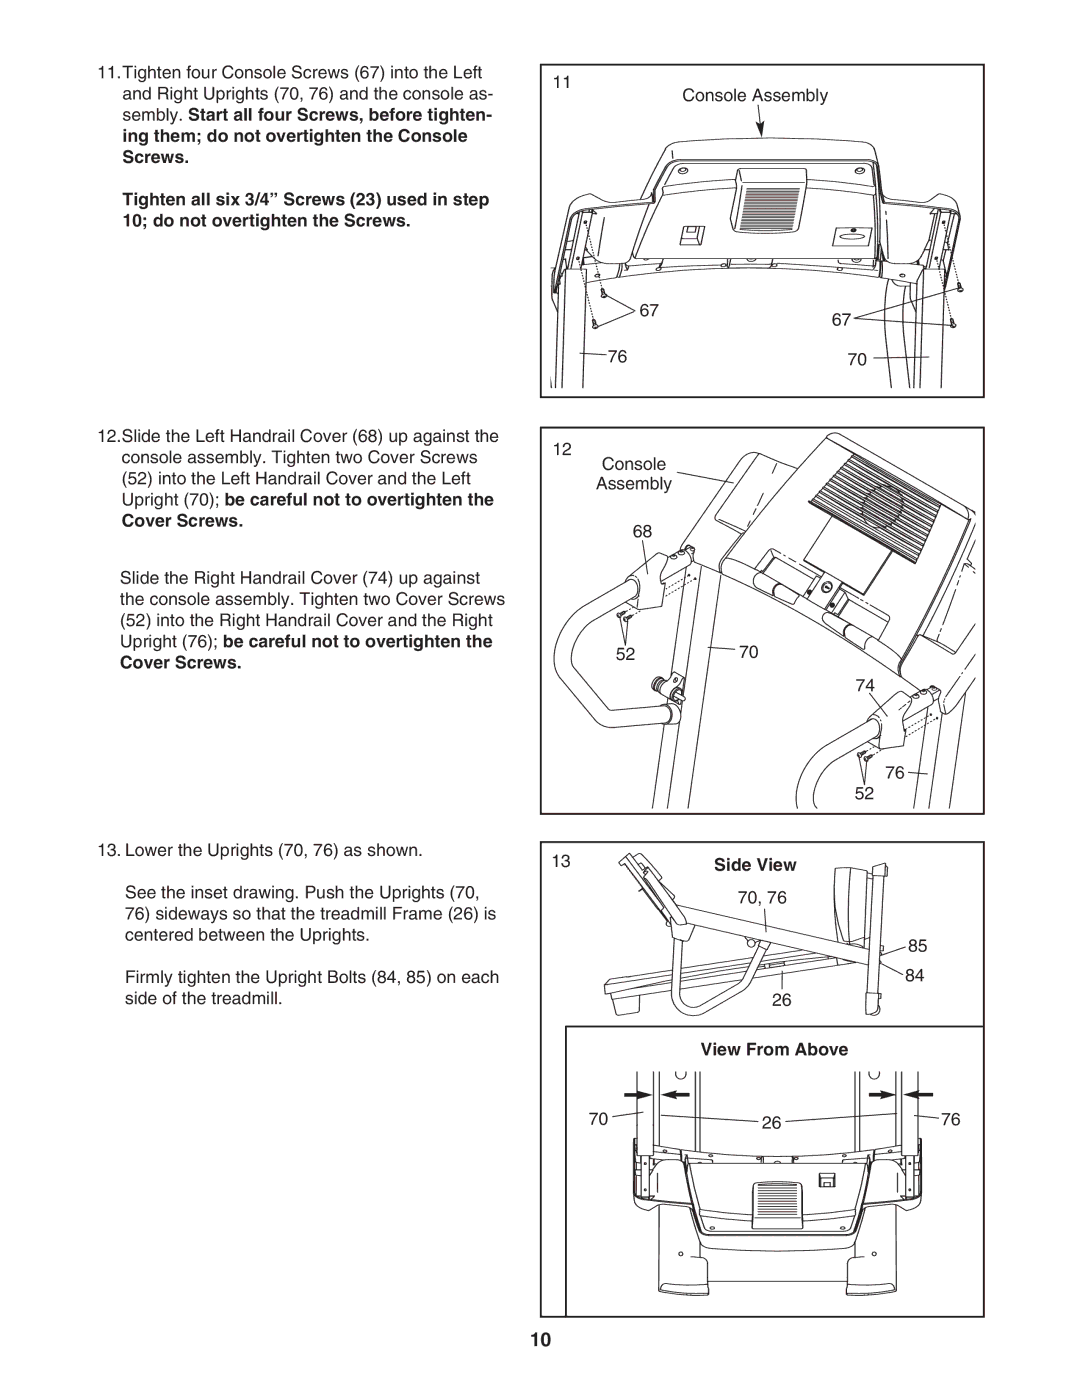
11.Tighten four Console Screws (67) into the Left and Right Uprights (70, 76) and the console as- sembly. Start all four Screws, before tighten- ing them; do not overtighten the Console Screws.
Tighten all six 3/4” Screws (23) used in step 10; do not overtighten the Screws.
12.Slide the Left Handrail Cover (68) up against the console assembly. Tighten two Cover Screws
(52)into the Left Handrail Cover and the Left Upright (70); be careful not to overtighten the
Cover Screws.
Slide the Right Handrail Cover (74) up against the console assembly. Tighten two Cover Screws
(52)into the Right Handrail Cover and the Right Upright (76); be careful not to overtighten the
Cover Screws.
13.Lower the Uprights (70, 76) as shown.
See the inset drawing. Push the Uprights (70, 76) sideways so that the treadmill Frame (26) is centered between the Uprights.
Firmly tighten the Upright Bolts (84, 85) on each side of the treadmill.
11 | Console Assembly |
| |
67 | 67 |
| |
76 | 70 |
12 |
|
Console |
|
Assembly |
|
68 |
|
52 | 70 |
| 74 |
| 76 |
| 52 |
13 | Side View |
| 70, 76 |
![]() 85
85
![]()
![]()
![]()
![]()
![]() 84
84 ![]() 26
26 ![]()
![]()
![]()
View From Above
70 ![]()
![]()
![]() 26
26 ![]()
![]()
![]() 76
76
10