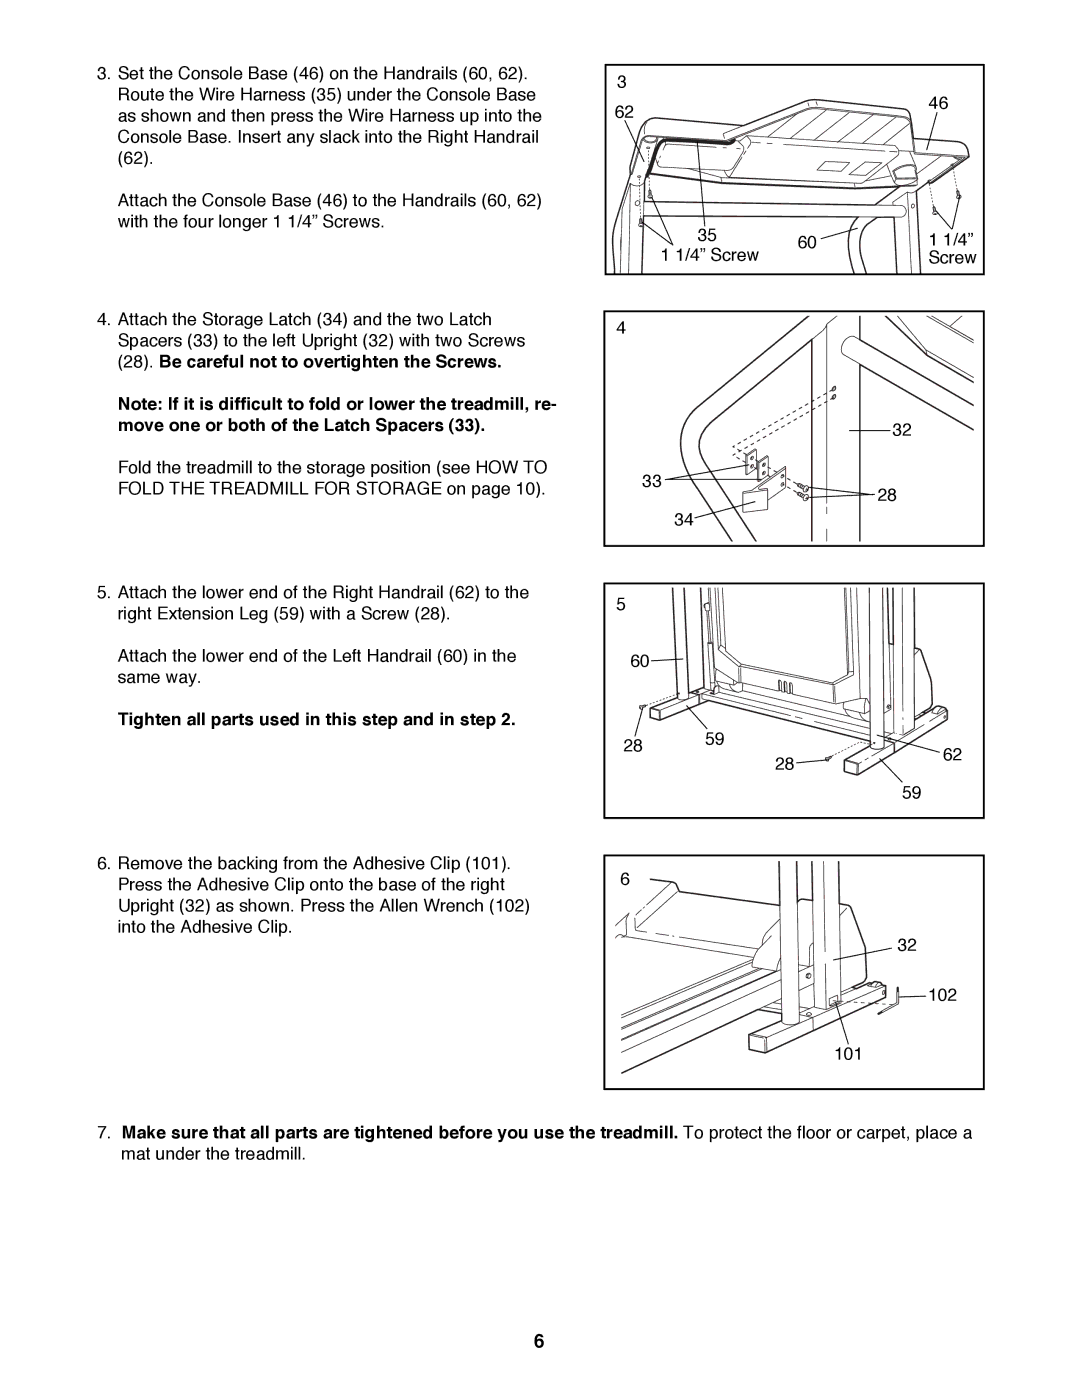
3.Set the Console Base (46) on the Handrails (60, 62). Route the Wire Harness (35) under the Console Base as shown and then press the Wire Harness up into the Console Base. Insert any slack into the Right Handrail (62).
Attach the Console Base (46) to the Handrails (60, 62) with the four longer 1 1/4Ó Screws.
4.Attach the Storage Latch (34) and the two Latch Spacers (33) to the left Upright (32) with two Screws (28). Be careful not to overtighten the Screws.
Note: If it is difficult to fold or lower the treadmill, re- move one or both of the Latch Spacers (33).
Fold the treadmill to the storage position (see HOW TO FOLD THE TREADMILL FOR STORAGE on page 10).
5.Attach the lower end of the Right Handrail (62) to the right Extension Leg (59) with a Screw (28).
Attach the lower end of the Left Handrail (60) in the same way.
Tighten all parts used in this step and in step 2.
6.Remove the backing from the Adhesive Clip (101). Press the Adhesive Clip onto the base of the right Upright (32) as shown. Press the Allen Wrench (102) into the Adhesive Clip.
3 |
|
|
|
62 |
|
| 46 |
|
|
| |
| 35 | 60 | 1 1/4Ó |
| 1 1/4Ó Screw |
| Screw |
4 |
|
|
|
|
|
| 32 |
33 |
| 28 | |
|
|
| |
| 34 |
|
|
5 |
|
|
|
60 |
|
|
|
28 | 59 |
| 62 |
| 28 | ||
|
| ||
|
|
| |
|
|
| 59 |
6 |
|
|
|
|
|
| 32 |
|
|
| 102 |
|
|
| 101 |
7.Make sure that all parts are tightened before you use the treadmill. To protect the floor or carpet, place a mat under the treadmill.
6