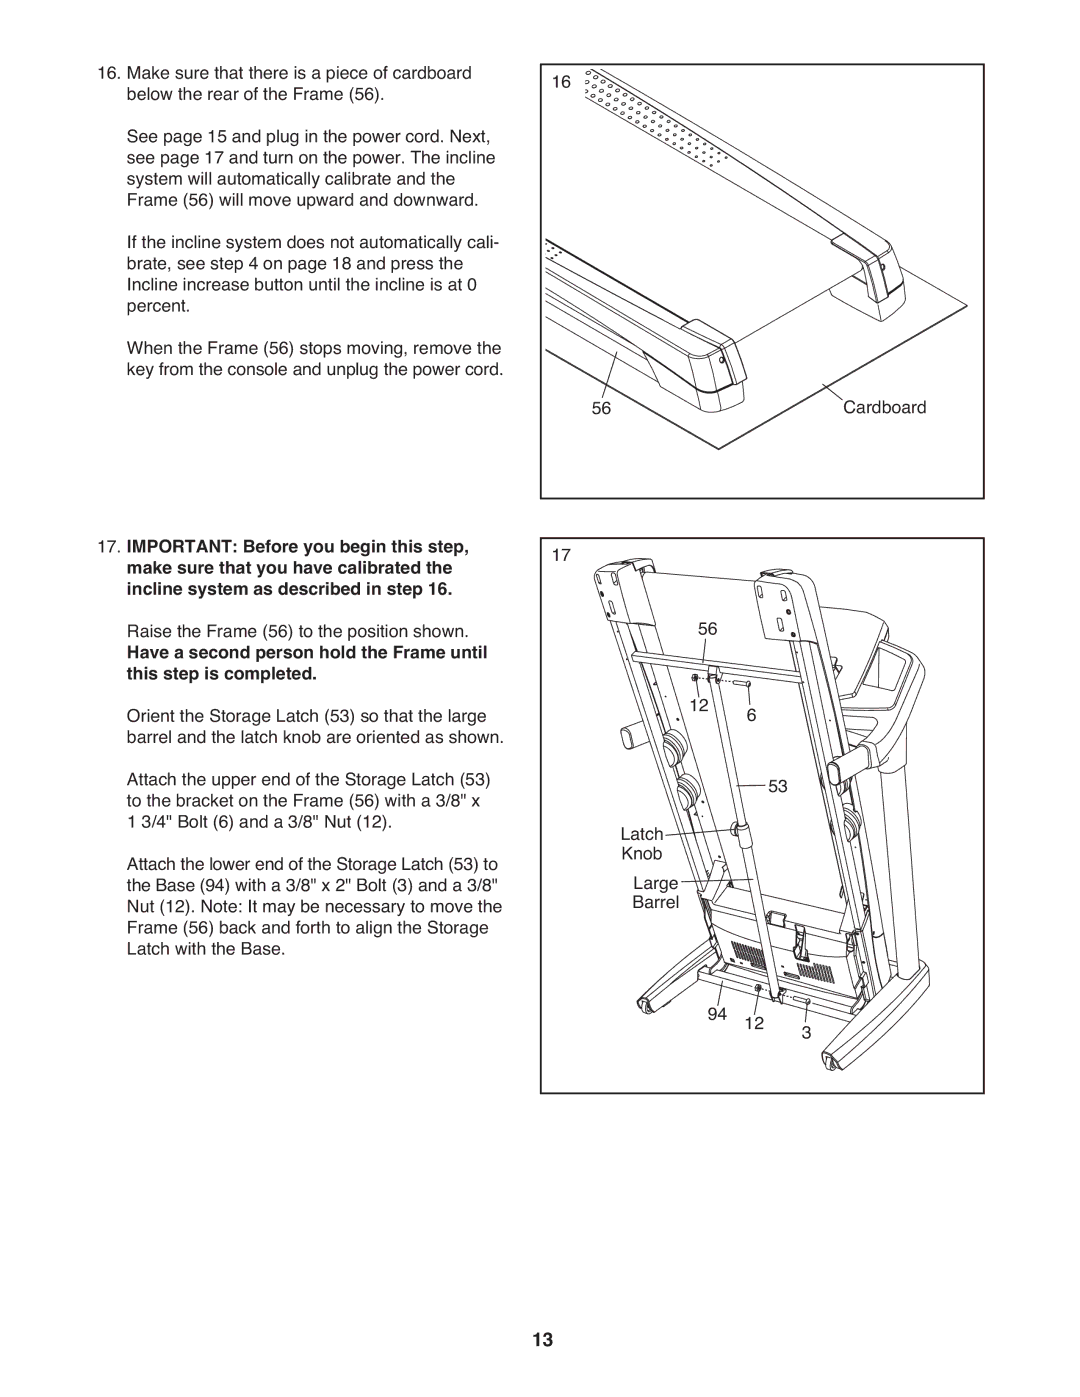
16. Make sure that there is a piece of cardboard | 16 |
|
|
below the rear of the Frame (56). |
|
| |
See page 15 and plug in the power cord. Next, |
|
|
|
see page 17 and turn on the power. The incline |
|
|
|
system will automatically calibrate and the |
|
|
|
Frame (56) will move upward and downward. |
|
|
|
If the incline system does not automatically cali- |
|
|
|
brate, see step 4 on page 18 and press the |
|
|
|
Incline increase button until the incline is at 0 |
|
|
|
percent. |
|
|
|
When the Frame (56) stops moving, remove the |
|
|
|
key from the console and unplug the power cord. | 56 |
| Cardboard |
|
| ||
17. IMPORTANT: Before you begin this step, | 17 |
|
|
make sure that you have calibrated the |
|
| |
incline system as described in step 16. | 56 |
|
|
Raise the Frame (56) to the position shown. |
|
| |
Have a second person hold the Frame until |
|
|
|
this step is completed. | 12 | 6 |
|
Orient the Storage Latch (53) so that the large |
| ||
barrel and the latch knob are oriented as shown. |
|
|
|
Attach the upper end of the Storage Latch (53) |
|
| 53 |
to the bracket on the Frame (56) with a 3/8" x | Latch |
| |
1 3/4" Bolt (6) and a 3/8" Nut (12). |
|
| |
Attach the lower end of the Storage Latch (53) to | Knob |
|
|
the Base (94) with a 3/8" x 2" Bolt (3) and a 3/8" | Large |
|
|
Nut (12). Note: It may be necessary to move the | Barrel |
|
|
Frame (56) back and forth to align the Storage |
|
|
|
Latch with the Base. |
|
|
|
| 94 | 12 | 3 |
| 13 |
|
|