Step 3: Install the Disk Drives
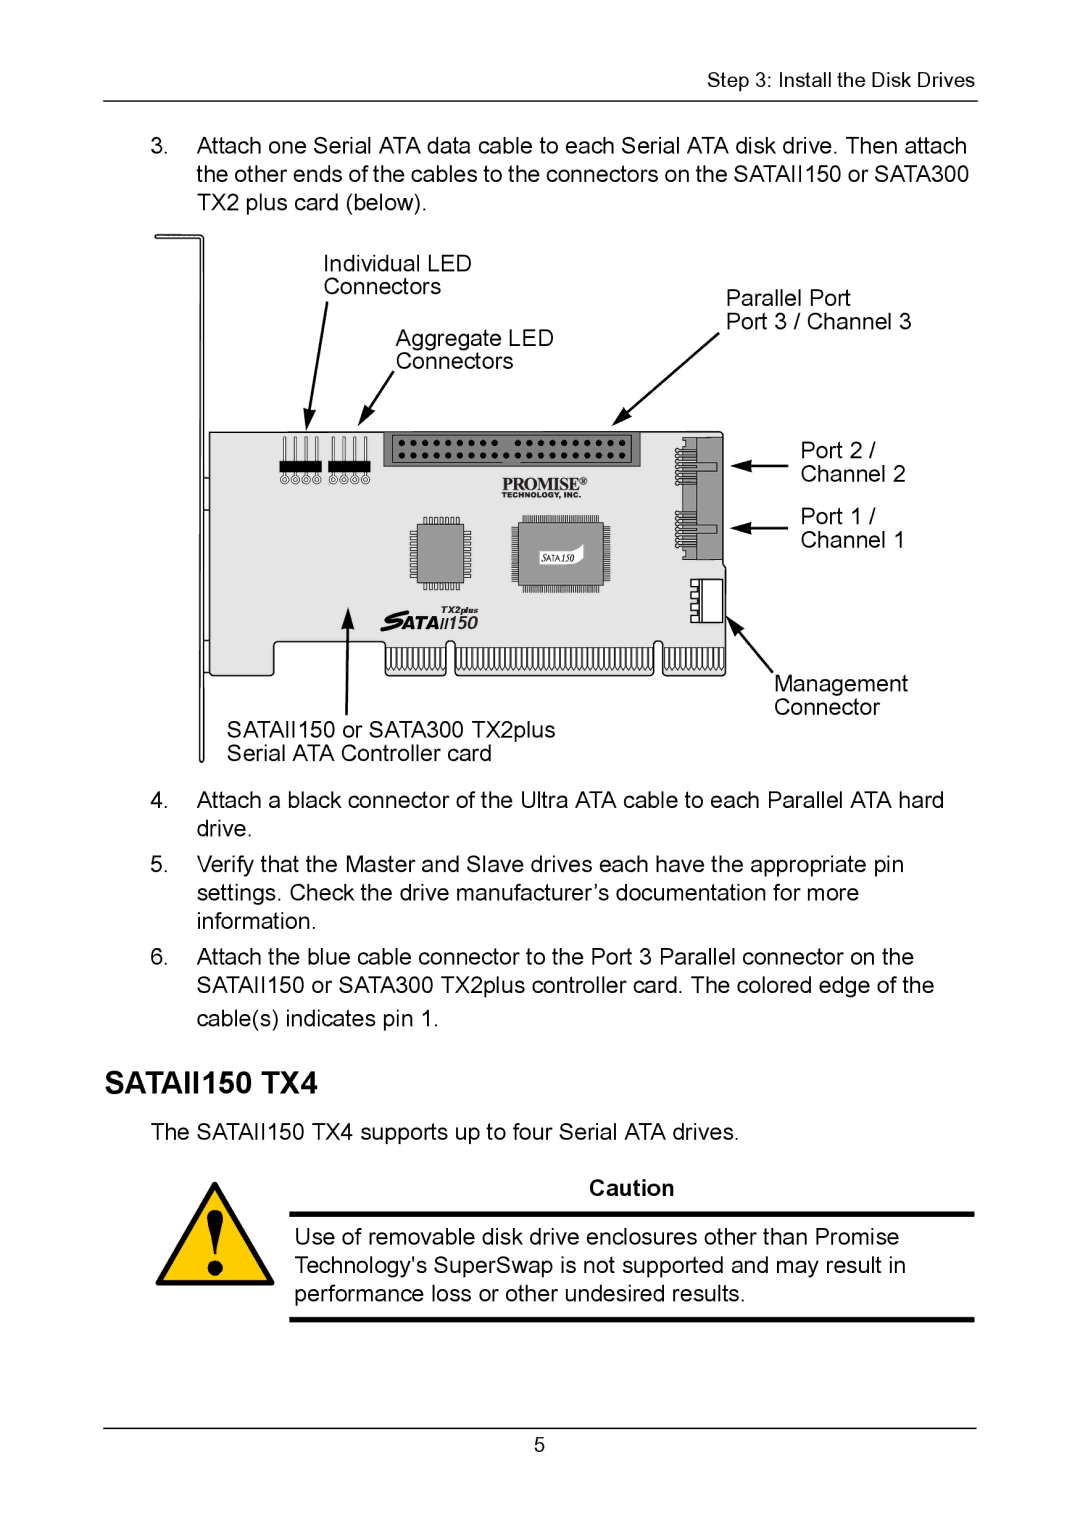
3.Attach one Serial ATA data cable to each Serial ATA disk drive. Then attach the other ends of the cables to the connectors on the SATAII150 or SATA300 TX2 plus card (below).
Individual LED
ConnectorsParallel Port
Port 3 / Channel 3
Aggregate LED
Connectors
Port 2 /
Channel 2
Port 1 /
Channel 1
TX2plus
ATAII150
Management Connector
SATAII150 or SATA300 TX2plus Serial ATA Controller card
4.Attach a black connector of the Ultra ATA cable to each Parallel ATA hard drive.
5.Verify that the Master and Slave drives each have the appropriate pin settings. Check the drive manufacturer’s documentation for more information.
6.Attach the blue cable connector to the Port 3 Parallel connector on the SATAII150 or SATA300 TX2plus controller card. The colored edge of the cable(s) indicates pin 1.
SATAII150 TX4
The SATAII150 TX4 supports up to four Serial ATA drives.
Caution
Use of removable disk drive enclosures other than Promise Technology's SuperSwap is not supported and may result in performance loss or other undesired results.
5