ASSEMBLY
NOTE: This tool is shipped completely assembled. No assembly time or tools are required.
INSTALLING AND REMOVING THE ABRASIVE BELT
 DISCONNECT TOOL FROM POWER SOURCE.
1.Place the sander on its left side.
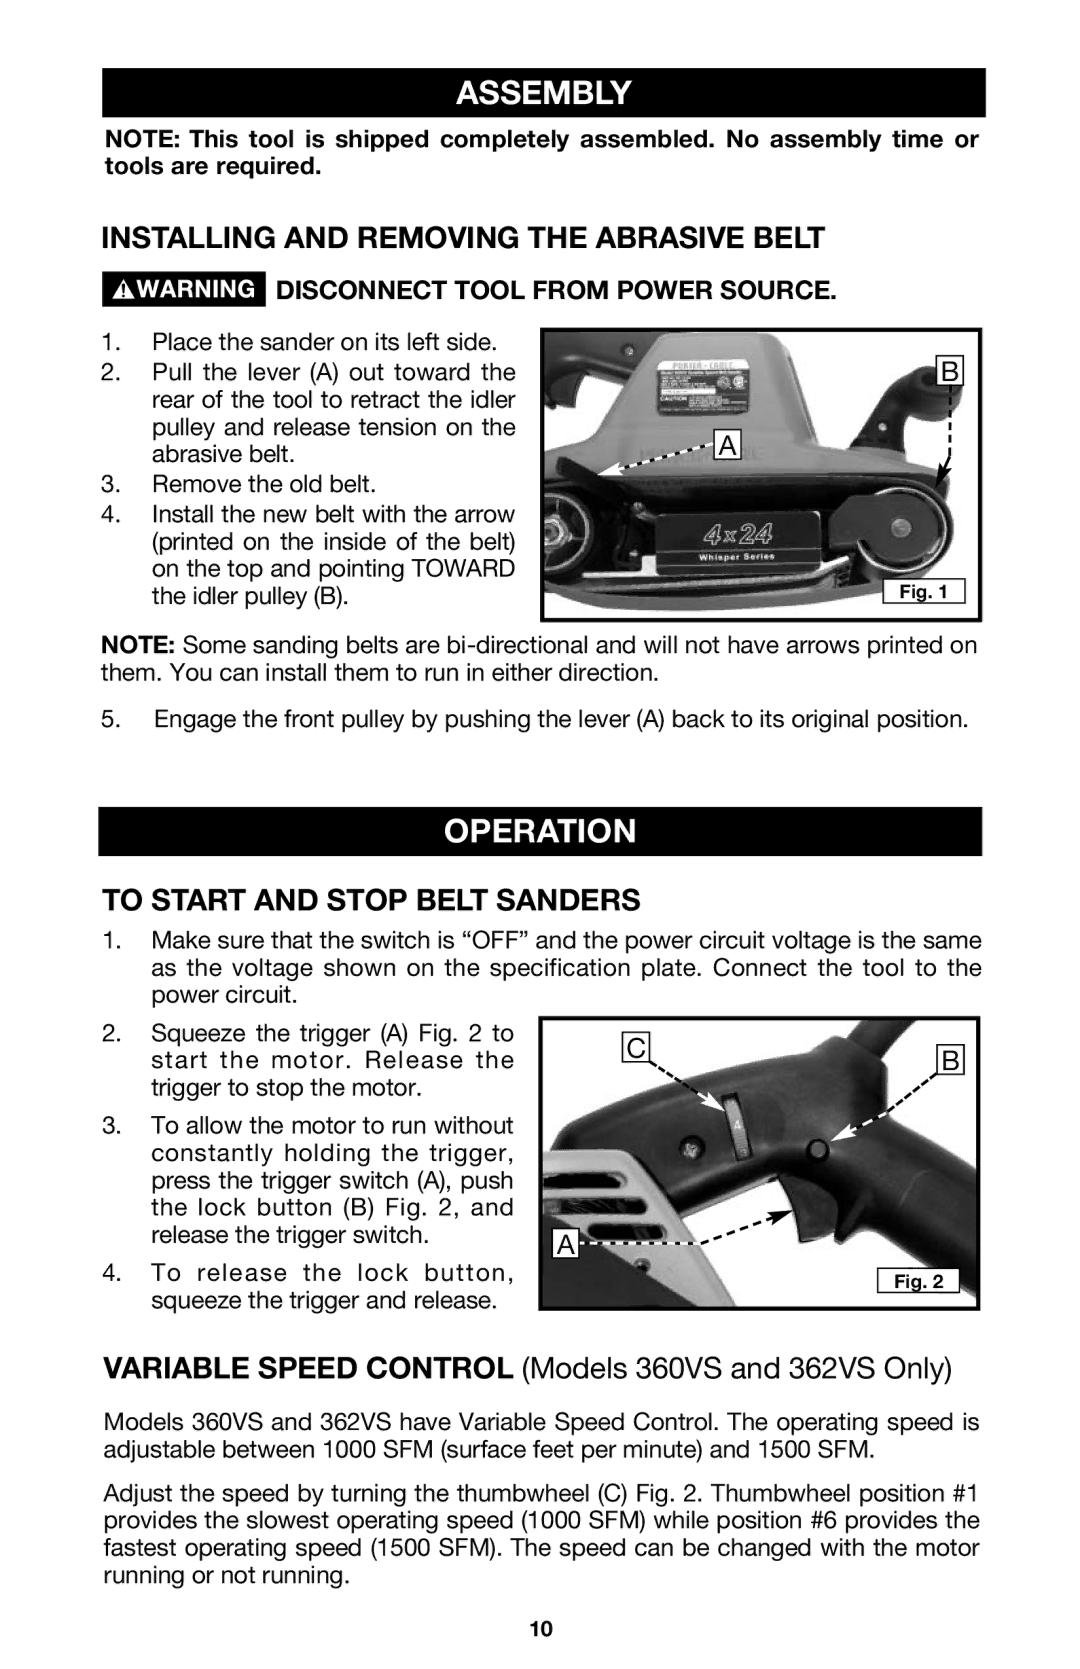
2.Pull the lever (A) out toward the rear of the tool to retract the idler pulley and release tension on the abrasive belt.
3.Remove the old belt.
4.Install the new belt with the arrow (printed on the inside of the belt) on the top and pointing TOWARD the idler pulley (B).
![]() A
A
B
Fig. 1
NOTE: Some sanding belts are
5.Engage the front pulley by pushing the lever (A) back to its original position.
OPERATION
TO START AND STOP BELT SANDERS
1.Make sure that the switch is “OFF” and the power circuit voltage is the same as the voltage shown on the specification plate. Connect the tool to the power circuit.
2.Squeeze the trigger (A) Fig. 2 to start the motor. Release the trigger to stop the motor.
3.To allow the motor to run without constantly holding the trigger, press the trigger switch (A), push the lock button (B) Fig. 2, and release the trigger switch.
4.To release the lock button, squeeze the trigger and release.
C | B |
| |
A |
|
| Fig. 2 |
VARIABLE SPEED CONTROL (Models 360VS and 362VS Only)
Models 360VS and 362VS have Variable Speed Control. The operating speed is adjustable between 1000 SFM (surface feet per minute) and 1500 SFM.
Adjust the speed by turning the thumbwheel (C) Fig. 2. Thumbwheel position #1 provides the slowest operating speed (1000 SFM) while position #6 provides the fastest operating speed (1500 SFM). The speed can be changed with the motor running or not running.
10
