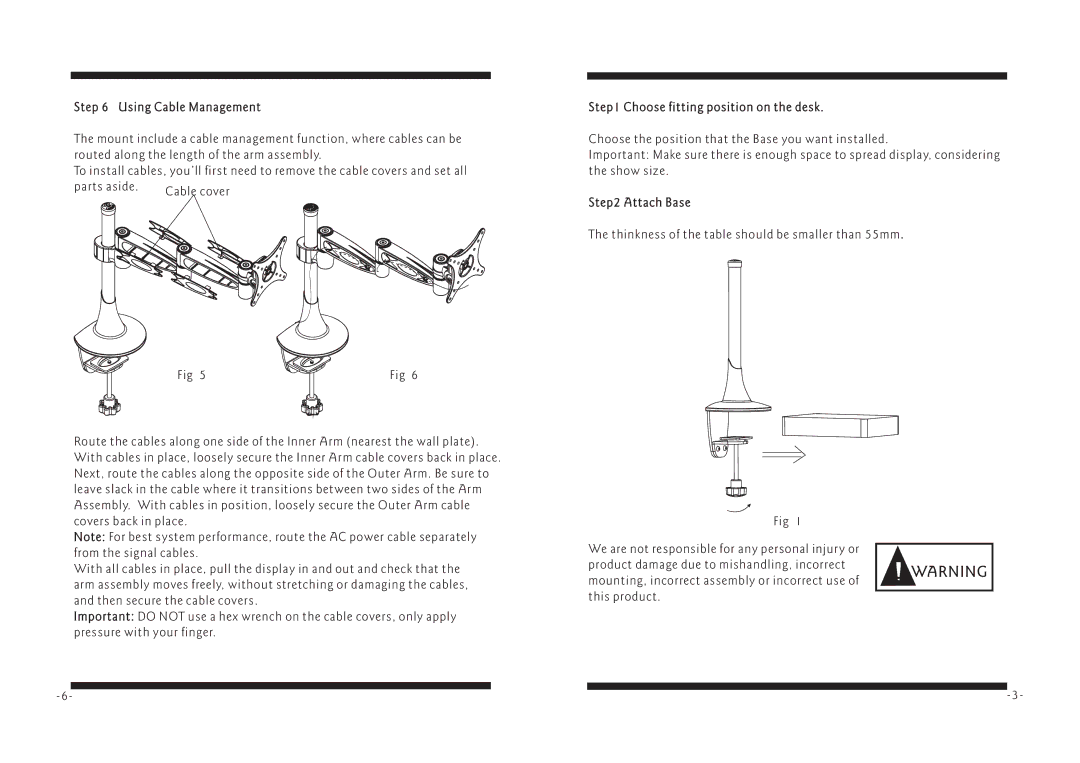
Step 6 Using Cable Management
The mount include a cable management function, where cables can be routed along the length of the arm assembly.
To install cables, you’ll first need to remove the cable covers and set all parts aside.
Fig 6
Route the cables along one side of the Inner Arm (nearest the wall plate). With cables in place, loosely secure the Inner Arm cable covers back in place. Next, route the cables along the opposite side of the Outer Arm. Be sure to leave slack in the cable where it transitions between two sides of the Arm Assembly. With cables in position, loosely secure the Outer Arm cable covers back in place.
Note: For best system performance, route the AC power cable separately from the signal cables.
With all cables in place, pull the display in and out and check that the arm assembly moves freely, without stretching or damaging the cables, and then secure the cable covers.
Important: DO NOT use a hex wrench on the cable covers, only apply pressure with your finger.
Step1 Choose fitting position on the desk.
Choose the position that the Base you want installed.
Important: Make sure there is enough space to spread display, considering the show size.
Step2 Attach Base
The thinkness of the table should be smaller than 55mm.
Fig 1
We are not responsible for any personal injury or
product damage due to mishandling, incorrectWARNING mounting, incorrect assembly or incorrect use of
this product.
|
|
|
| |
|
| |||