SYSTEM MOUNTING DIAGRAM

~---_-------->,<I
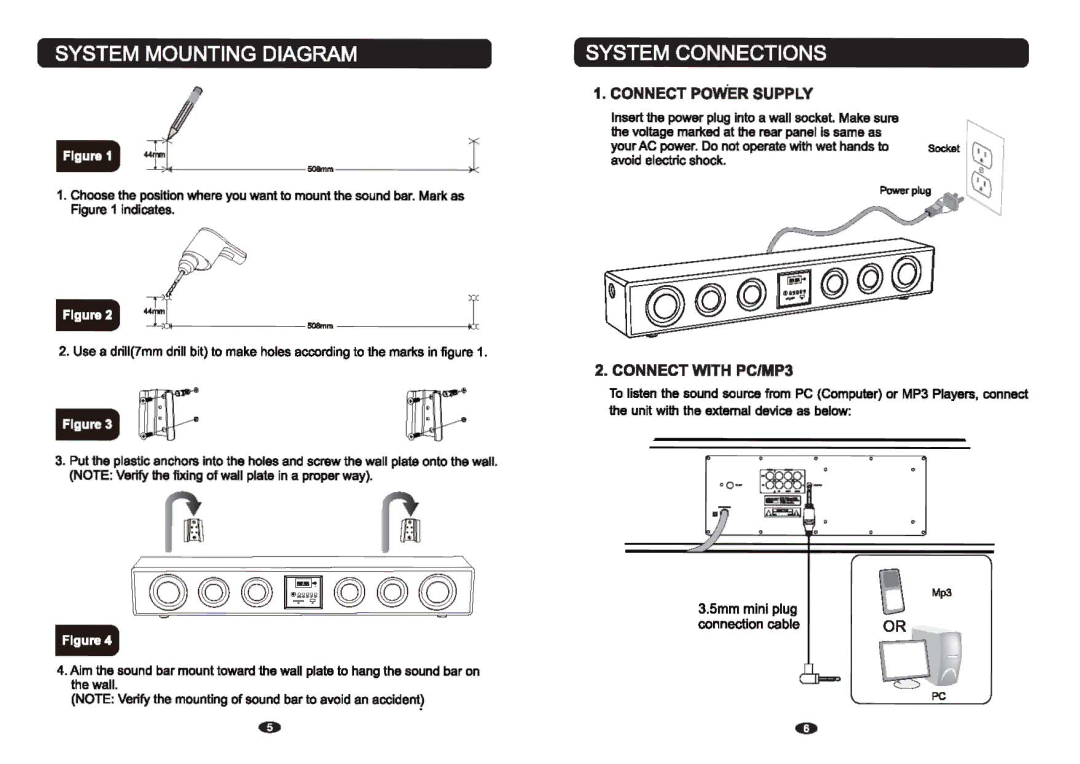
1.Choose the pos/tion where you want to mount the sound bar. Mark as
Fogure 1 Inclcat...
... L;I,
2. Use a drill(7mm drill bit) to make holes according to the marks in figure 1.
3.Put 1he plaatlc anchonllnto 1he ~ and savw1he wall plata onto the wall. (NOTE: Verify the 1bdng of wall plate in a proper way).
4.Aim the sound bar mount toward the wall plate to hang the sound bar on the wall.
(NOTE: Verily the mounting of sound bar to avoid an accident)
SYSTEM CONNECTIONS
1.CONNECT POWER SUPPLY
Insert 1he power plug Into. wall 8OCk8l Make ...'" |
| f'.... | ||||
the voltage marKed at the rear panel is same as |
| . . ~ | ||||
your AC power. 00 not operate wtth wet hands to | Soc:kaI | ~.' | ||||
avoid electric shock. |
| I~ | ||||
|
|
|
|
| ~ | |
|
|
|
|
|
|
|
|
|
|
|
|
|
|
|
|
|
|
|
|
|
|
|
|
|
|
|
|
|
|
|
|
|
|
|
|
|
|
|
|
|
|
|
|
|
|
|
|
|
|
|
|
|
|
|
|
2.CONNECT WITH PCIMP3
To listan 1he sound source from PC (Computer) or MP3 Players, connect
the unit with the extemaI device as below:
' 0 - | • |
| |
| • |
|
|
|
|
|
|
|
|
|
|
|
|
|
|
|
|
|
|
|
|
|
|
3.5mm mini plug |
|
|
| ~ M~ |
|
| ||||
|
|
|
|
| ||||||
|
|
|
|
|
|
|
|
| ||
connection cable |
|
|
|
| OR |
|
| |||
|
|
|
|
|
|
|
| PC |
|
|
|
|
|
|
|
|
|
|
|
| |
|
|
|
|
|
|
|
|
|
| |
|
|
|
|
|
|
|
|
|
| |
|
|
|
|
|
|
|
|
|
| |
|
|
|
|
|
|
|
|
|
| |
o
