Panel Information
2 | 3 | 4 | 2 |
DECK B
COUNTER
| ON/STANDBY | PLAY CrO2 | HI.SP.DUBBING | REC CrO2 |
DECK A PLAYBACK |
| REC/PLAYBACK BECK B | ||
| POWER |
| DUBBING |
|
|
|
| REC LEVEL |
|
|
|
| MIN | MAX |
6 | 1 | 10 | 9 | 8 | 5 | 7 | 6 |
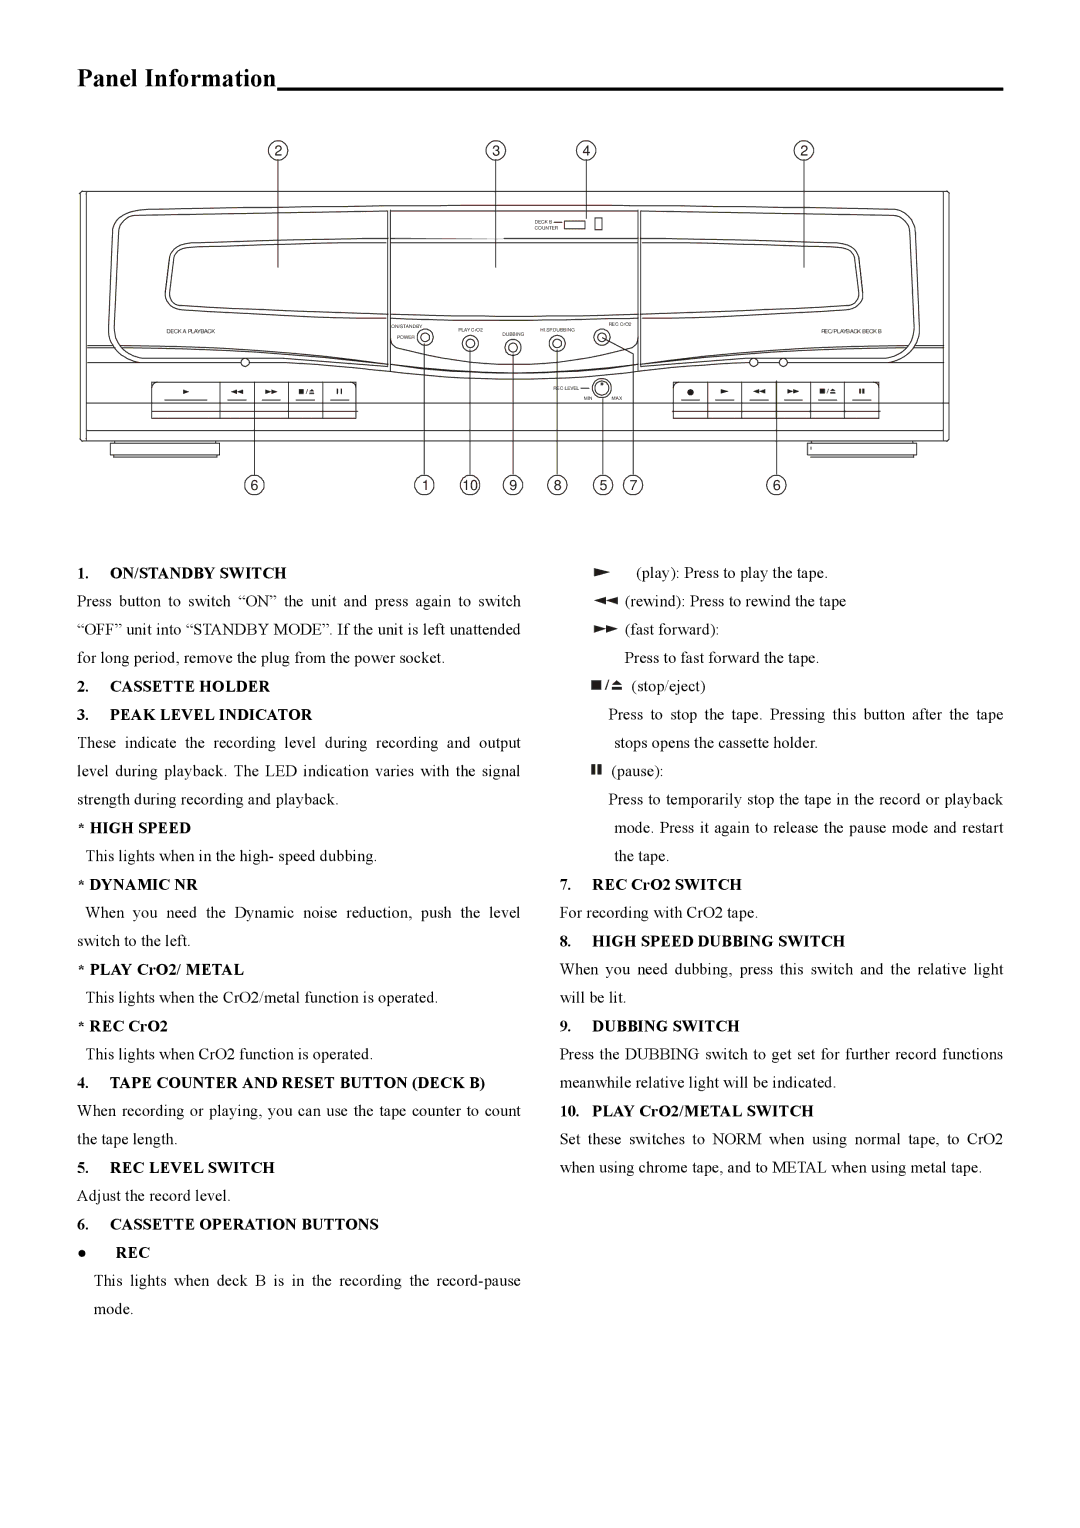
1.ON/STANDBY SWITCH
Press button to switch “ON” the unit and press again to switch “OFF” unit into “STANDBY MODE”. If the unit is left unattended for long period, remove the plug from the power socket.
2.CASSETTE HOLDER
3.PEAK LEVEL INDICATOR
These indicate the recording level during recording and output level during playback. The LED indication varies with the signal strength during recording and playback.
* HIGH SPEED
This lights when in the high- speed dubbing.
* DYNAMIC NR
When you need the Dynamic noise reduction, push the level switch to the left.
* PLAY CrO2/ METAL
This lights when the CrO2/metal function is operated.
* REC CrO2
This lights when CrO2 function is operated.
4.TAPE COUNTER AND RESET BUTTON (DECK B) When recording or playing, you can use the tape counter to count the tape length.
5.REC LEVEL SWITCH
Adjust the record level.
6.CASSETTE OPERATION BUTTONS ● REC
This lights when deck B is in the recording the
(play): Press to play the tape.
![]() (rewind): Press to rewind the tape
(rewind): Press to rewind the tape
![]() (fast forward):
(fast forward):
Press to fast forward the tape. ![]()
![]()
![]() (stop/eject)
(stop/eject)
Press to stop the tape. Pressing this button after the tape stops opens the cassette holder.
(pause):
Press to temporarily stop the tape in the record or playback mode. Press it again to release the pause mode and restart the tape.
7.REC CrO2 SWITCH For recording with CrO2 tape.
8.HIGH SPEED DUBBING SWITCH
When you need dubbing, press this switch and the relative light will be lit.
9.DUBBING SWITCH
Press the DUBBING switch to get set for further record functions meanwhile relative light will be indicated.
10. PLAY CrO2/METAL SWITCH
Set these switches to NORM when using normal tape, to CrO2 when using chrome tape, and to METAL when using metal tape.
