Installation Guide HyperStack Cable 9000 Series Stackable Chassis Switch
Install HyperStack Licenses
Follow the directions on the License Key Upgrade document for each switch. Apply the respective license keys to each switch using the Feature Add command.
Switch #> admin start
Switch (admin) #> feature add
This feature upgrade does NOT require a switch reset. Do you want to continue with license upgrade procedure? (y/n): [n] y
Log Msg: [day mon date hh:mm:ss.sss CST year][C][8400.006B][Switch][Upgrading License for HyperStack(tm)capability]
Log Msg: [day mon date hh:mm:ss.sss CST year][C][8400.0047][Switch][New licenses are being installed]
Connect the HyperStack Cables
Use a screwdriver to remove the covers from all ICC ports.
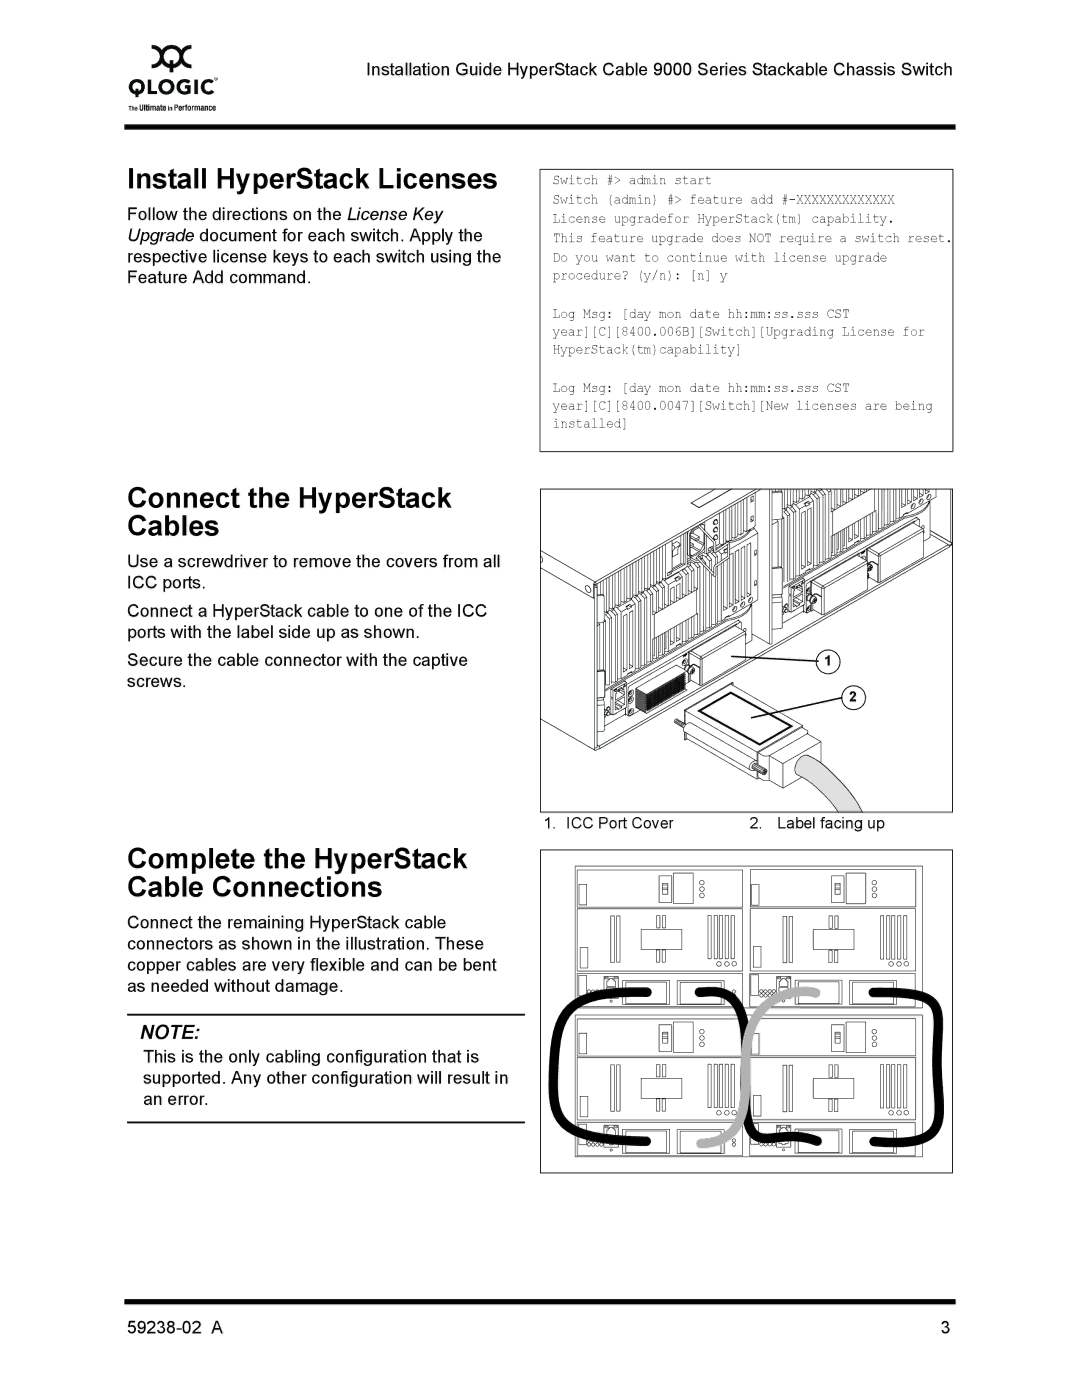
Connect a HyperStack cable to one of the ICC ports with the label side up as shown.
Secure the cable connector with the captive screws.
Complete the HyperStack Cable Connections
Connect the remaining HyperStack cable connectors as shown in the illustration. These copper cables are very flexible and can be bent as needed without damage.
NOTE:
This is the only cabling configuration that is supported. Any other configuration will result in an error.
2 |
1. ICC Port Cover | 2. Label facing up |
3 |
