Installation Guide HyperStack Cable 9000 Series Stackable Chassis Switch
Mount the Switches
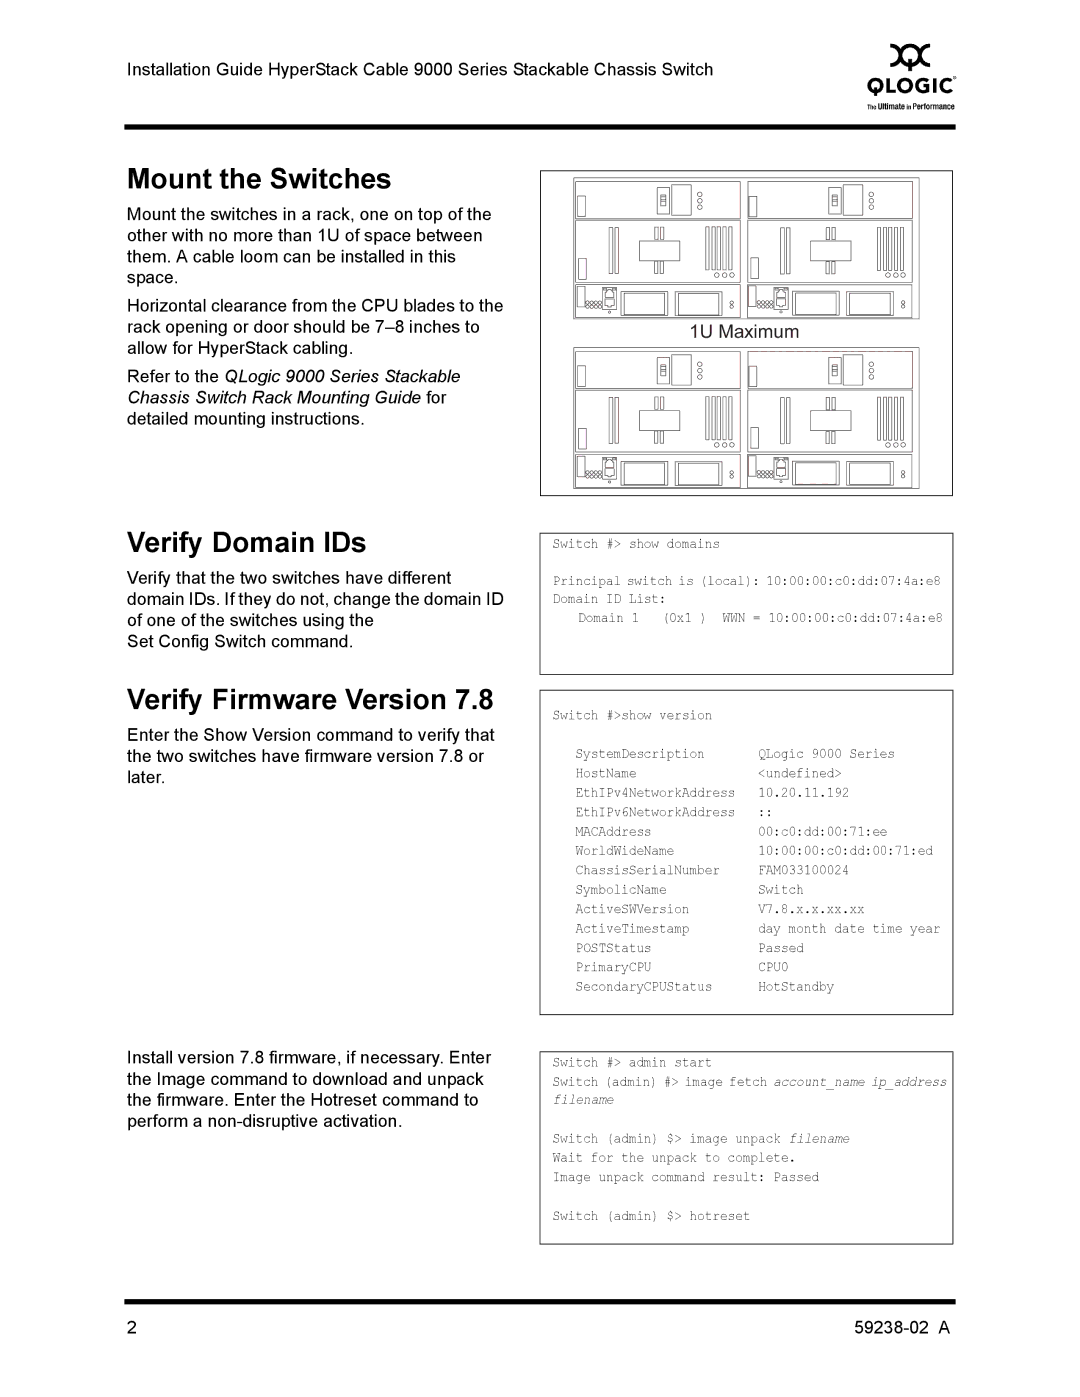
Mount the switches in a rack, one on top of the other with no more than 1U of space between them. A cable loom can be installed in this space.
Horizontal clearance from the CPU blades to the rack opening or door should be
Refer to the QLogic 9000 Series Stackable Chassis Switch Rack Mounting Guide for detailed mounting instructions.
Verify Domain IDs
Verify that the two switches have different domain IDs. If they do not, change the domain ID of one of the switches using the
Set Config Switch command.
Verify Firmware Version 7.8
Enter the Show Version command to verify that the two switches have firmware version 7.8 or later.
1U Maximum
Switch #> show domains
Principal switch is (local): 10:00:00:c0:dd:07:4a:e8 Domain ID List:
Domain 1 (0x1 ) WWN = 10:00:00:c0:dd:07:4a:e8
Switch #>show version |
|
SystemDescription | QLogic 9000 Series |
HostName | <undefined> |
EthIPv4NetworkAddress | 10.20.11.192 |
EthIPv6NetworkAddress | :: |
MACAddress | 00:c0:dd:00:71:ee |
WorldWideName | 10:00:00:c0:dd:00:71:ed |
ChassisSerialNumber | FAM033100024 |
SymbolicName | Switch |
ActiveSWVersion | V7.8.x.x.xx.xx |
ActiveTimestamp | day month date time year |
POSTStatus | Passed |
PrimaryCPU | CPU0 |
SecondaryCPUStatus | HotStandby |
|
|
Install version 7.8 firmware, if necessary. Enter the Image command to download and unpack the firmware. Enter the Hotreset command to perform a
Switch #> admin start
Switch (admin) #> image fetch account_name ip_address filename
Switch (admin) $> image unpack filename Wait for the unpack to complete.
Image unpack command result: Passed
Switch (admin) $> hotreset
2 |