Box Contents
QSDR74RTS DVR |
| 4 Cameras with Stands |
| 2 QSDS0612D Cameras (6mm Lens) | |
|
| 2 QSDS3612D Cameras (3.6mm Lens) |
|
|
|
|
|
|
|
| Power Supply & 4 |
|
|
| Splitter For Cameras |
| Power Supply For DVR | |
|
|
|
|
|
|
|
|
|
|
4 Camera Cables | BNC (M) – RCA (F) Adapter | Ethernet Cable | ||
|
|
|
|
|
|
|
|
|
|
USB Mouse | Remote Control | Software CD | |
|
|
| Quick Start Guide |
|
|
| User Manual (this manual) |
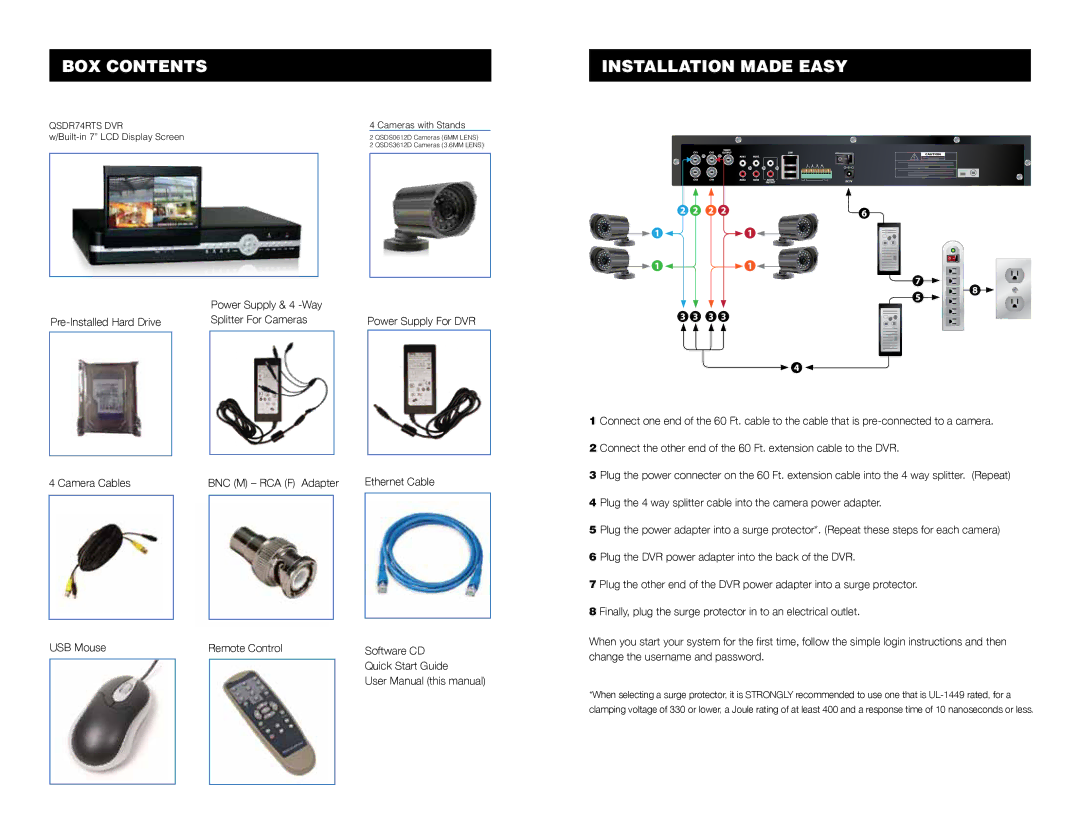
installation made easy
1 Connect one end of the 60 Ft. cable to the cable that is
2 Connect the other end of the 60 Ft. extension cable to the DVR.
3 Plug the power connecter on the 60 Ft. extension cable into the 4 way splitter. (Repeat)
4 Plug the 4 way splitter cable into the camera power adapter.
5 Plug the power adapter into a surge protector*. (Repeat these steps for each camera)
6 Plug the DVR power adapter into the back of the DVR.
7 Plug the other end of the DVR power adapter into a surge protector.
8 Finally, plug the surge protector in to an electrical outlet.
When you start your system for the first time, follow the simple login instructions and then change the username and password.
*When selecting a surge protector, it is STRONGLY recommended to use one that is