QSDL503AD USER MANUAL
Section 4: SYSTEM INSTALLATION
4.1: Main Control Panel
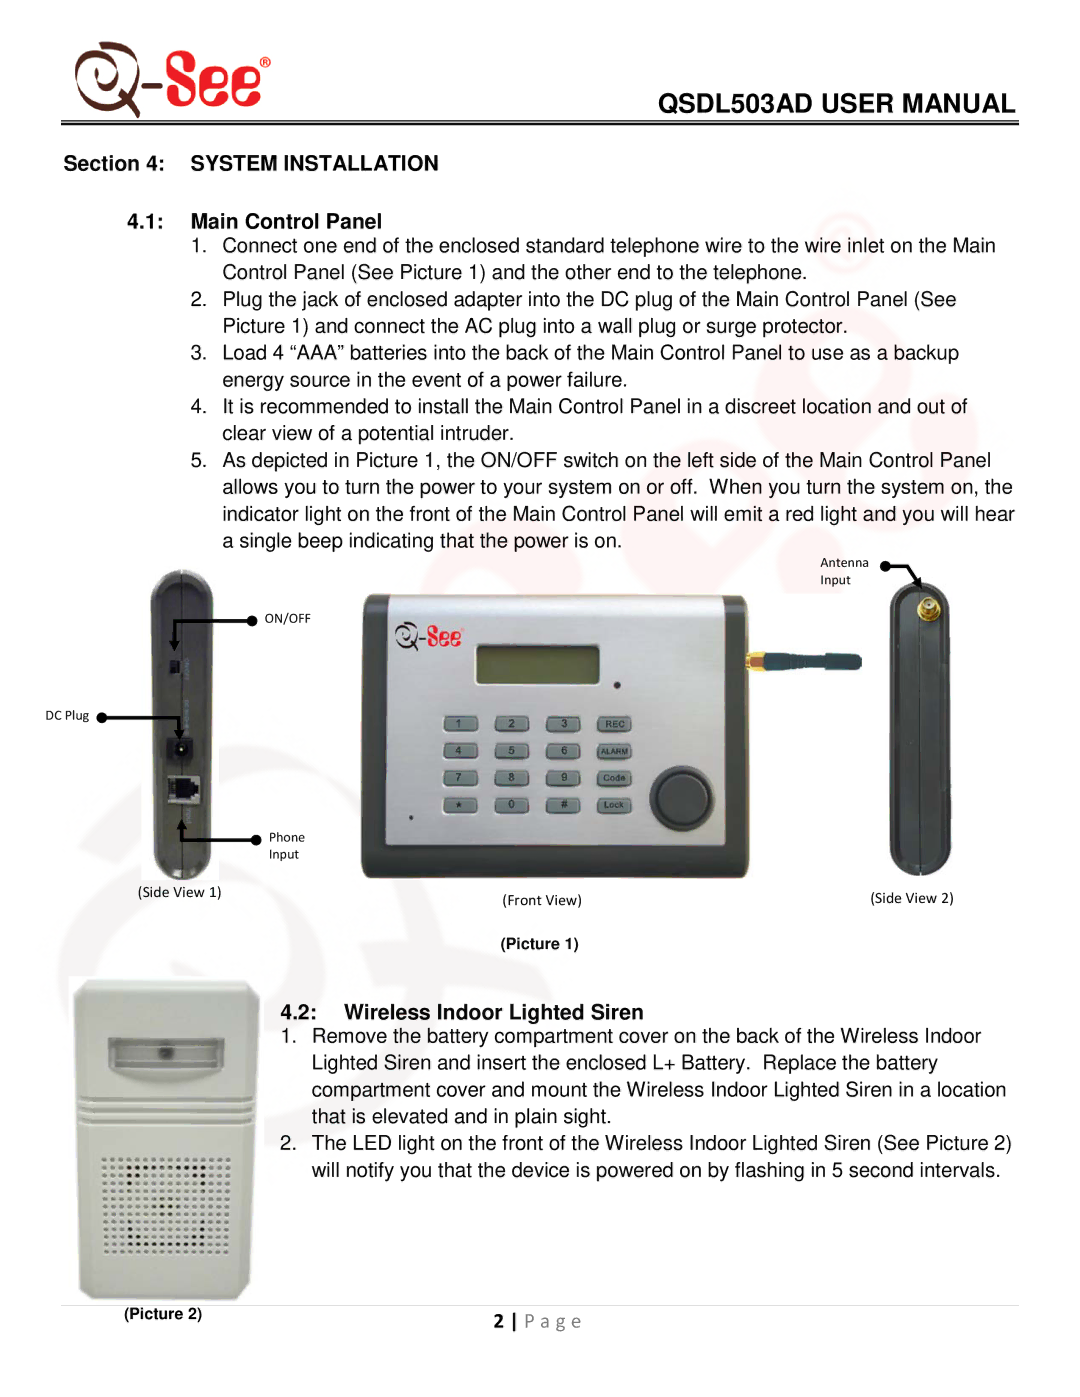
1.Connect one end of the enclosed standard telephone wire to the wire inlet on the Main Control Panel (See Picture 1) and the other end to the telephone.
2.Plug the jack of enclosed adapter into the DC plug of the Main Control Panel (See Picture 1) and connect the AC plug into a wall plug or surge protector.
3.Load 4 “AAA” batteries into the back of the Main Control Panel to use as a backup energy source in the event of a power failure.
4.It is recommended to install the Main Control Panel in a discreet location and out of clear view of a potential intruder.
5.As depicted in Picture 1, the ON/OFF switch on the left side of the Main Control Panel allows you to turn the power to your system on or off. When you turn the system on, the indicator light on the front of the Main Control Panel will emit a red light and you will hear a single beep indicating that the power is on.
Antenna
Input
![]() ON/OFF
ON/OFF
DC Plug
Phone
Input
(Side View 1) | (Front View) | (Side View 2) |
| ||
| (Picture 1) |
|
4.2: Wireless Indoor Lighted Siren
1.Remove the battery compartment cover on the back of the Wireless Indoor Lighted Siren and insert the enclosed L+ Battery. Replace the battery compartment cover and mount the Wireless Indoor Lighted Siren in a location that is elevated and in plain sight.
2.The LED light on the front of the Wireless Indoor Lighted Siren (See Picture 2) will notify you that the device is powered on by flashing in 5 second intervals.
(Picture 2) | 2 P a g e |