QSDL503AD USER MANUAL
Section 5: SETTING UP THE MAIN CONTROL PANEL
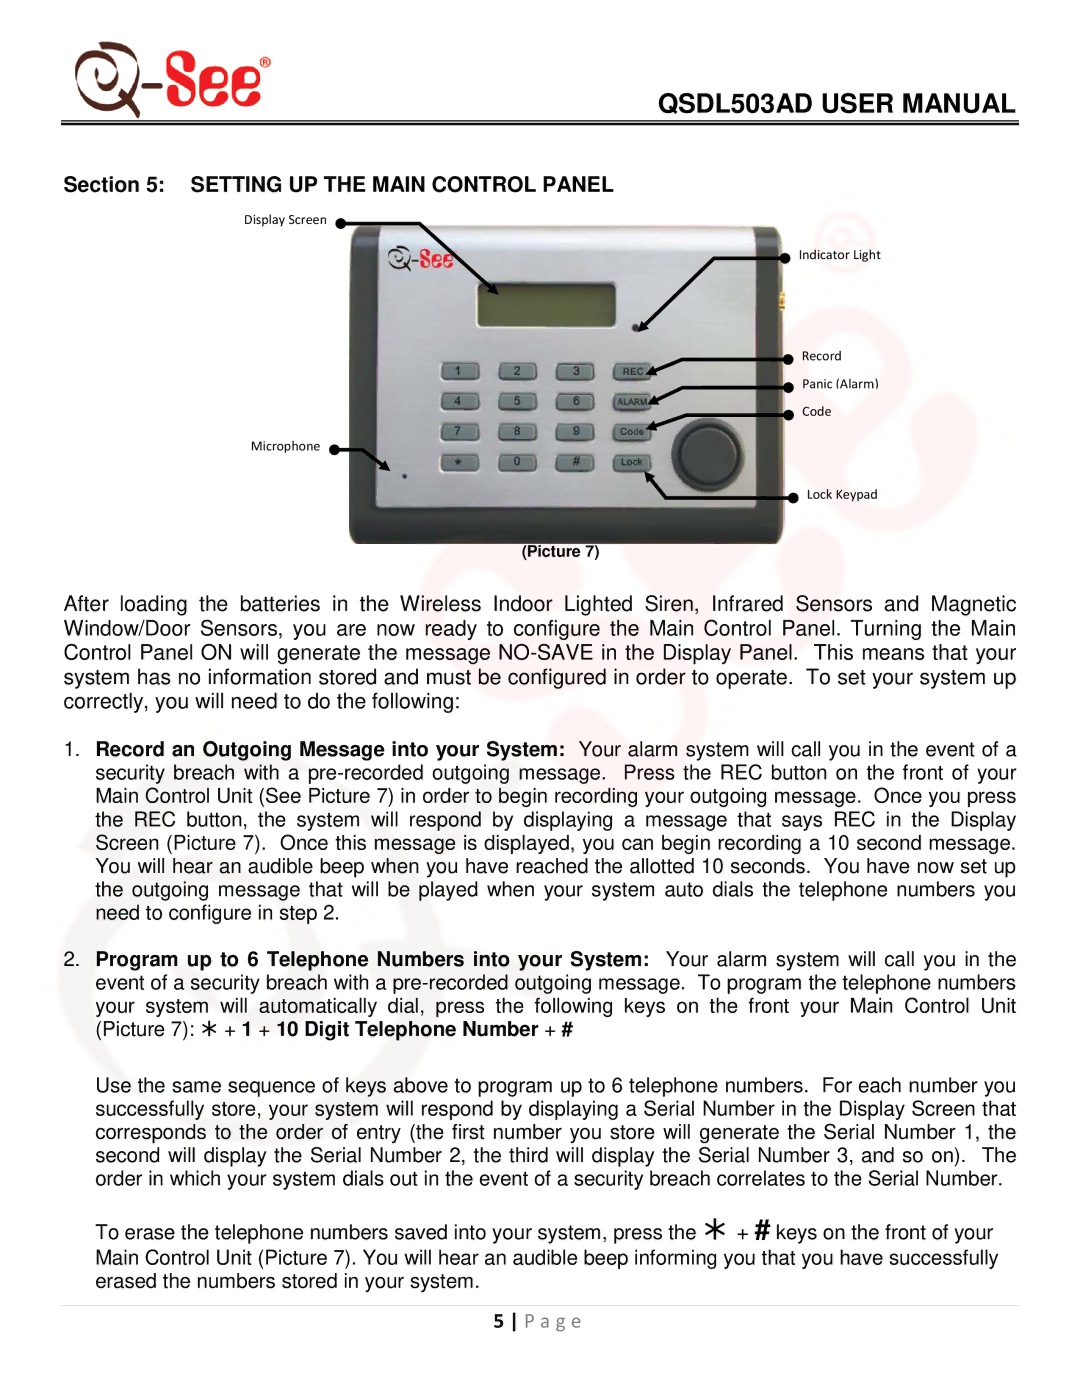
Display Screen
Microphone ![]()
Indicator Light
Record
Panic (Alarm)
![]() Code
Code
![]() Lock Keypad
Lock Keypad
(Picture 7)
After loading the batteries in the Wireless Indoor Lighted Siren, Infrared Sensors and Magnetic Window/Door Sensors, you are now ready to configure the Main Control Panel. Turning the Main Control Panel ON will generate the message
1.Record an Outgoing Message into your System: Your alarm system will call you in the event of a security breach with a
2.Program up to 6 Telephone Numbers into your System: Your alarm system will call you in the event of a security breach with a
Use the same sequence of keys above to program up to 6 telephone numbers. For each number you successfully store, your system will respond by displaying a Serial Number in the Display Screen that corresponds to the order of entry (the first number you store will generate the Serial Number 1, the second will display the Serial Number 2, the third will display the Serial Number 3, and so on). The order in which your system dials out in the event of a security breach correlates to the Serial Number.
To erase the telephone numbers saved into your system, press the + # keys on the front of your Main Control Unit (Picture 7). You will hear an audible beep informing you that you have successfully erased the numbers stored in your system.
5 P a g e