BASIC FUNCTIONS

CHAPTER 3

3.1 POWER ON/OFF

Before turning on the DVR, ensure that all connections are good.

POWER ON

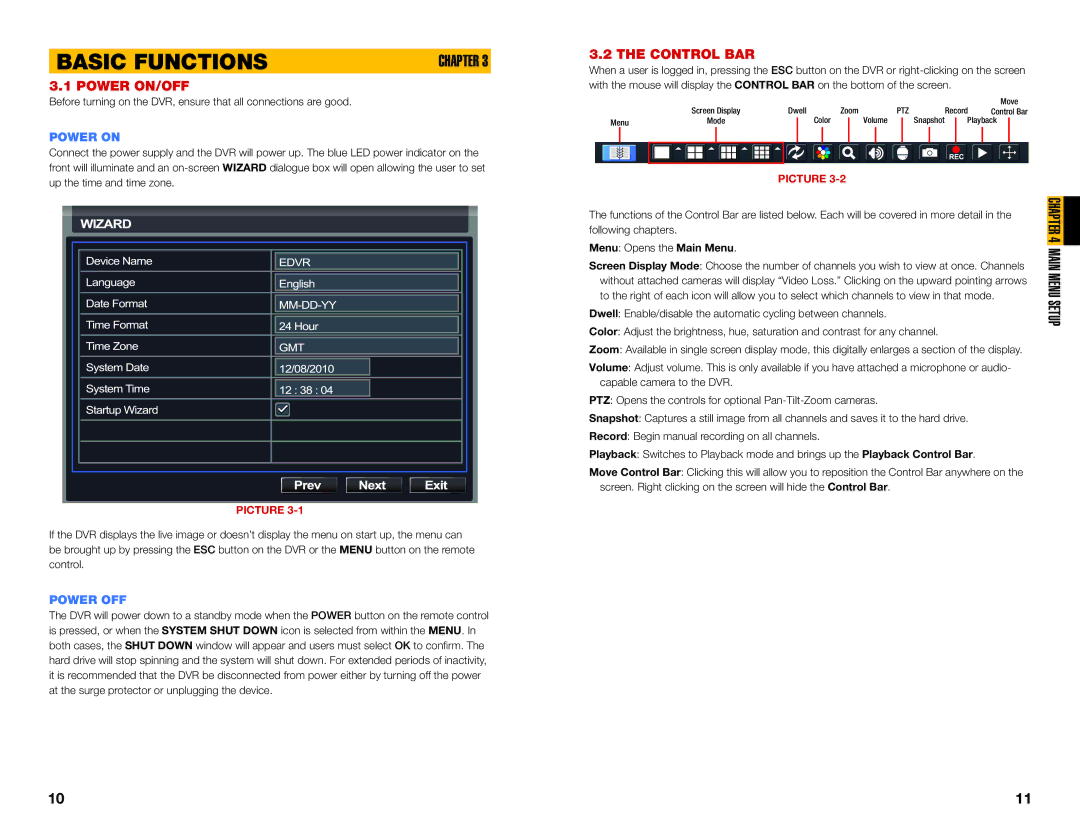
Connect the power supply and the DVR will power up. The blue LED power indicator on the front will illuminate and an on-screen WIZARD dialogue box will open allowing the user to set up the time and time zone.

PICTURE 3-1

If the DVR displays the live image or doesn’t display the menu on start up, the menu can be brought up by pressing the ESC button on the DVR or the MENU button on the remote control.

POWER OFF

The DVR will power down to a standby mode when the POWER button on the remote control is pressed, or when the SYSTEM SHUT DOWN icon is selected from within the MENU. In both cases, the SHUT DOWN window will appear and users must select OK to confirm. The hard drive will stop spinning and the system will shut down. For extended periods of inactivity, it is recommended that the DVR be disconnected from power either by turning off the power at the surge protector or unplugging the device.

3.2 THE CONTROL BAR

When a user is logged in, pressing the ESC button on the DVR or right-clicking on the screen with the mouse will display the CONTROL BAR on the bottom of the screen.


Screen Display


Dwell


Zoom


PTZ


Record

Move


Control Bar

Menu


Mode


Color


Volume


Snapshot


Playback


PICTURE 3-2

The functions of the Control Bar are listed below. Each will be covered in more detail in the following chapters.

Menu: Opens the Main Menu.

Screen Display Mode: Choose the number of channels you wish to view at once. Channels without attached cameras will display “Video Loss.” Clicking on the upward pointing arrows to the right of each icon will allow you to select which channels to view in that mode.

Dwell: Enable/disable the automatic cycling between channels.

Color: Adjust the brightness, hue, saturation and contrast for any channel.

Zoom: Available in single screen display mode, this digitally enlarges a section of the display.

Volume: Adjust volume. This is only available if you have attached a microphone or audio- capable camera to the DVR.

PTZ: Opens the controls for optional Pan-Tilt-Zoom cameras.

Snapshot: Captures a still image from all channels and saves it to the hard drive.

Record: Begin manual recording on all channels.

Playback: Switches to Playback mode and brings up the Playback Control Bar.

Move Control Bar: Clicking this will allow you to reposition the Control Bar anywhere on the screen. Right clicking on the screen will hide the Control Bar.

CHAPTER 4 MAIN MENU SETUP

10

11

Page 6
Image 6
Q-See QT454, QT428, QT426, QT446 user manual Basic Functions, Main Menu Setup, Power ON/OFF, Control BAR

QT428, QT446, QT426, QT454 specifications

The Q-See QT428, QT426, QT446, and QT454 are part of Q-See's advanced security camera systems, designed to provide robust surveillance for both residential and commercial applications. These models are known for their reliability, extensive features, and user-friendly interfaces, making them a popular choice among security-conscious consumers.

The QT428 is equipped with 4 channels, enabling users to monitor multiple areas simultaneously without compromising on quality. It offers a remarkable 1080p high-definition video output, ensuring that recorded footage remains clear and detailed. The QT428 also features night vision capabilities, allowing for effective monitoring in low-light conditions, which is crucial for nighttime surveillance.

Moving to the QT426, this model provides slightly fewer channels but enhances its storage capabilities. This system supports a range of hard drives, allowing users to increase their storage space according to their specific needs. Just like the QT428, it also boasts 1080p video resolution and advanced night vision capabilities, ensuring that no detail is overlooked.

The QT446 offers a blend of functionality and affordability, catering to budget-conscious users without skimping on features. It comes with 4 channels, delivers 1080p video quality, and includes remote access options via mobile devices. This feature is immensely beneficial for users who wish to monitor their properties in real time from anywhere in the world.

Lastly, the QT454 is the top-tier model in this line. It boasts 8 channels, making it ideal for larger properties or businesses that require comprehensive coverage. The QT454 not only features crystal-clear 1080p resolution but also includes enhanced motion detection capabilities and smart alerts. Users can customize their alert settings to receive updates whenever movement is detected, making it an effective tool for proactive security measures.

All of these models utilize advanced H.264 video compression technology, which ensures efficient video storage without sacrificing quality. The systems are also compatible with various viewing platforms, allowing users to access their camera feeds on smartphones or computers. Moreover, installation is straightforward, as Q-See provides all necessary components and clear instructions.

In conclusion, the Q-See QT428, QT426, QT446, and QT454 security camera systems are a testament to Q-See's commitment to quality and performance. With features like HD video, night vision, and easy remote access, these systems are designed to meet the diverse needs of consumers seeking reliable security solutions.