Time Tab

You can set the length of time the DVRs record an event before and after a motion detection or alarm is triggered as well as how long an individual record is preserved.

Pre-alarm record time: This sets the length of time showing events prior to a motion detection or sensor-triggered event that is included in the record.

Post-alarm record: Sets the length of time - from 10 to 60 seconds - that is added to the record after the event is finished.

Expire time: The time - up to 60 days - that

an event is saved on the drive beforePICTURE 4-17it could be overwritten (See Recycle

Record below).

4.4 SCHEDULE CONFIGURATION

Configure your camera to record at specific times based on time of day, motion detection or other sensor input. There are three tabs; Schedule, Motion and Sensor

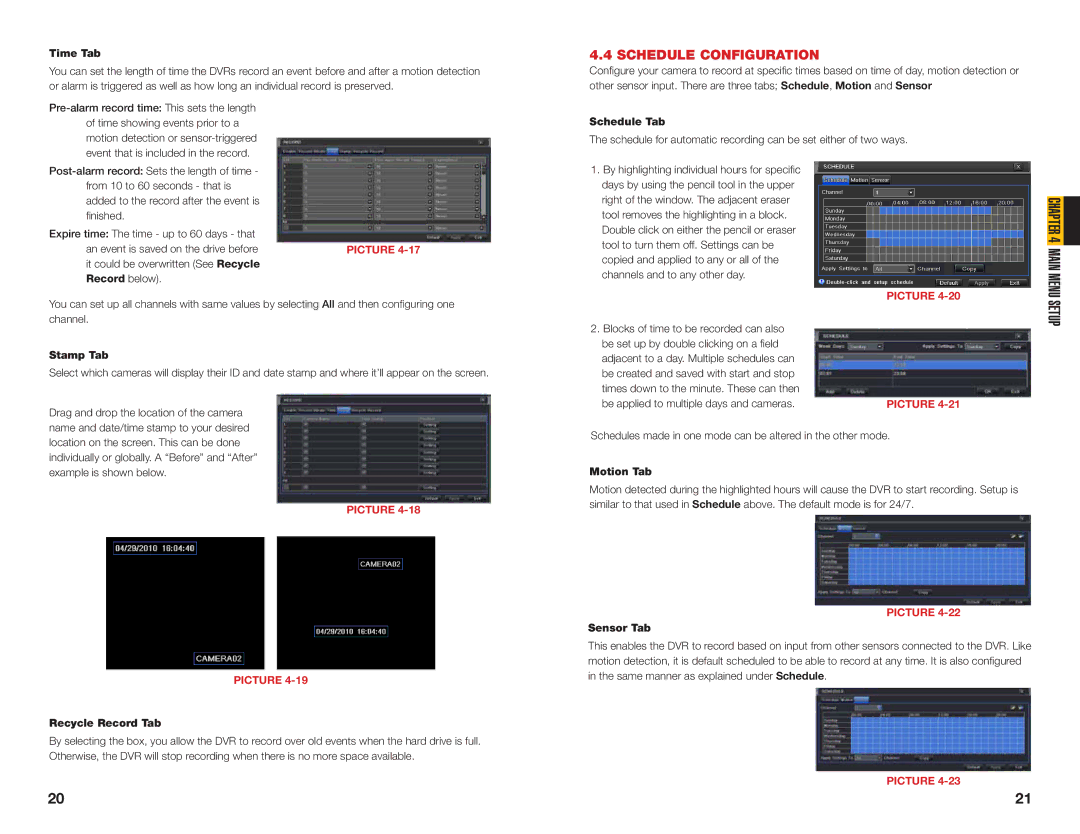
Schedule Tab

The schedule for automatic recording can be set either of two ways.

1.By highlighting individual hours for specific days by using the pencil tool in the upper right of the window. The adjacent eraser tool removes the highlighting in a block. Double click on either the pencil or eraser tool to turn them off. Settings can be copied and applied to any or all of the channels and to any other day.

CHAPTER 4 MAIN MENU

You can set up all channels with same values by selecting All and then configuring one channel.

Stamp Tab

Select which cameras will display their ID and date stamp and where it’ll appear on the screen.

Drag and drop the location of the camera name and date/time stamp to your desired

2.Blocks of time to be recorded can also be set up by double clicking on a field adjacent to a day. Multiple schedules can be created and saved with start and stop times down to the minute. These can then be applied to multiple days and cameras.

PICTURE 4-20

PICTURE 4-21

SETUP

location on the screen. This can be done individually or globally. A “Before” and “After” example is shown below.

PICTURE 4-18

PICTURE 4-19

Recycle Record Tab

By selecting the box, you allow the DVR to record over old events when the hard drive is full. Otherwise, the DVR will stop recording when there is no more space available.

Schedules made in one mode can be altered in the other mode.

Motion Tab

Motion detected during the highlighted hours will cause the DVR to start recording. Setup is similar to that used in Schedule above. The default mode is for 24/7.

PICTURE 4-22

Sensor Tab

This enables the DVR to record based on input from other sensors connected to the DVR. Like motion detection, it is default scheduled to be able to record at any time. It is also configured in the same manner as explained under Schedule.

PICTURE 4-23

20

21

Page 11
Image 11
Q-See QT446, QT428, QT426, QT454 user manual Schedule Configuration

QT428, QT446, QT426, QT454 specifications

The Q-See QT428, QT426, QT446, and QT454 are part of Q-See's advanced security camera systems, designed to provide robust surveillance for both residential and commercial applications. These models are known for their reliability, extensive features, and user-friendly interfaces, making them a popular choice among security-conscious consumers.

The QT428 is equipped with 4 channels, enabling users to monitor multiple areas simultaneously without compromising on quality. It offers a remarkable 1080p high-definition video output, ensuring that recorded footage remains clear and detailed. The QT428 also features night vision capabilities, allowing for effective monitoring in low-light conditions, which is crucial for nighttime surveillance.

Moving to the QT426, this model provides slightly fewer channels but enhances its storage capabilities. This system supports a range of hard drives, allowing users to increase their storage space according to their specific needs. Just like the QT428, it also boasts 1080p video resolution and advanced night vision capabilities, ensuring that no detail is overlooked.

The QT446 offers a blend of functionality and affordability, catering to budget-conscious users without skimping on features. It comes with 4 channels, delivers 1080p video quality, and includes remote access options via mobile devices. This feature is immensely beneficial for users who wish to monitor their properties in real time from anywhere in the world.

Lastly, the QT454 is the top-tier model in this line. It boasts 8 channels, making it ideal for larger properties or businesses that require comprehensive coverage. The QT454 not only features crystal-clear 1080p resolution but also includes enhanced motion detection capabilities and smart alerts. Users can customize their alert settings to receive updates whenever movement is detected, making it an effective tool for proactive security measures.

All of these models utilize advanced H.264 video compression technology, which ensures efficient video storage without sacrificing quality. The systems are also compatible with various viewing platforms, allowing users to access their camera feeds on smartphones or computers. Moreover, installation is straightforward, as Q-See provides all necessary components and clear instructions.

In conclusion, the Q-See QT428, QT426, QT446, and QT454 security camera systems are a testament to Q-See's commitment to quality and performance. With features like HD video, night vision, and easy remote access, these systems are designed to meet the diverse needs of consumers seeking reliable security solutions.