QSC Audio AD-S82H user manual Align the cover on the back

Models: AD-S82H AD-S82

1 44
Download 44 pages 50.73 Kb
Page 7
Image 7

Optional YM-8 and YM-8T Mounting Procedure (continued)

EN

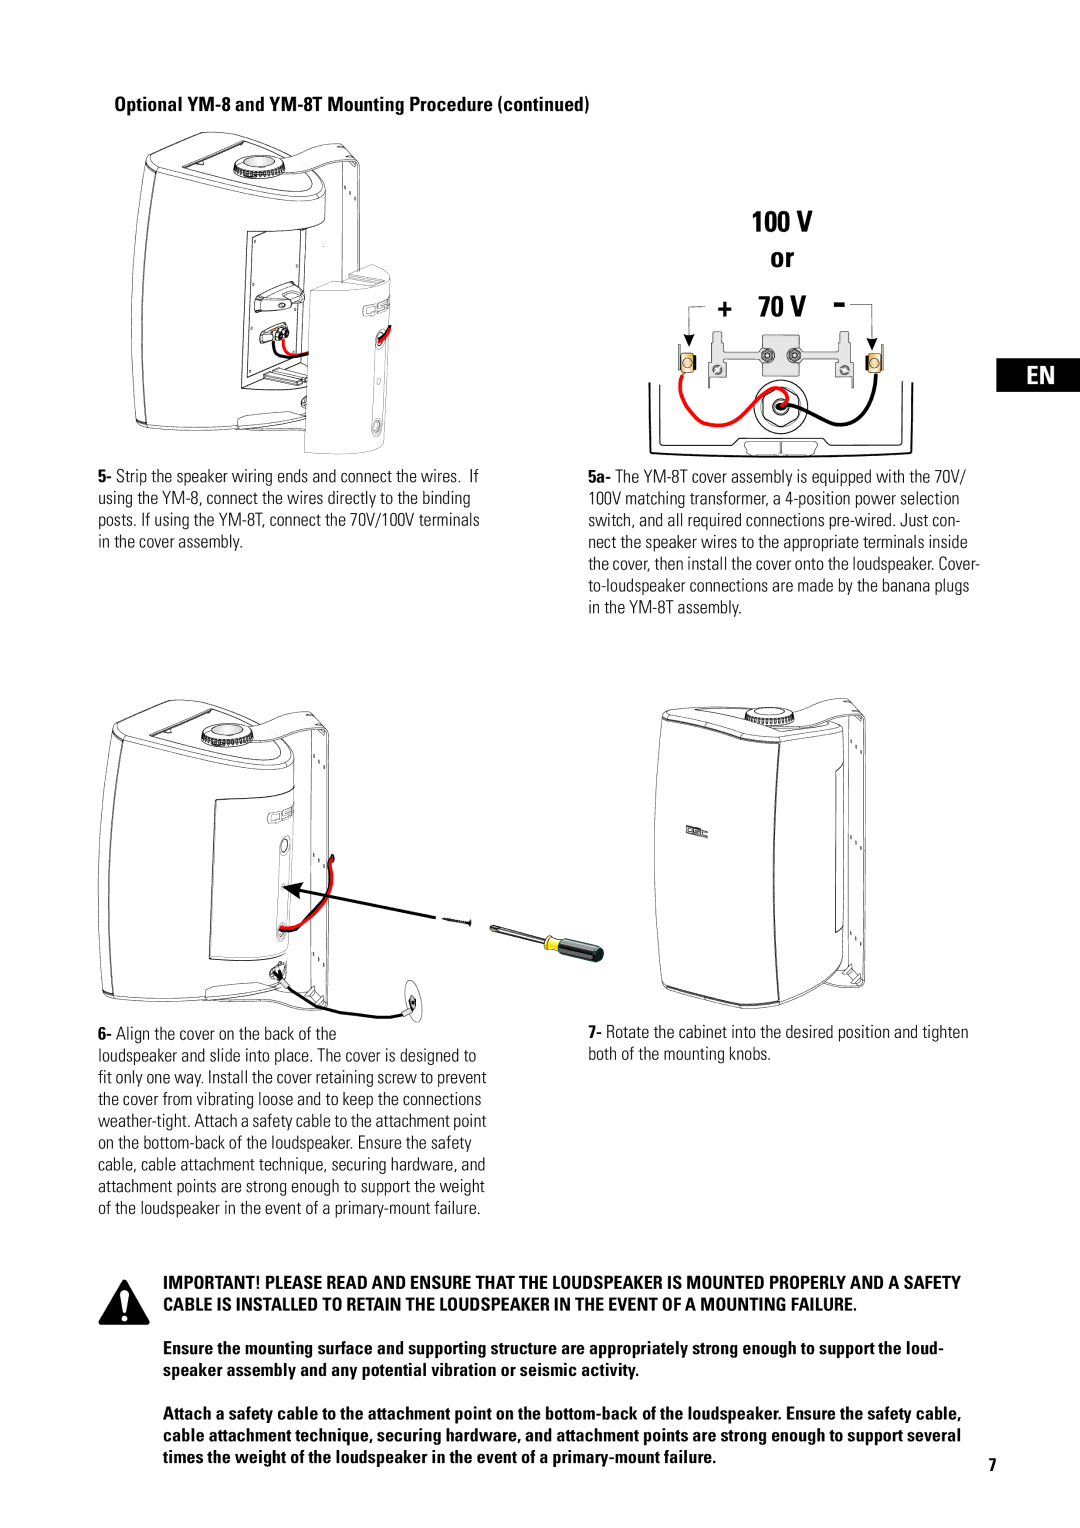
5- Strip the speaker wiring ends and connect the wires. If using the YM-8, connect the wires directly to the binding posts. If using the YM-8T, connect the 70V/100V terminals in the cover assembly.

6- Align the cover on the back of the

loudspeaker and slide into place. The cover is designed to fit only one way. Install the cover retaining screw to prevent the cover from vibrating loose and to keep the connections weather-tight. Attach a safety cable to the attachment point on the bottom-back of the loudspeaker. Ensure the safety cable, cable attachment technique, securing hardware, and attachment points are strong enough to support the weight of the loudspeaker in the event of a primary-mount failure.

5a- The YM-8T cover assembly is equipped with the 70V/ 100V matching transformer, a 4-position power selection switch, and all required connections pre-wired. Just con- nect the speaker wires to the appropriate terminals inside the cover, then install the cover onto the loudspeaker. Cover- to-loudspeaker connections are made by the banana plugs in the YM-8T assembly.

7- Rotate the cabinet into the desired position and tighten both of the mounting knobs.

IMPORTANT! PLEASE READ AND ENSURE THAT THE LOUDSPEAKER IS MOUNTED PROPERLY AND A SAFETY CABLE IS INSTALLED TO RETAIN THE LOUDSPEAKER IN THE EVENT OF A MOUNTING FAILURE.

Ensure the mounting surface and supporting structure are appropriately strong enough to support the loud- speaker assembly and any potential vibration or seismic activity.

Attach a safety cable to the attachment point on the bottom-back of the loudspeaker. Ensure the safety cable,


cable attachment technique, securing hardware, and attachment points are strong enough to support several


times the weight of the loudspeaker in the event of a primary-mount failure.

7


Page 7
Image 7
QSC Audio AD-S82H user manual Align the cover on the back