DSP-3 specifications
QSC Audio has long been recognized for its commitment to delivering high-quality audio solutions, and the QSC DSP-3 is no exception. This advanced digital signal processor (DSP) embodies cutting-edge technologies, designed to enhance audio systems in a variety of environments, including live sound, broadcasting, and installation applications.One of the main features of the DSP-3 is its exceptional audio processing capabilities, boasting 32-bit floating-point processing for superior sound quality. This ensures that audio remains clear and dynamic, with minimal distortion, even under demanding conditions. With a frequency response of 20 Hz to 20 kHz, the DSP-3 caters to a wide range of audio frequencies, ensuring no detail is lost in the sound.
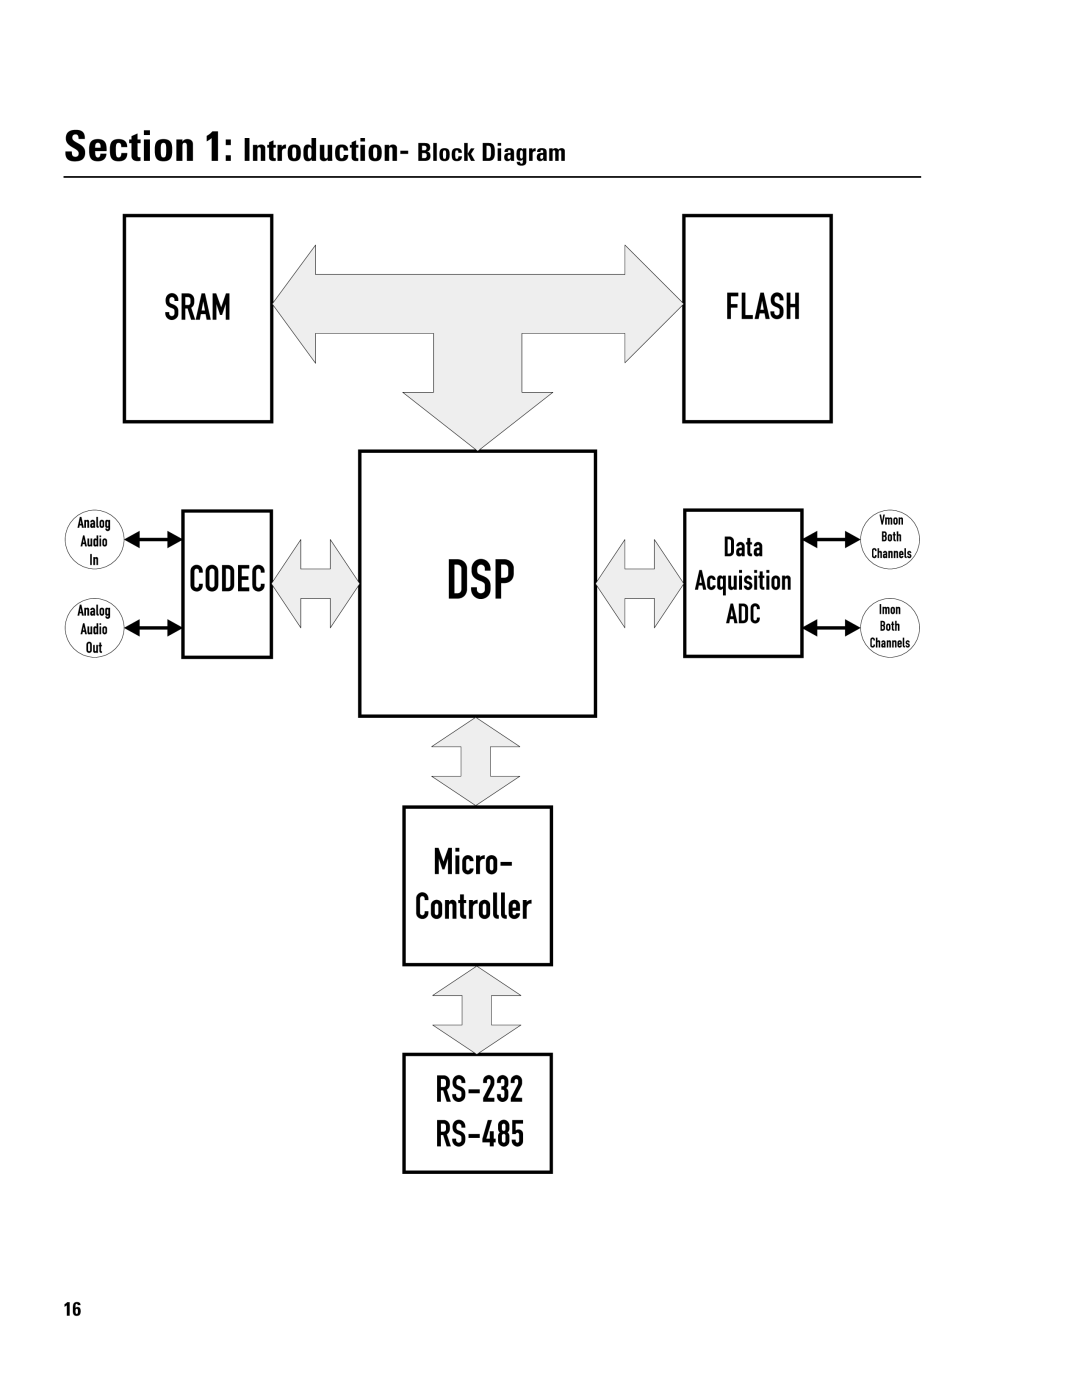
The DSP-3 offers extensive input and output options, including multiple analog and digital inputs and outputs. This flexibility allows for seamless integration into existing sound systems, catering to various setups while accommodating different signal formats. Users benefit from the unit’s configurability, enabling tailored solutions for different applications.
One of the standout technologies integrated into the DSP-3 is its advanced FIR (Finite Impulse Response) filtering capabilities. FIR filters are known for their phase linearity, which is crucial for maintaining the integrity of the audio signal through the processing chain. This feature helps in achieving accurate sound reproduction, ensuring a natural listening experience.
Additionally, the DSP-3 comes equipped with a user-friendly interface, featuring real-time monitoring and control options. This interface allows sound engineers and technicians to swiftly make adjustments on the fly, resulting in optimized audio performance tailored to the specific venue or event.
Another notable characteristic of the DSP-3 is its robust protection features. With built-in limiters, compressors, and equalizers, the device safeguards audio equipment from damage due to excessive signal levels, while maintaining the best audio quality possible. This added layer of protection is invaluable in live sound scenarios, where unpredictable dynamics can occur.
Overall, the QSC DSP-3 stands out as a powerful and flexible digital signal processor that meets the needs of modern audio applications. Its combination of advanced processing capabilities, extensive connectivity, intuitive interface, and protection mechanisms makes it an essential tool for audio professionals aiming to achieve exceptional sound quality in diverse environments. Whether for live events, installations, or broadcast applications, the DSP-3 enhances audio performance and reliability, solidifying QSC's reputation as a leader in the audio industry.