Installation and Use
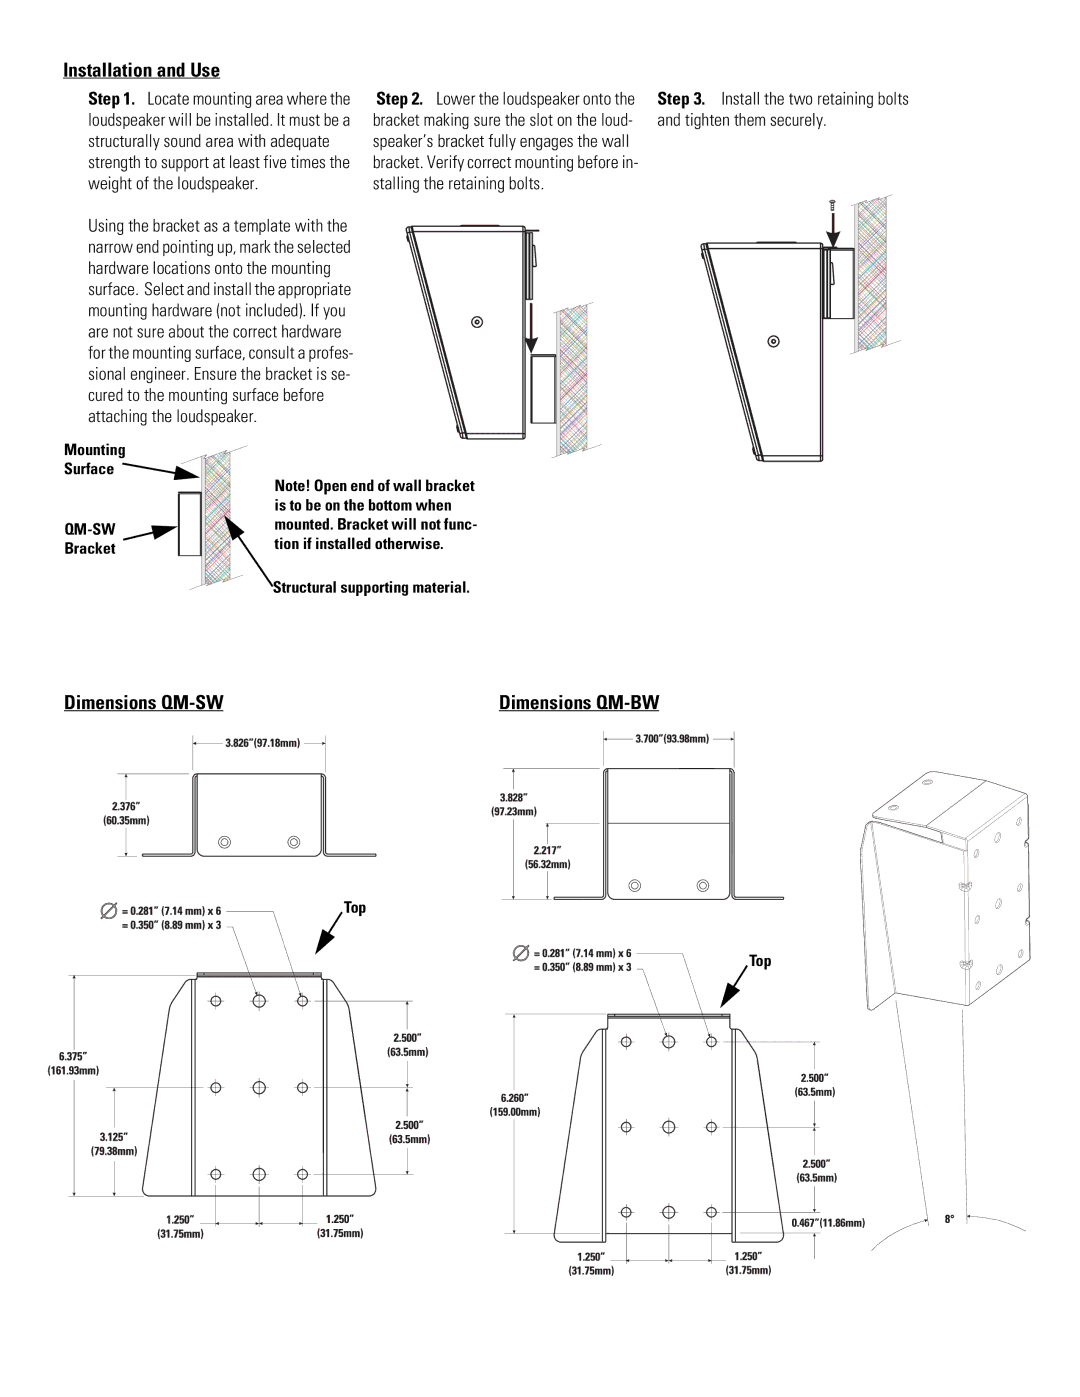
Step 1. Locate mounting area where the loudspeaker will be installed. It must be a structurally sound area with adequate strength to support at least five times the weight of the loudspeaker.
Using the bracket as a template with the narrow end pointing up, mark the selected hardware locations onto the mounting surface. Select and install the appropriate mounting hardware (not included). If you are not sure about the correct hardware for the mounting surface, consult a profes- sional engineer. Ensure the bracket is se- cured to the mounting surface before attaching the loudspeaker.
Step 2. Lower the loudspeaker onto the bracket making sure the slot on the loud- speaker’s bracket fully engages the wall bracket. Verify correct mounting before in- stalling the retaining bolts.
Step 3. Install the two retaining bolts and tighten them securely.
Mounting |
Surface |
Bracket |
Note! Open end of wall bracket is to be on the bottom when mounted. Bracket will not func- tion if installed otherwise.
Structural supporting material.
Dimensions | Dimensions | |||||||||||||||
|
|
|
|
|
|
|
|
|
|
|
|
|
|
|
|
|
|
|
|
|
|
|
|
|
|
|
|
|
|
|
|
|
|
|
|
|
|
|
|
|
|
|
|
|
|
|
|
|
|
|
|
|
|
|
|
|
|
|
|
|
|
|
|
|
|
|
|
|
|
|
|
|
|
|
|
|
|
|
|
|
|
|
|
|
|
|
|
|
|
|
|
|
|
|
|
|
|
|
|
|
|
|
|
|
|
|
|
|
|
|
|
|
|
|
|
|
|
|
|
|
|
|
|
|
|
|
|
|
|
|
|
|
|
|
|
|
|
|
|
|
|
|
|
|
|
|
|
|
|
|
|
|
|
|
|
|
|
|
|
|
|
|
|
|
|
|
|
|
|
Top
Top
