Manuals
/
Quartz
/
Household Appliance
/
Plumbing Product
Quartz
QZ3111
manual
Step-by-stepinstructions, Quartz Thermo installation guide
Models:
QZ3111
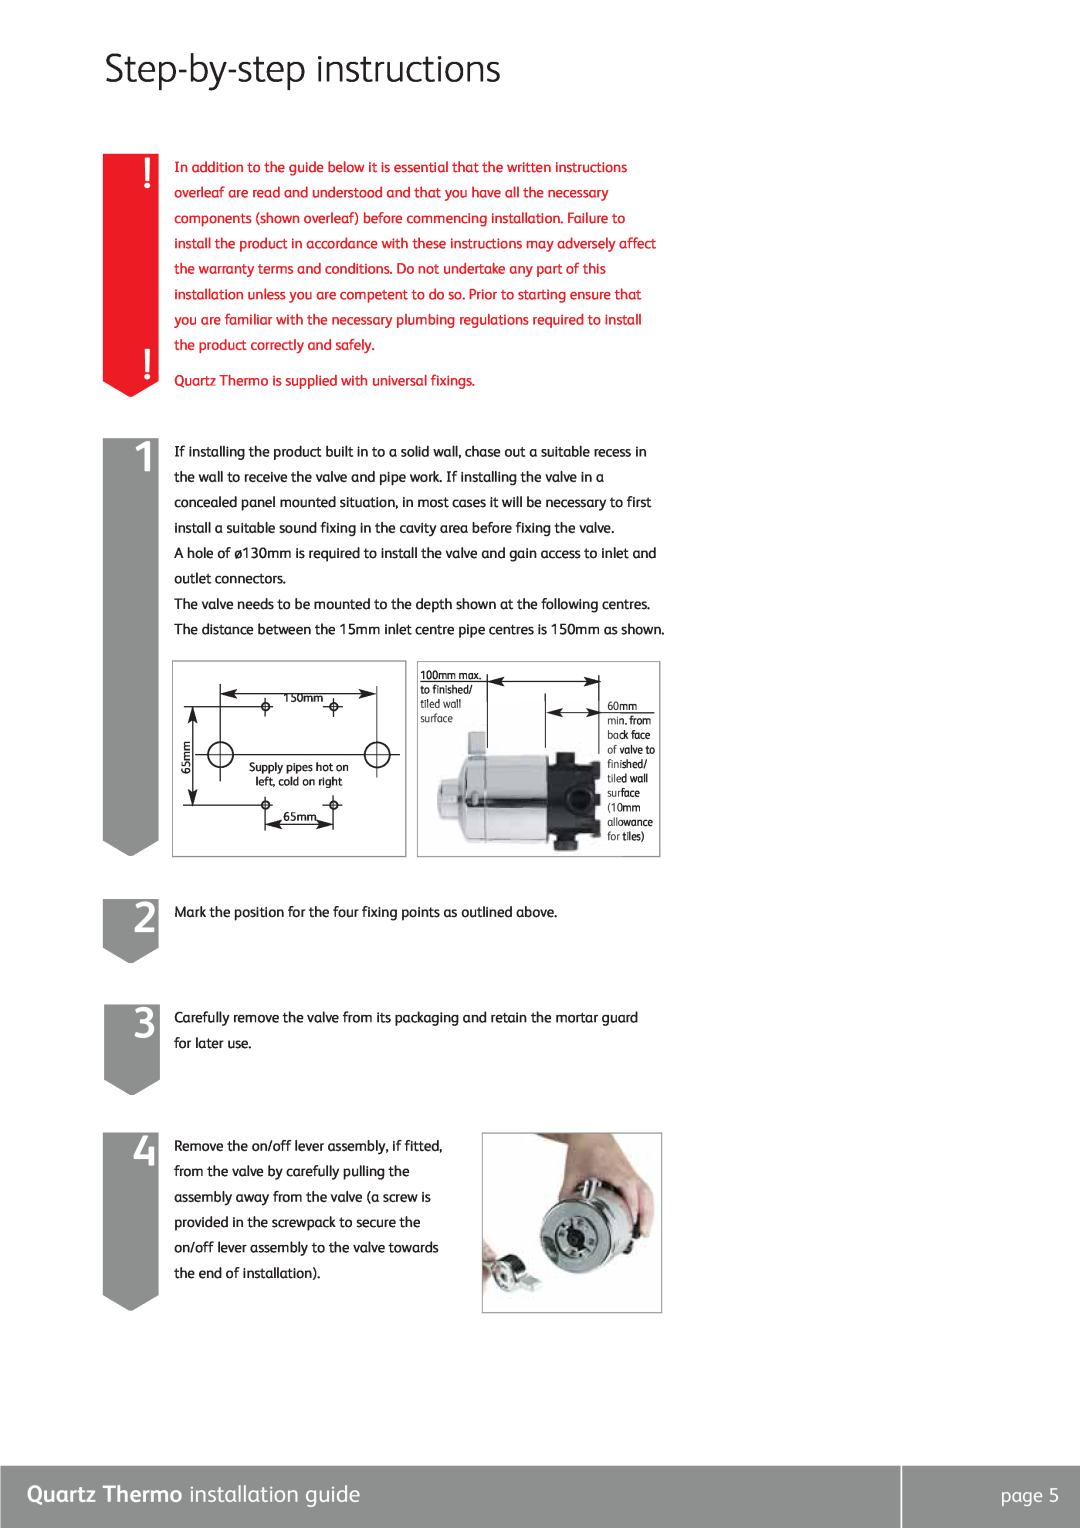
1
5
16
16
Download
16 pages
50.84 Kb
1
2
3
4
5
6
7
8
Troubleshooting
Install
Step-by-stepinstructions
Adjustable height head
Safety
Page 5
Image 5
Page 4
Page 6
Page 5
Image 5
Page 4
Page 6
Contents
Concealed shower valve with adjustable head
Quartz Thermo installation guide
Quartz
Thermo
Quartz Thermo installation guide
Shower systems
QZ3111
Components
Important information
Safety information
Introduction
Flushing
Stored water capacities
Pump installation
Pressures
Gravity fed hot and cold supplies
Quartz Thermo is supplied with universal fixings
Step-by-stepinstructions
Quartz Thermo installation guide
Prepare the wall fixings as required
Quartz Thermo installation guide
THE MORTAR GUARD MUST BE USED
Quartz Thermo installation guide
Temporarily cap off the outlet supply pipe
ring and the white temperature preset
Quartz Thermo installation guide
Quartz Thermo installation guide
Adjustable height head installation
Fit the rail end clip fitting into position into
Quartz Thermo installation guide
Connect the hose to the wall outlet assembly
Quartz Thermo installation guide
after passing it through the gel hook/hose
restraint if required and run the shower for
Quartz Thermo installation guide
After installation
Commissioning
Cleaning
After installation
User guide
Quartz Thermo installation guide
Symptom
Troubleshooting guide
Action
Quartz Thermo installation guide
Quartz Thermo installation guide
Typical installations
Typical gravity system installation
Typical Thermal storage unit system installation
Aqualisa Products Limited The Flyer’s Way
Top
Page
Image
Contents