DA25 DISCONE ANTENNA KIT ASSEMBLY
Although we know that you are anxious to complete the assembly of your an- tenna kit, it is necessary to assemble it in a specific order to insure the proper operation of the finished unit. Try to avoid the urge to jump ahead installing components.
Since you may appreciate some
Use the boxes to check off your progress.
Check all received parts against the parts list. The parts list describes the vari- ous markings that may be found on the kit parts. Carefully sort the parts into small piles, (an empty egg tray does nicely for this purpose) to aid in finding the correct part at the required time.
Enough of that… lets get started!
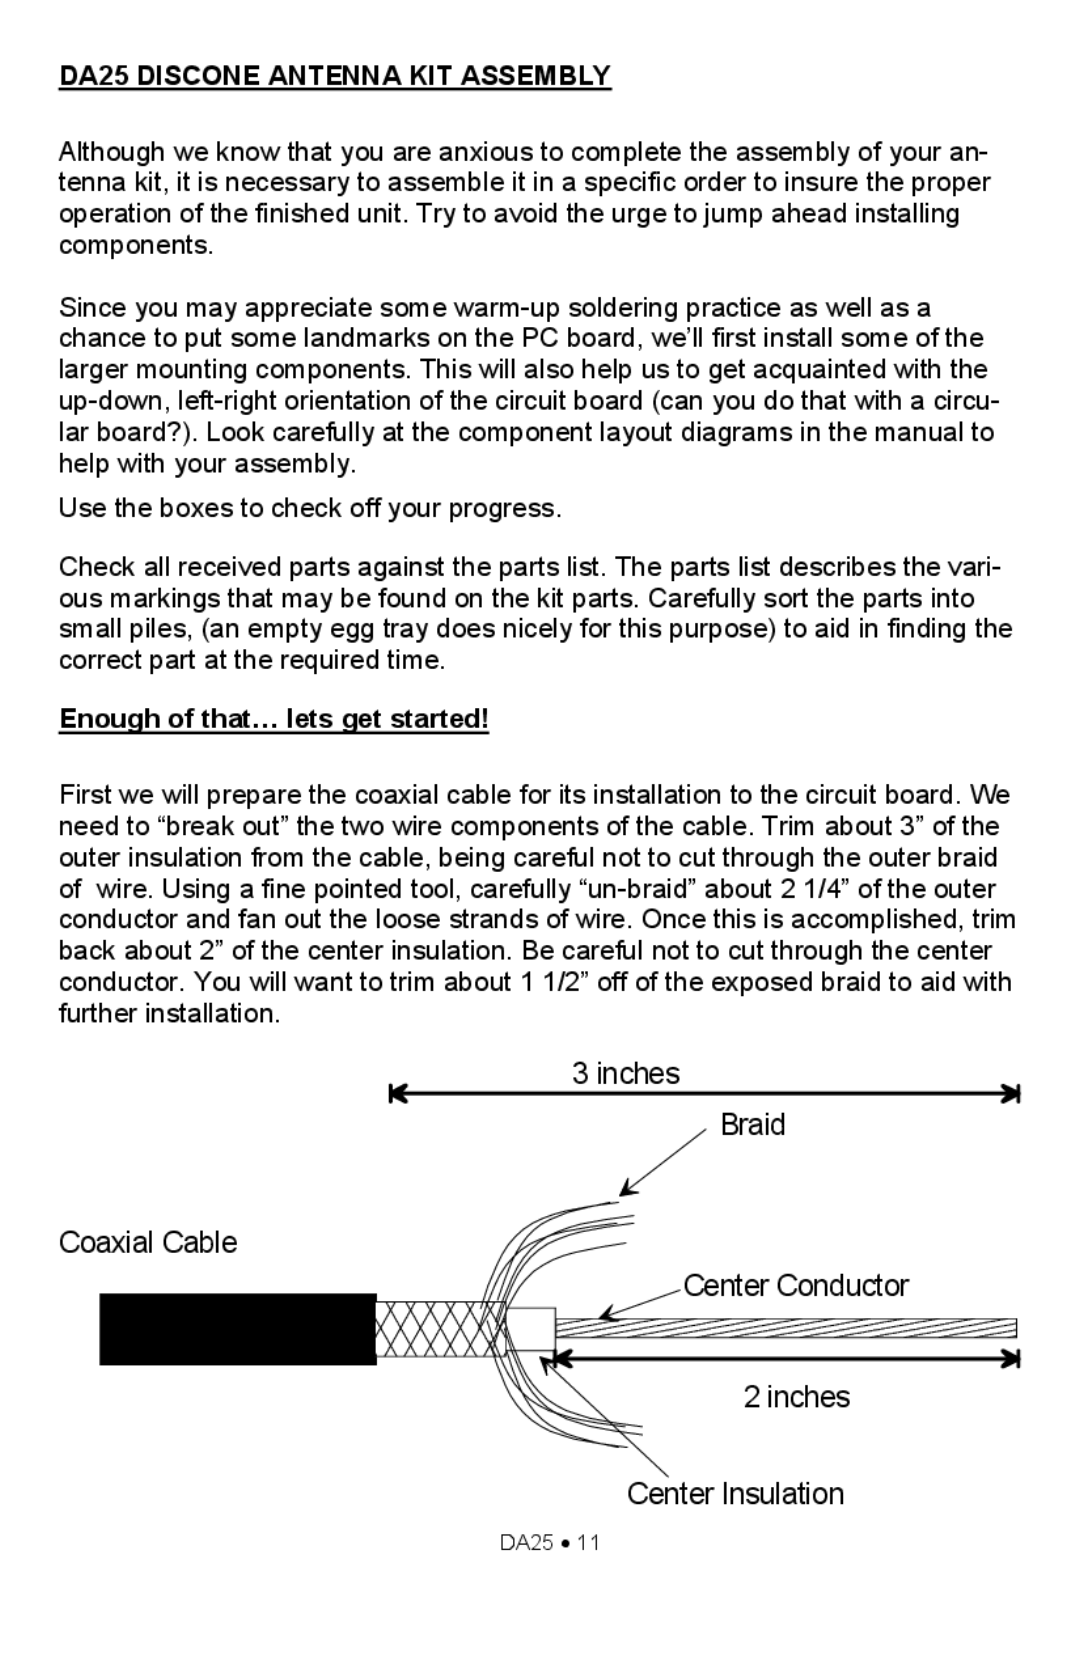
First we will prepare the coaxial cable for its installation to the circuit board. We need to “break out” the two wire components of the cable. Trim about 3” of the outer insulation from the cable, being careful not to cut through the outer braid of wire. Using a fine pointed tool, carefully
3 inches
Braid
Coaxial Cable
Center Conductor |
2 inches |
Center Insulation |
