Assembly and Set-Up
Turn power switch off before conducting any maintenance procedures.
qCharging the Battery
Your Ground Force may not have a fully charged battery; therefore it is a good idea to charge the battery prior to use.
• Initial charge time: 12 hours | • Run time: Up to 40 minutes of continuous ride time. |
• Recharge time: 12 hours, even if the light turns green. | Run time may vary depending on riding conditions, |
• Fully charge battery before storing. | climate and/or proper maintenance. |
• When the scooter is not in regular use, recharge | • Average battery life: 250 charge/discharge cycles |
the battery at least once a month until normal | • To ensure long battery life, do not store the battery |
use is resumed. | in temperatures above 75° or below |
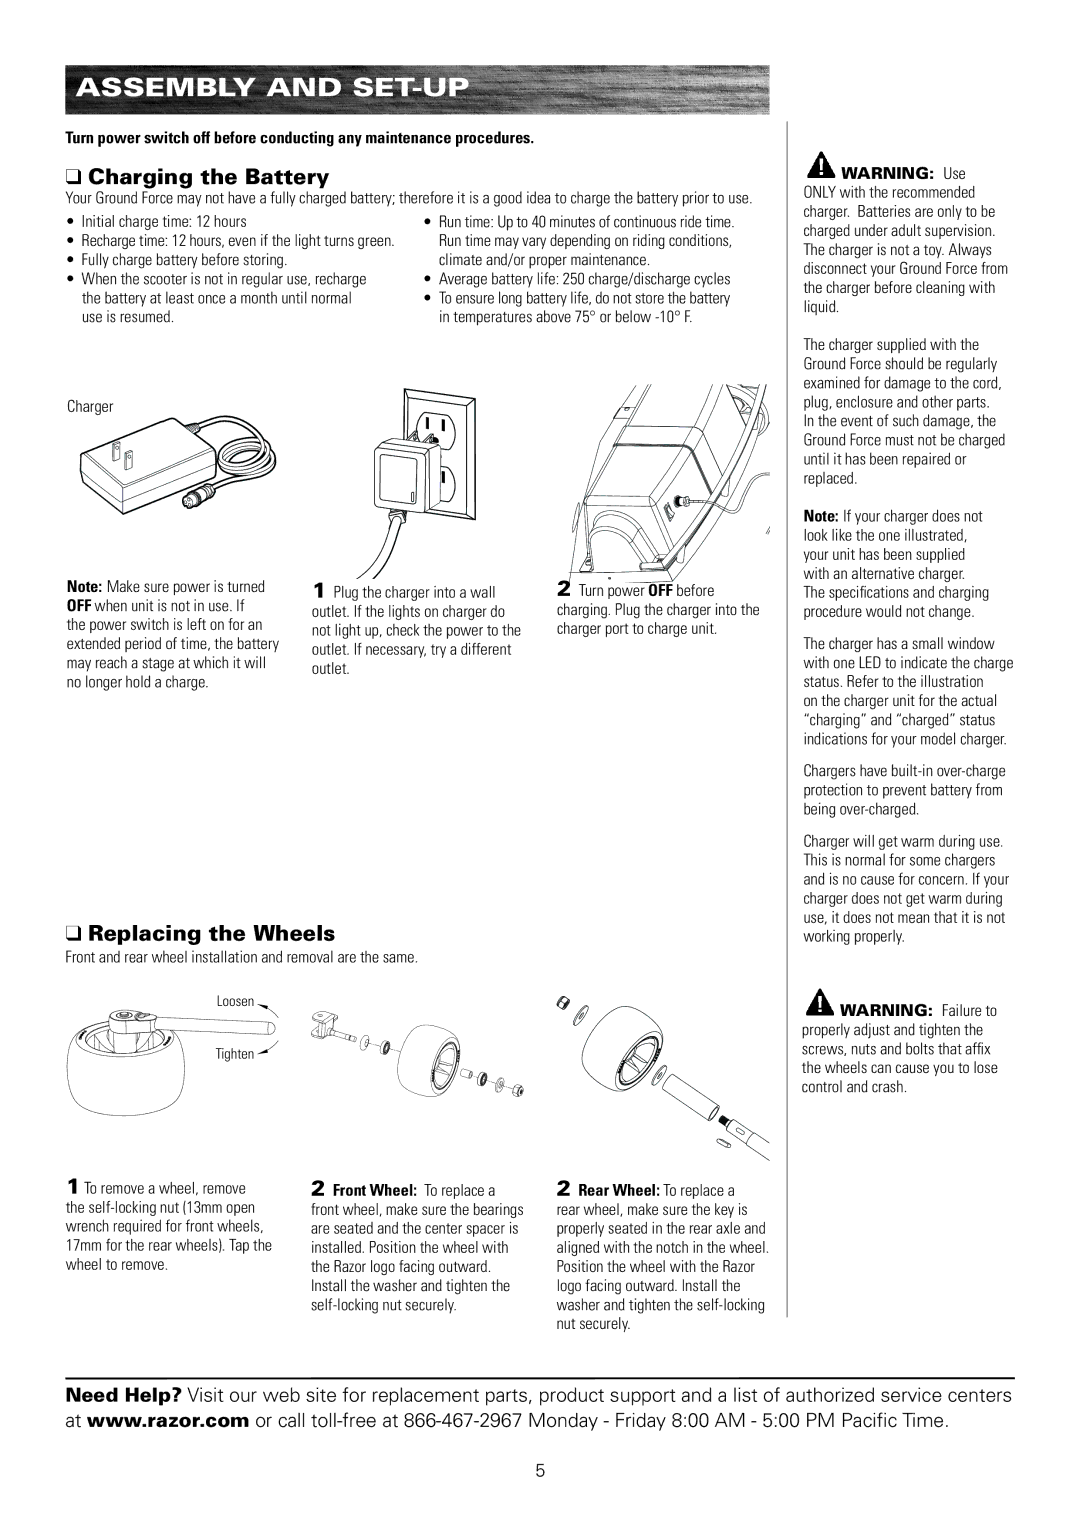
Charger
Note: Make sure power is turned | 1 Plug the charger into a wall | 2 Turn power OFF before |
OFF when unit is not in use. If | outlet. If the lights on charger do | charging. Plug the charger into the |
the power switch is left on for an | not light up, check the power to the | charger port to charge unit. |
extended period of time, the battery | outlet. If necessary, try a different |
|
may reach a stage at which it will |
| |
outlet. |
| |
no longer hold a charge. |
| |
|
|
qReplacing the Wheels
Front and rear wheel installation and removal are the same.
Loosen
Tighten
WARNING: Use ONLY with the recommended charger. Batteries are only to be charged under adult supervision. The charger is not a toy. Always disconnect your Ground Force from the charger before cleaning with liquid.
The charger supplied with the Ground Force should be regularly examined for damage to the cord, plug, enclosure and other parts. In the event of such damage, the Ground Force must not be charged until it has been repaired or replaced.
Note: If your charger does not look like the one illustrated, your unit has been supplied with an alternative charger. The specifications and charging procedure would not change.
The charger has a small window with one LED to indicate the charge status. Refer to the illustration
on the charger unit for the actual “charging” and “charged” status indications for your model charger.
Chargers have
Charger will get warm during use. This is normal for some chargers and is no cause for concern. If your charger does not get warm during use, it does not mean that it is not working properly.
![]() WARNING: Failure to properly adjust and tighten the screws, nuts and bolts that affix the wheels can cause you to lose control and crash.
WARNING: Failure to properly adjust and tighten the screws, nuts and bolts that affix the wheels can cause you to lose control and crash.
1 To remove a wheel, remove the
2Front Wheel: To replace a front wheel, make sure the bearings are seated and the center spacer is installed. Position the wheel with the Razor logo facing outward. Install the washer and tighten the
2Rear Wheel: To replace a rear wheel, make sure the key is properly seated in the rear axle and aligned with the notch in the wheel. Position the wheel with the Razor logo facing outward. Install the washer and tighten the
Need Help? Visit our web site for replacement parts, product support and a list of authorized service centers at www.razor.com or call
5