4 Using the TV Menu

Using the Menu System

This section explores the menus of your TV. Each menu is outlined and detailed to help you get the most from your TV. The Parental Control Menu is discussed in Chapter 3. To access the menu system, follow these steps:

1.Press the MENU button.

2.Use the up or down arrow to highlight an option and press OK or the right arrow to display it.

3.Press the up and down arrow to move to a different option within the menu. If necessary, press OK or right arrow to display the choices of the option youÕve highlighted. If available, use the text at the bottom of each screen for help.

4.To return to the previous menu, press the GO BACK or left arrow.

Descriptions of each menu are discussed in the order they appear.

There are two ways to exit a menu:

¥Press the CLEAR or Menu button. The menus are cleared from the screen and you return to TV viewing.

¥Press the GO BACK or left arrow repeatedly until the menus disappear.

Picture

Sound

Setup

List & Labels

Parental Control

Exit

Picture Menu

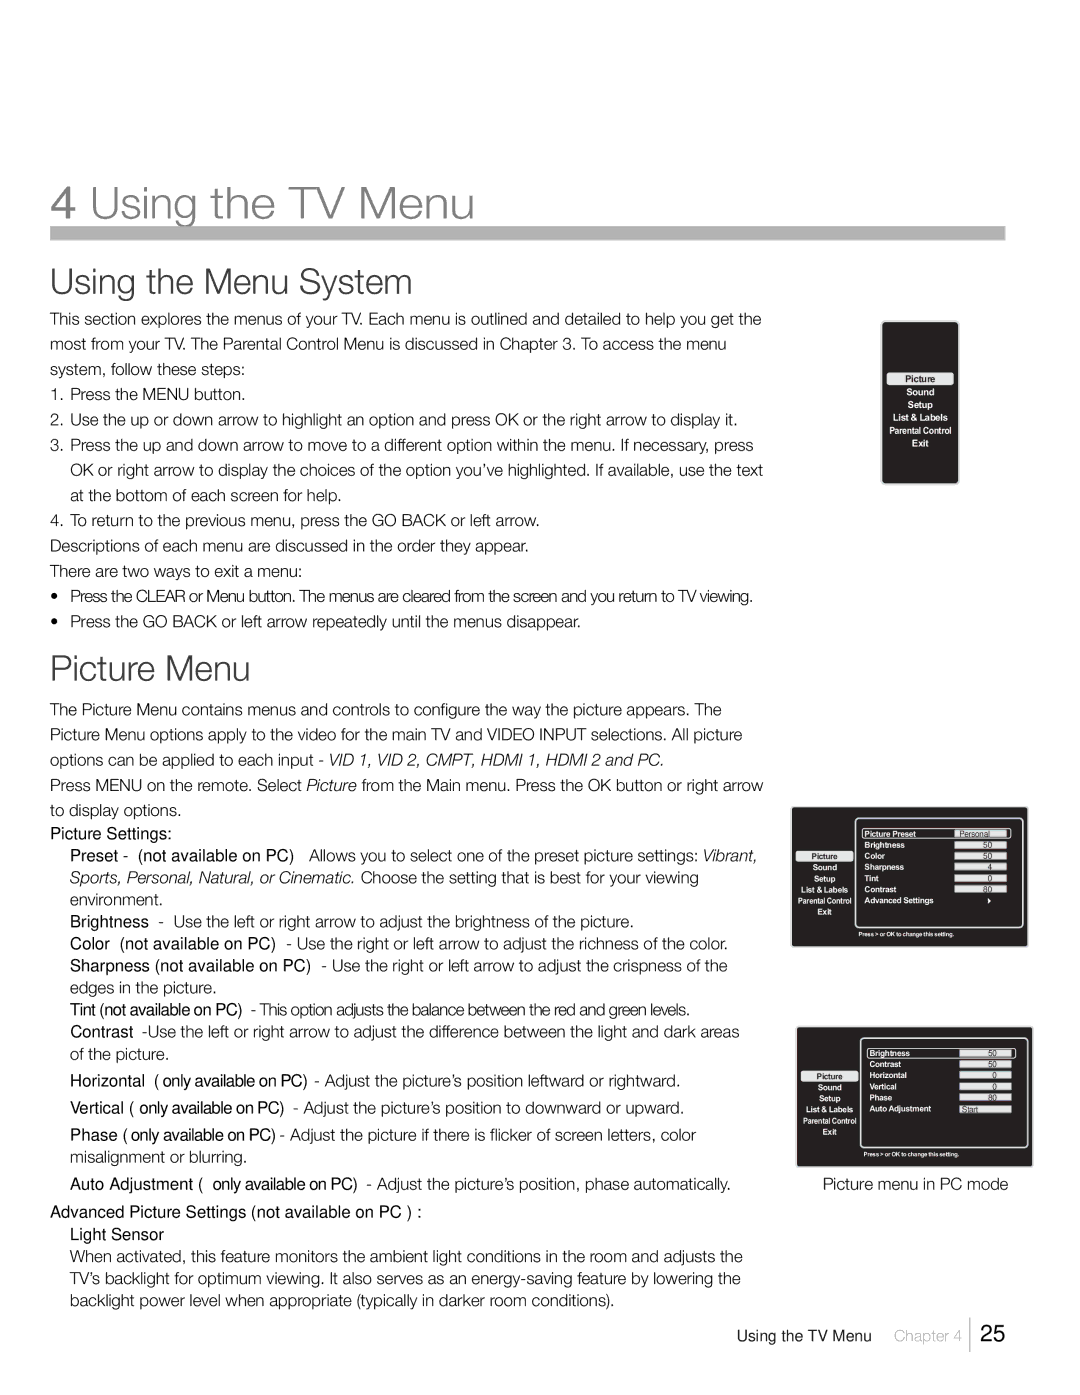
The Picture Menu contains menus and controls to configure the way the picture appears. The Picture Menu options apply to the video for the main TV and VIDEO INPUT selections. All picture options can be applied to each input - VID 1, VID 2, CMPT, HDMI 1, HDMI 2 and PC.

Press MENU on the remote. Select Picture from the Main menu. Press the OK button or right arrow to display options.

Picture Settings:

Preset - (not available on PC) Allows you to select one of the preset picture settings: Vibrant, Sports, Personal, Natural, or Cinematic. Choose the setting that is best for your viewing environment.

Brightness - Use the left or right arrow to adjust the brightness of the picture.

Color (not available on PC) - Use the right or left arrow to adjust the richness of the color. Sharpness (not available on PC) - Use the right or left arrow to adjust the crispness of the edges in the picture.

Tint (not available on PC) - This option adjusts the balance between the red and green levels. Contrast -Use the left or right arrow to adjust the difference between the light and dark areas of the picture.

Horizontal ( only available on PC) - Adjust the pictureÕs position leftward or rightward. Vertical ( only available on PC) - Adjust the pictureÕs position to downward or upward.

Phase ( only available on PC)- Adjust the picture if there is flicker of screen letters, color misalignment or blurring.

Auto Adjustment ( only available on PC) - Adjust the pictureÕs position, phase automatically.

Advanced Picture Settings (not available on PC ) :

Light Sensor

When activated, this feature monitors the ambient light conditions in the room and adjusts the TVÕs backlight for optimum viewing. It also serves as an energy-saving feature by lowering the backlight power level when appropriate (typically in darker room conditions).


Picture Preset

Personal


Brightness

50

Picture

Color

50

Sound

Sharpness

4

Setup

Tint

0

List & Labels

Contrast

80

Parental Control

Advanced Settings


Exit


Press > or OK to change this setting.


Brightness

50


Contrast

50

Picture

Horizontal

0

Sound

Vertical

0

Setup

Phase

80

List & Labels

Auto Adjustment

Start

Parental Control


Exit


Press > or OK to change this setting.

Picture menu in PC mode

Using the TV Menu Chapter 4

25

Page 25
Image 25
RCA L26HD41, L26HD31R, L22HD41V warranty Using the Menu System, Picture Menu, Picture menu in PC mode

L22HD41V, L22HD41, L26HD41, L26HD31R specifications

The RCA L26HD31R, L26HD41, L22HD41, and L22HD41V series of HDTVs are notable for their blend of advanced technology and user-friendly features, catering to a wide audience seeking quality entertainment options. These models, though differing in size and specifications, share common characteristics that reflect RCA’s commitment to delivering value and performance.

At the core of these models is their high-definition resolution. Both the L26HD31R and L26HD41 offer vibrant 720p resolution, ensuring that viewers enjoy a clear, detailed picture quality. Meanwhile, the L22HD41 and L22HD41V, being smaller, also deliver impressive 720p visuals that are ideal for bedrooms or smaller living spaces. The crisp imagery provided by these TVs makes for an engaging viewing experience, whether it's for watching movies, playing video games, or catching up on TV shows.

Another significant feature across this series is the inclusion of multiple HDMI ports. This functionality allows users to connect various devices, such as gaming consoles, Blu-ray players, and streaming devices, ensuring a hassle-free integration of tech. The availability of HDMI connections reflects the modern consumer’s need for versatility when it comes to entertainment systems.

In terms of audio, RCA has ensured that these models come equipped with built-in speakers that provide decent sound quality. While external sound systems may enhance the audio experience, the integrated speakers are sufficient for casual viewing, making these TVs suitable for everyday use.

The design of the RCA L-series is also noteworthy, featuring sleek lines and a contemporary look that can complement any room’s decor. The lightweight nature of these models makes them easy to mount on walls or place on stands, providing flexibility in how they are set up in various environments.

Energy efficiency is another consideration with these HDTVs. They are designed to consume less power compared to older models, which not only appeals to environmentally conscious consumers but also helps reduce electricity bills.

In summary, the RCA L26HD31R, L26HD41, L22HD41, and L22HD41V series models present a compelling option for those in search of reliable, high-definition televisions. With their impressive picture quality, versatile connectivity options, and user-centric design, they stand out as solid choices for a wide range of viewers. RCA continues to deliver on its promise of quality and innovation, making these models worthy contenders in the competitive HDTV market.