
RTD317 specifications
The RCA RTD317 is a versatile and compact 17-inch digital TV that offers an engaging viewing experience with its user-friendly features and advanced technologies. Designed for those who appreciate functionality and affordability in their entertainment devices, this television is ideal for smaller spaces such as bedrooms, kitchens, or offices.One of the key features of the RCA RTD317 is its 720p HD resolution, which ensures a clear and vibrant display quality. This resolution allows viewers to enjoy their favorite shows and movies with impressive clarity, bringing colors to life and enhancing the overall viewing experience. Although it is a smaller screen size, the high-definition quality compensates for it by providing stunning visuals that keep viewers engaged.
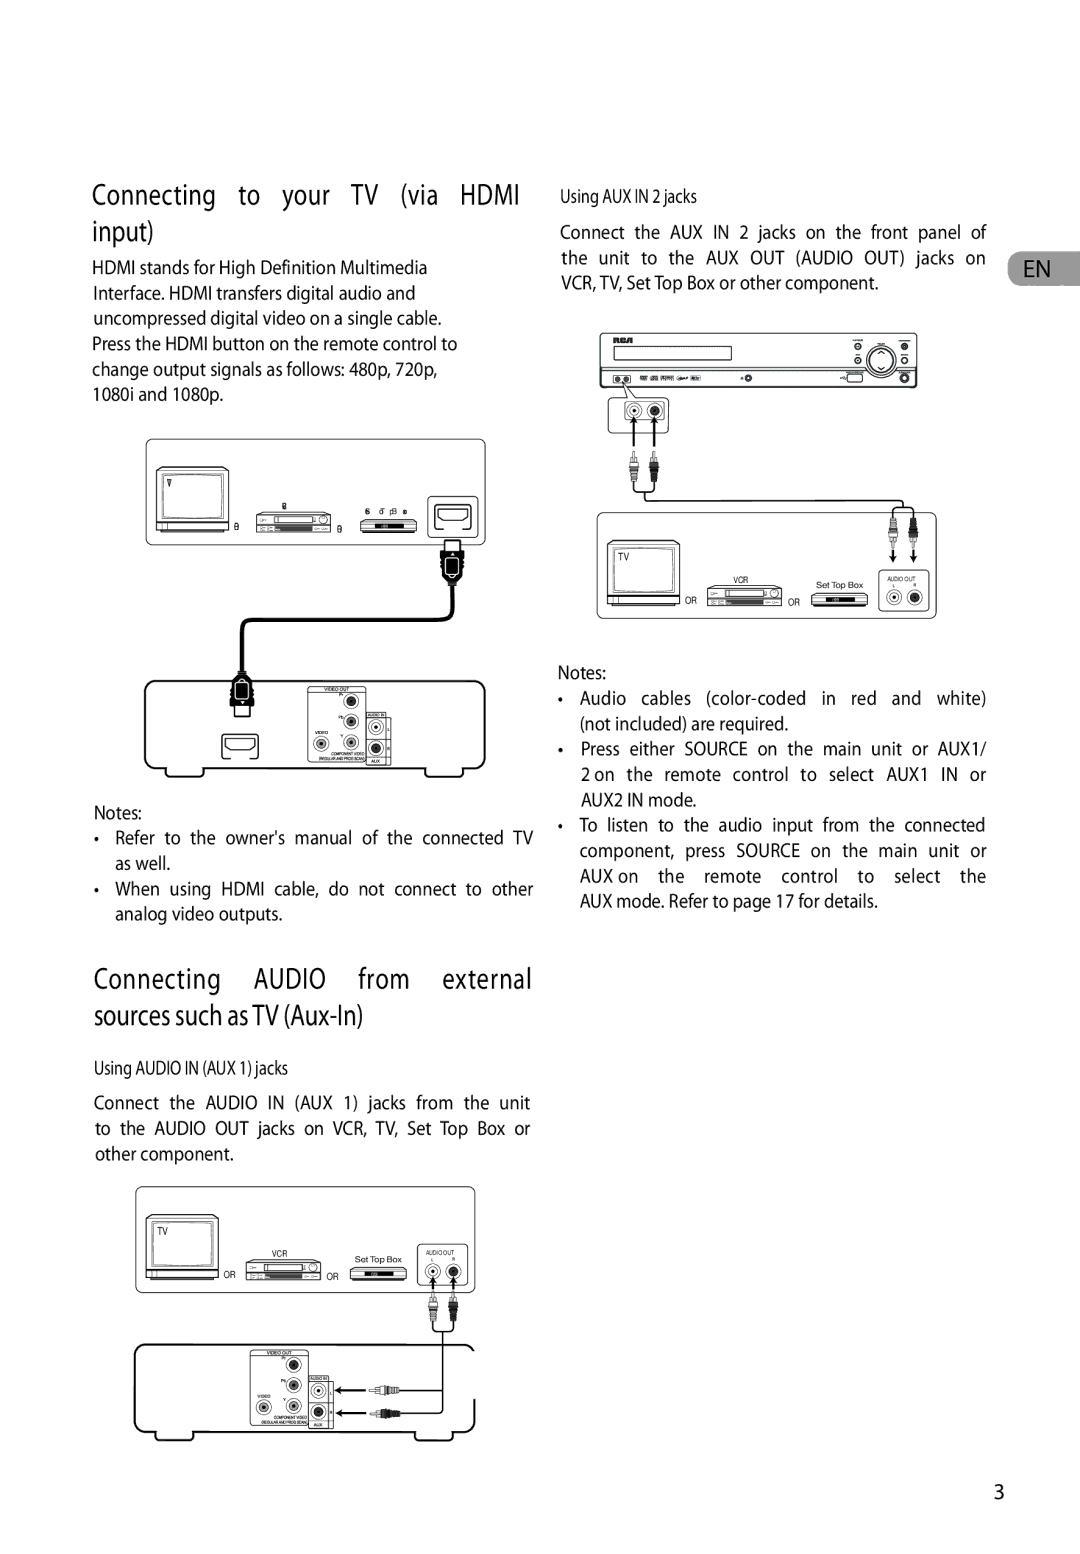
Equipped with a built-in digital tuner, the RCA RTD317 allows users to access over-the-air broadcast signals without the need for an external cable or satellite box. This feature is particularly appealing for cord-cutters seeking to enjoy live television without the added costs of traditional subscription services. The TV also supports multiple input options, including HDMI and USB ports, enabling users to connect various devices such as gaming consoles, streaming devices, and USB flash drives with ease.
Another notable technology included in the RCA RTD317 is its Energy Star certification. This ensures that the television operates efficiently and helps reduce energy consumption, making it an eco-friendly choice for environmentally-conscious consumers. Additionally, the TV is designed with a sleek and modern aesthetic, ensuring it blends seamlessly into any home decor.
In terms of audio performance, the RCA RTD317 features built-in speakers that provide clear sound output, enhancing the viewing experience. Users can also connect external audio systems via the audio output for an even richer sound experience, making it suitable for movie nights or gaming sessions.
Overall, the RCA RTD317 combines practicality and quality into a compact package. Its main features, including 720p HD resolution, built-in digital tuner, multiple connectivity options, and energy efficiency, make it an excellent choice for anyone seeking a reliable and straightforward television solution that fits comfortably in smaller spaces. Whether for casual viewing, streaming, or gaming, the RCA RTD317 meets the diverse needs of modern viewers, making it a noteworthy addition to the television market.