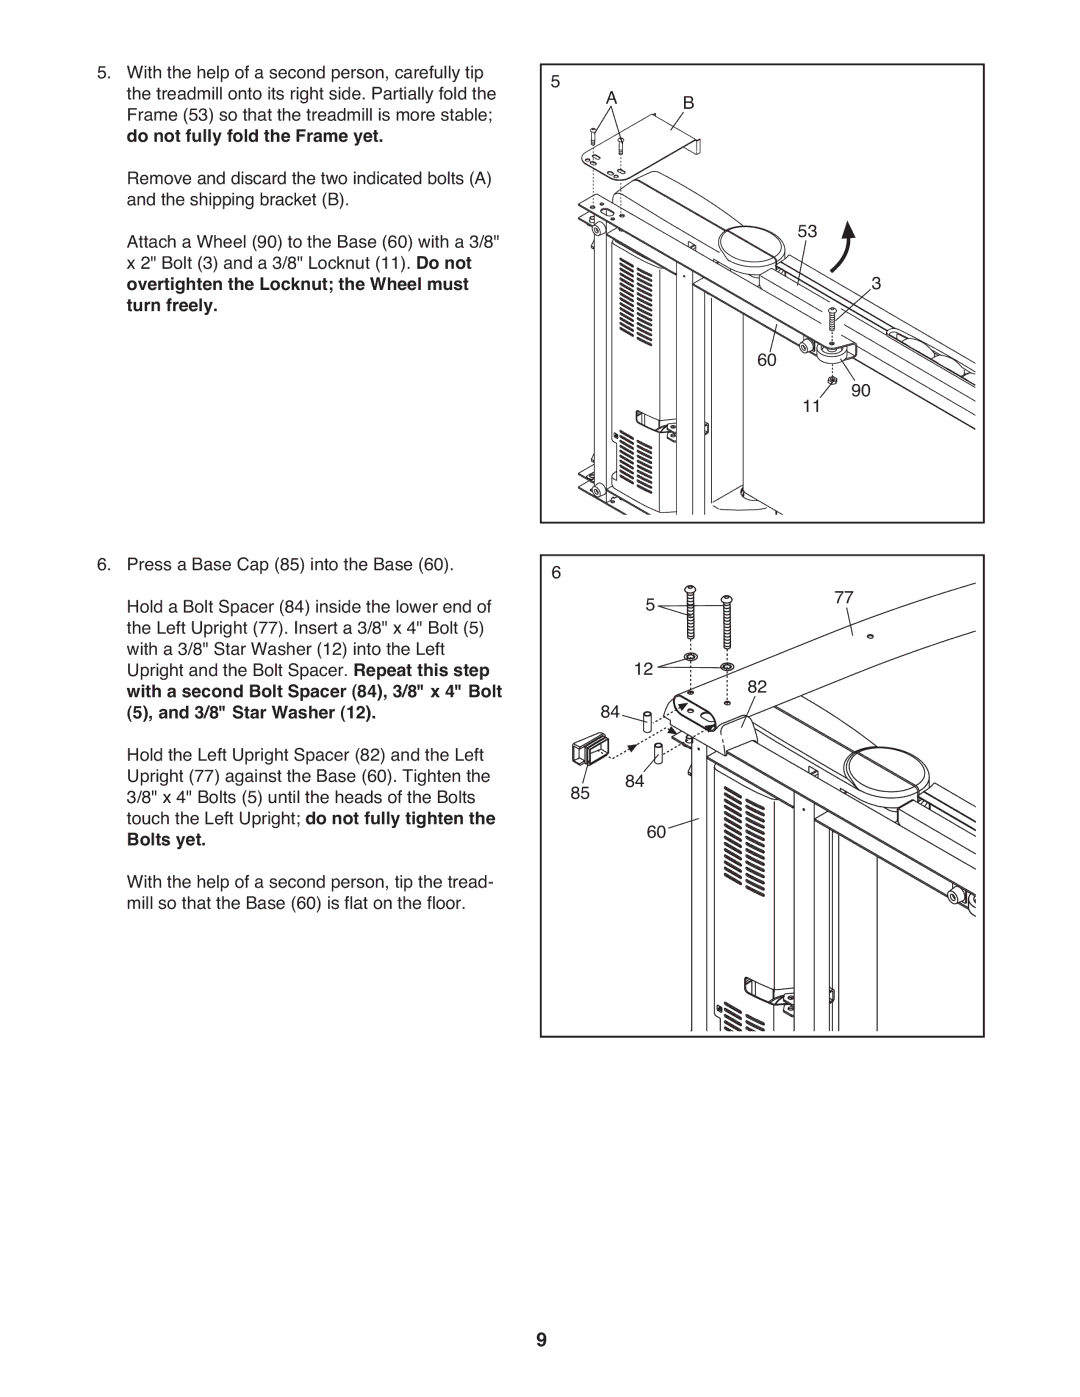
5. With the help of a second person, carefully tip | 5 |
|
|
|
|
the treadmill onto its right side. Partially fold the | A | B |
|
| |
Frame (53) so that the treadmill is more stable; |
|
|
| ||
do not fully fold the Frame yet. |
|
|
|
|
|
Remove and discard the two indicated bolts (A) |
|
|
|
|
|
and the shipping bracket (B). |
|
|
| 53 |
|
Attach a Wheel (90) to the Base (60) with a 3/8" |
|
|
|
| |
x 2" Bolt (3) and a 3/8" Locknut (11). Do not |
|
|
|
| 3 |
overtighten the Locknut; the Wheel must |
|
|
|
| |
turn freely. |
|
| 60 |
|
|
|
|
| 11 | 90 | |
|
|
|
| ||
|
|
|
|
| |
6. Press a Base Cap (85) into the Base (60). | 6 | 5 |
|
| 77 |
Hold a Bolt Spacer (84) inside the lower end of |
|
|
| ||
the Left Upright (77). Insert a 3/8" x 4" Bolt (5) |
|
|
|
|
|
with a 3/8" Star Washer (12) into the Left |
| 12 |
|
|
|
Upright and the Bolt Spacer. Repeat this step |
| 82 |
|
| |
with a second Bolt Spacer (84), 3/8" x 4" Bolt |
| 84 |
|
| |
(5), and 3/8" Star Washer (12). |
|
|
|
| |
Hold the Left Upright Spacer (82) and the Left |
|
|
|
|
|
Upright (77) against the Base (60). Tighten the | 85 | 84 |
|
|
|
3/8" x 4" Bolts (5) until the heads of the Bolts |
|
|
| ||
touch the Left Upright; do not fully tighten the |
| 60 |
|
|
|
Bolts yet. |
|
|
|
| |
With the help of a second person, tip the tread- |
|
|
|
|
|
mill so that the Base (60) is flat on the floor. |
|
|
|
|
|
| 9 |
|
|
|
|