Important: Keep these instructions for future reference
Gate Instructions
Assembling and Installing Your Gate
**Note: IMPORTANT you will notice a slight Gap between the gate door latch and the frame tube . THIS IS NOT A DEFECT . Your gate is a pressure mounted gate and this gap will disappear once you tighten your gate in the doorway.
Step 1.
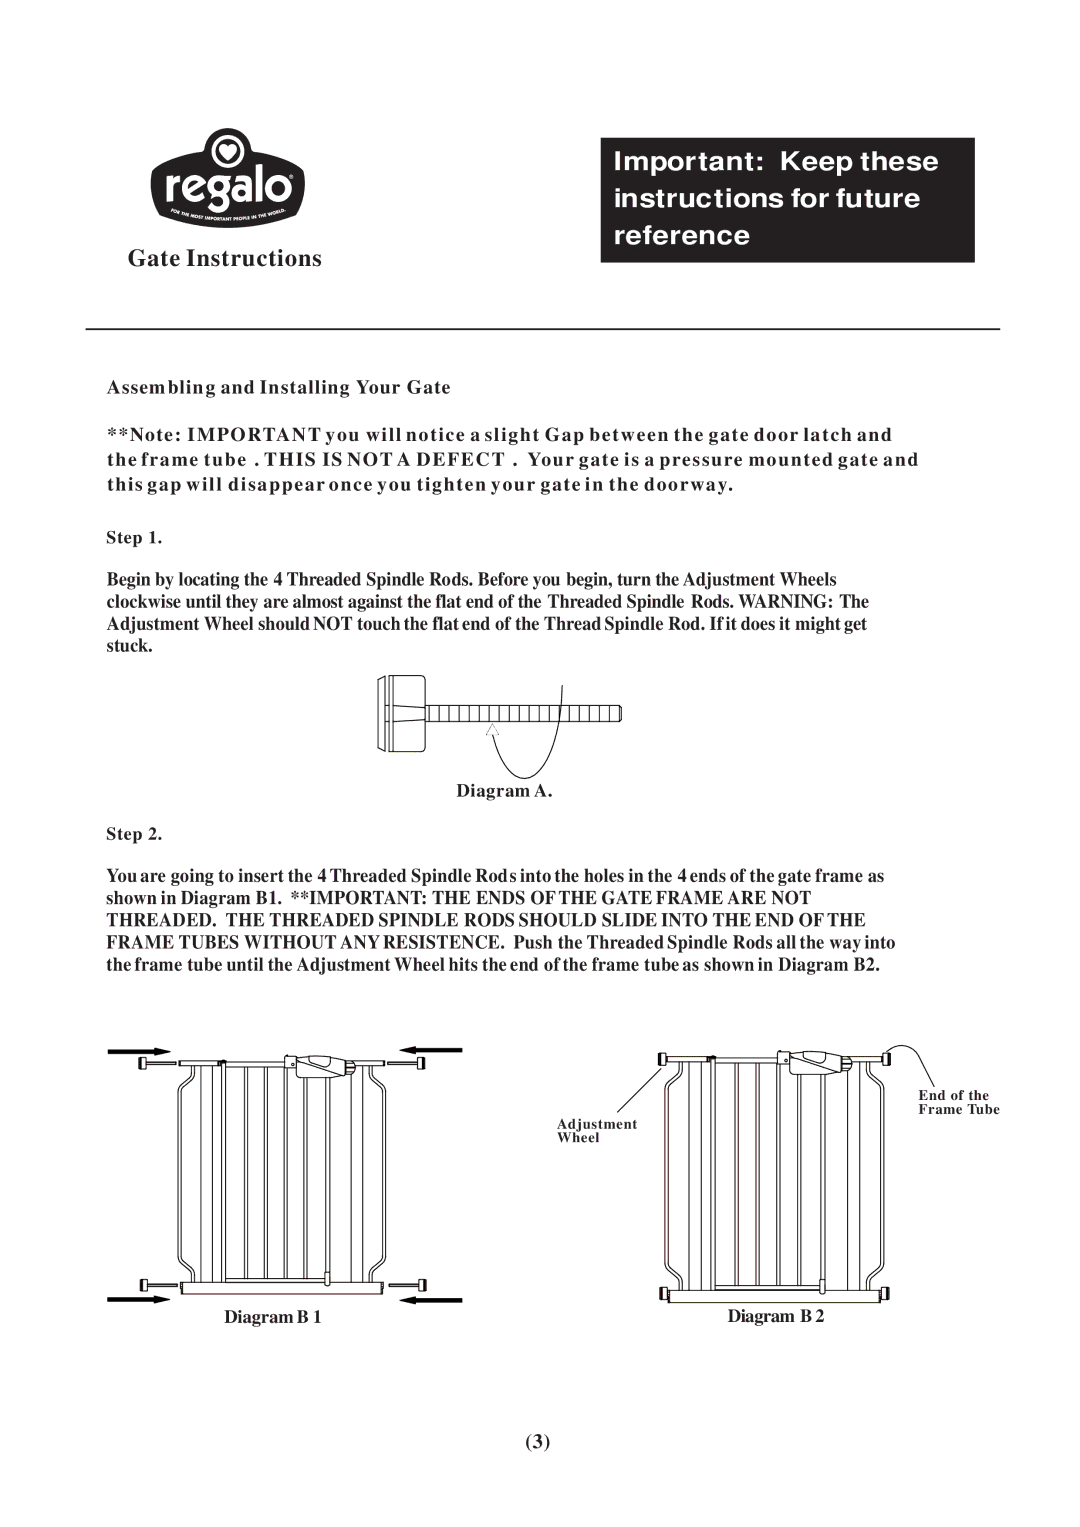
Begin by locating the 4 Threaded Spindle Rods. Before you begin, turn the Adjustment Wheels clockwise until they are almost against the flat end of the Threaded Spindle Rods. WARNING: The Adjustment Wheel should NOT touch the flat end of the Thread Spindle Rod. If it does it might get stuck.
Diagram A.
Step 2.
You are going to insert the 4 Threaded Spindle Rods into the holes in the 4 ends of the gate frame as shown in Diagram B1. **IMPORTANT: THE ENDS OF THE GATE FRAME ARE NOT THREADED. THE THREADED SPINDLE RODS SHOULD SLIDE INTO THE END OF THE FRAME TUBES WITHOUT ANY RESISTENCE. Push the Threaded Spindle Rods all the way into the frame tube until the Adjustment Wheel hits the end of the frame tube as shown in Diagram B2.
Diagram B 1 |
Adjustment Wheel
Diagram B 2 |
End of the Frame Tube
(3)