ASSEMBLY
![]() WARNING:
WARNING:
The tool should never be connected to a power sup- ply when you are assembling parts, making adjust- ments, cleaning, performing maintenance, or when the tool is not in use. Disconnecting the tool will pre- vent accidental starting that could cause serious in- jury.
To Install Bits
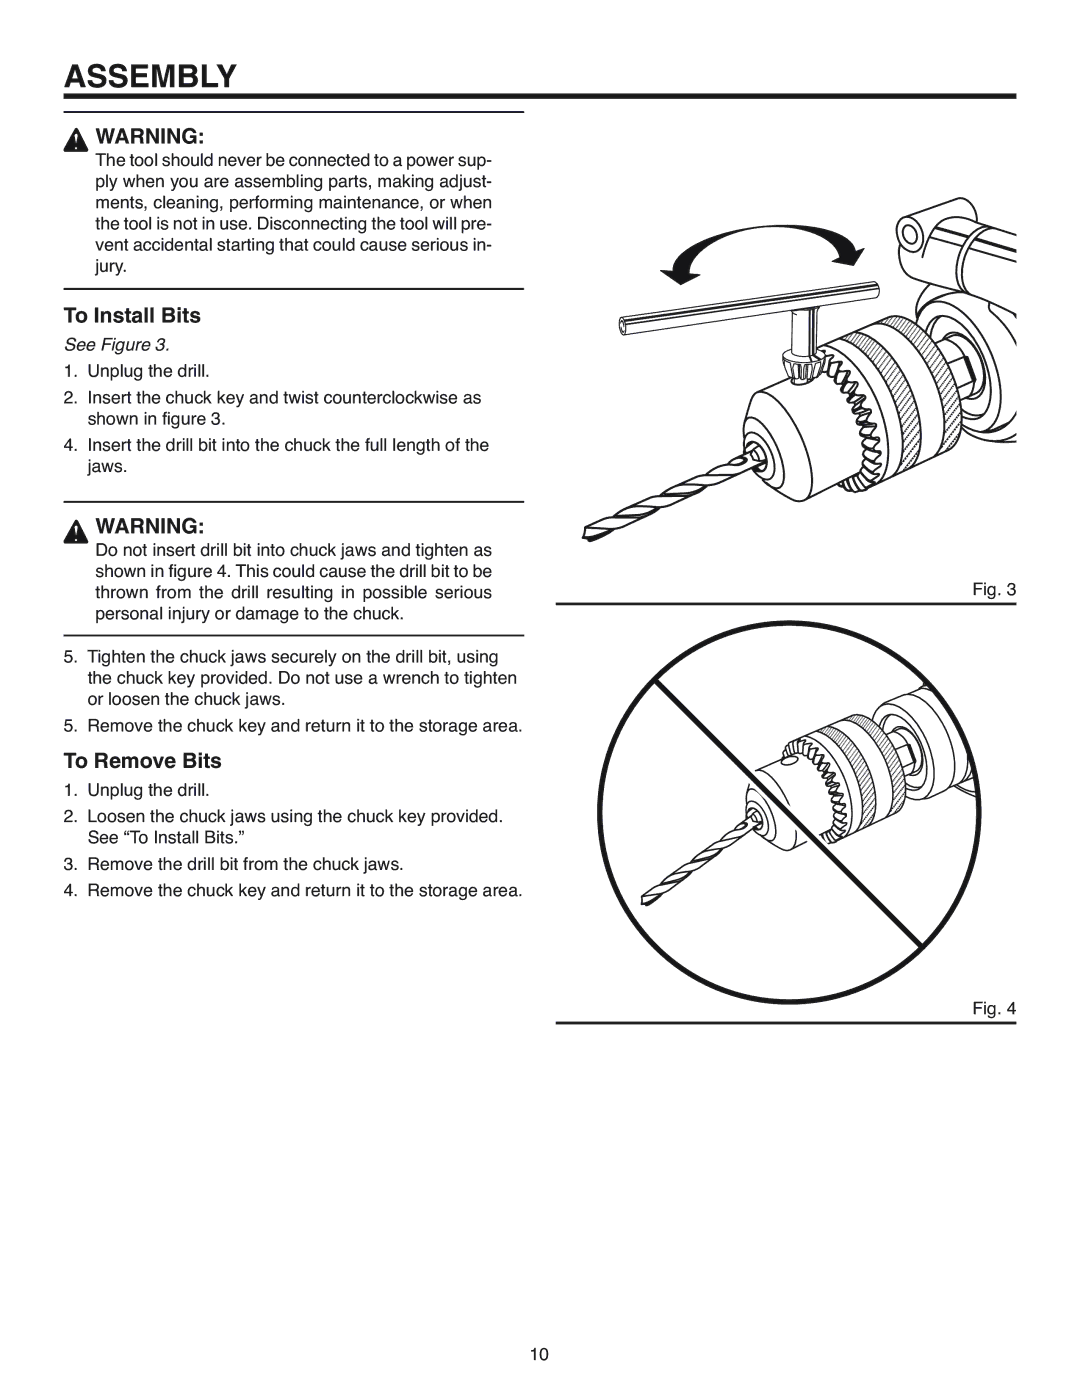
See Figure 3.
1.Unplug the drill.
2.Insert the chuck key and twist counterclockwise as shown in figure 3.
4.Insert the drill bit into the chuck the full length of the jaws.
WARNING:
Do not insert drill bit into chuck jaws and tighten as shown in figure 4. This could cause the drill bit to be thrown from the drill resulting in possible serious personal injury or damage to the chuck.
5.Tighten the chuck jaws securely on the drill bit, using the chuck key provided. Do not use a wrench to tighten or loosen the chuck jaws.
5. Remove the chuck key and return it to the storage area.
To Remove Bits
1.Unplug the drill.
2.Loosen the chuck jaws using the chuck key provided. See “To Install Bits.”
3.Remove the drill bit from the chuck jaws.
4.Remove the chuck key and return it to the storage area.
Fig. 3
Fig. 4
10