Installing the Wave Expansion Board

Up to two optional Wave Expansion Boards (SRX Series) can be installed in the VR-760.

Wave Expansion Boards store Wave data, Patches, and Rhythm Sets, and by equipping the VR-760 with these boards, you can greatly expand your sound palette.

Cautions When Installing an Wave Expansion Board

To avoid the risk of damage to internal components that can be caused by static electricity, please carefully observe the following whenever you handle the board.

Before you touch the board, always first grasp a metal object (such as a water pipe), so you are sure that any static electricity you might have been carrying has been discharged.

When handling the board, grasp it only by its edges. Avoid touching any of the electronic components or connectors.

Save the bag in which the board was originally shipped, and put the board back into it whenever you need to store or transport it.

Use a Philips screwdriver that is suitable for the size of the screw (a number 2 screwdriver). If an unsuitable screwdriver is used, the head of the screw may be stripped.

To remove a screw, rotate the screwdriver counter- clockwise. To tighten a screw, rotate the screwdriver

clockwise.

fig.08-01(Screw)

loosentighten

Be careful that the screws you remove do not drop into the interior of the VR-760.

Do not leave the rear panel cover removed. After installation of the Wave Expansion Boards is complete, be sure to replace the cover.

Do not touch any of the printed circuit pathways or connection terminals.

Be careful not to cut your hand on the edge of the installation bay.

Never use excessive force when installing a circuit board. If it doesn’t fit properly on the first attempt, remove the board and try again.

When circuit board installation is complete, double-check your work.

Always turn the unit off and unplug the power cord before attempting installation of the circuit board.

Install only the specified circuit board(s) (SRX Series). Remove only the specified screws.

Install the Wave Expansion Boards after removing the bottom panel cover.

There are two slots (A and B) into which a board can be installed. Specify which slot’s board is to be used by pressing [SRX EXPANSION] and [-][+] buttons on the front panel when using waves, tones, or Rhythm Sets from the wave expansion boards.

Installing SRX Series Boards

1.Before installing the Wave Expansion Board, turn off the power of the VR-760 and all connected devices, and disconnect all cables, including the Power cable, from the VR-760.

2.Turn the VR-760 over, remove the four screws indicated in the following diagram, and remove

the cover.

fig.08-02(CoverOfBottom)

Screws to be removed

When turning the unit upside-down, get a bunch of newspapers or magazines, and place them under the four corners or at both ends to prevent damage to the buttons and controls. Also, you should try to orient the

unit so no buttons or controls get damaged.

fig.08-03

When turning the unit upside-down, handle with care to avoid dropping it, or allowing it to fall or tip over.

Wave Expansion Boards

83

Page 83
Image 83
Roland VR-760 owner manual Installing the Wave Expansion Board, Installing SRX Series Boards

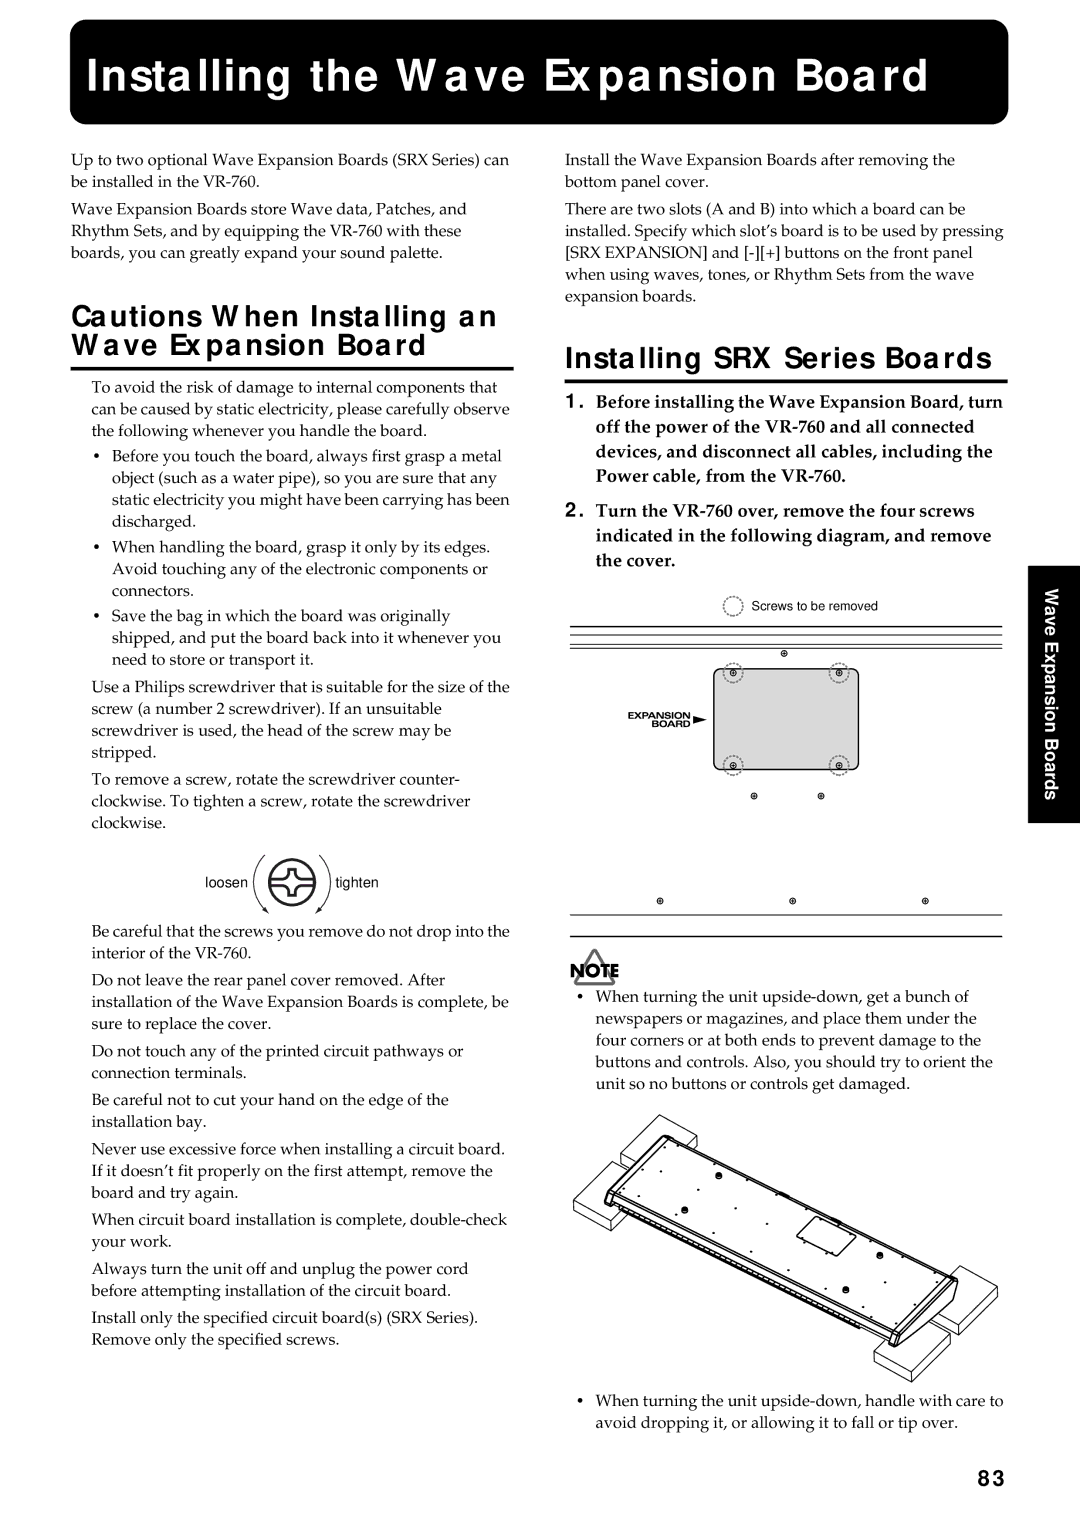
VR-760 specifications

The Roland VR-760 is a versatile stage keyboard designed to cater to the requirements of both live performers and studio musicians. With a blend of organ sounds, electric pianos, and synthesizer textures, the VR-760 stands out for its exceptional sound quality and user-friendly interface.

One of the standout features of the VR-760 is its extensive collection of sounds optimized for live performance. It comes equipped with a sophisticated organ section that offers a range of vintage and modern tones. Musicians can achieve classic rotary speaker effects, which are essential for creating an authentic organ sound. The keybed is designed for expressiveness, ensuring that all nuances are captured, making it ideal for dynamic playing.

Additionally, the VR-760 features high-quality electric pianos that replicate the sounds of legendary models. With an expansive library of piano sounds, the keyboard allows for seamless transitions between soft ballads and powerful driving riffs, catering to various genres. The layered sound functionality enables users to combine multiple sounds for a richer audio experience.

The synthesizer section of the VR-760 includes extensive waveform options and modulation capabilities. Users can explore a wide range of synthesis styles, allowing them to manipulate sounds in real-time during performances. The advanced sound engine ensures that the sounds generated remain rich and full, even when heavily modulated.

Another key highlight of the VR-760 is its built-in effects processing, which includes reverb, delay, and chorus settings. These effects can be easily applied to enhance the overall sound output, providing a higher level of polish without the need for external equipment. The intuitive interface allows performers to adjust these effects quickly, ensuring seamless transitions between different sounds and styles during a live show.

Portability is also a major benefit of the Roland VR-760. Weighing in at a manageable size, it is suitable for gigging musicians who travel frequently. The robust construction ensures that it can withstand the rigors of the road while delivering reliable performance night after night.

Lastly, the VR-760 offers seamless connectivity options, including MIDI and USB ports. This makes it easy to integrate with other devices, such as computers or external sound modules, enhancing its versatility in both performance and recording setups.

In summary, the Roland VR-760 combines powerful sounds, user-friendly controls, and portable design, making it a standout choice for musicians seeking a high-quality stage keyboard that does not compromise on performance.