Loading the Camera
[Return to Manual index] [Previous page] [Next page]
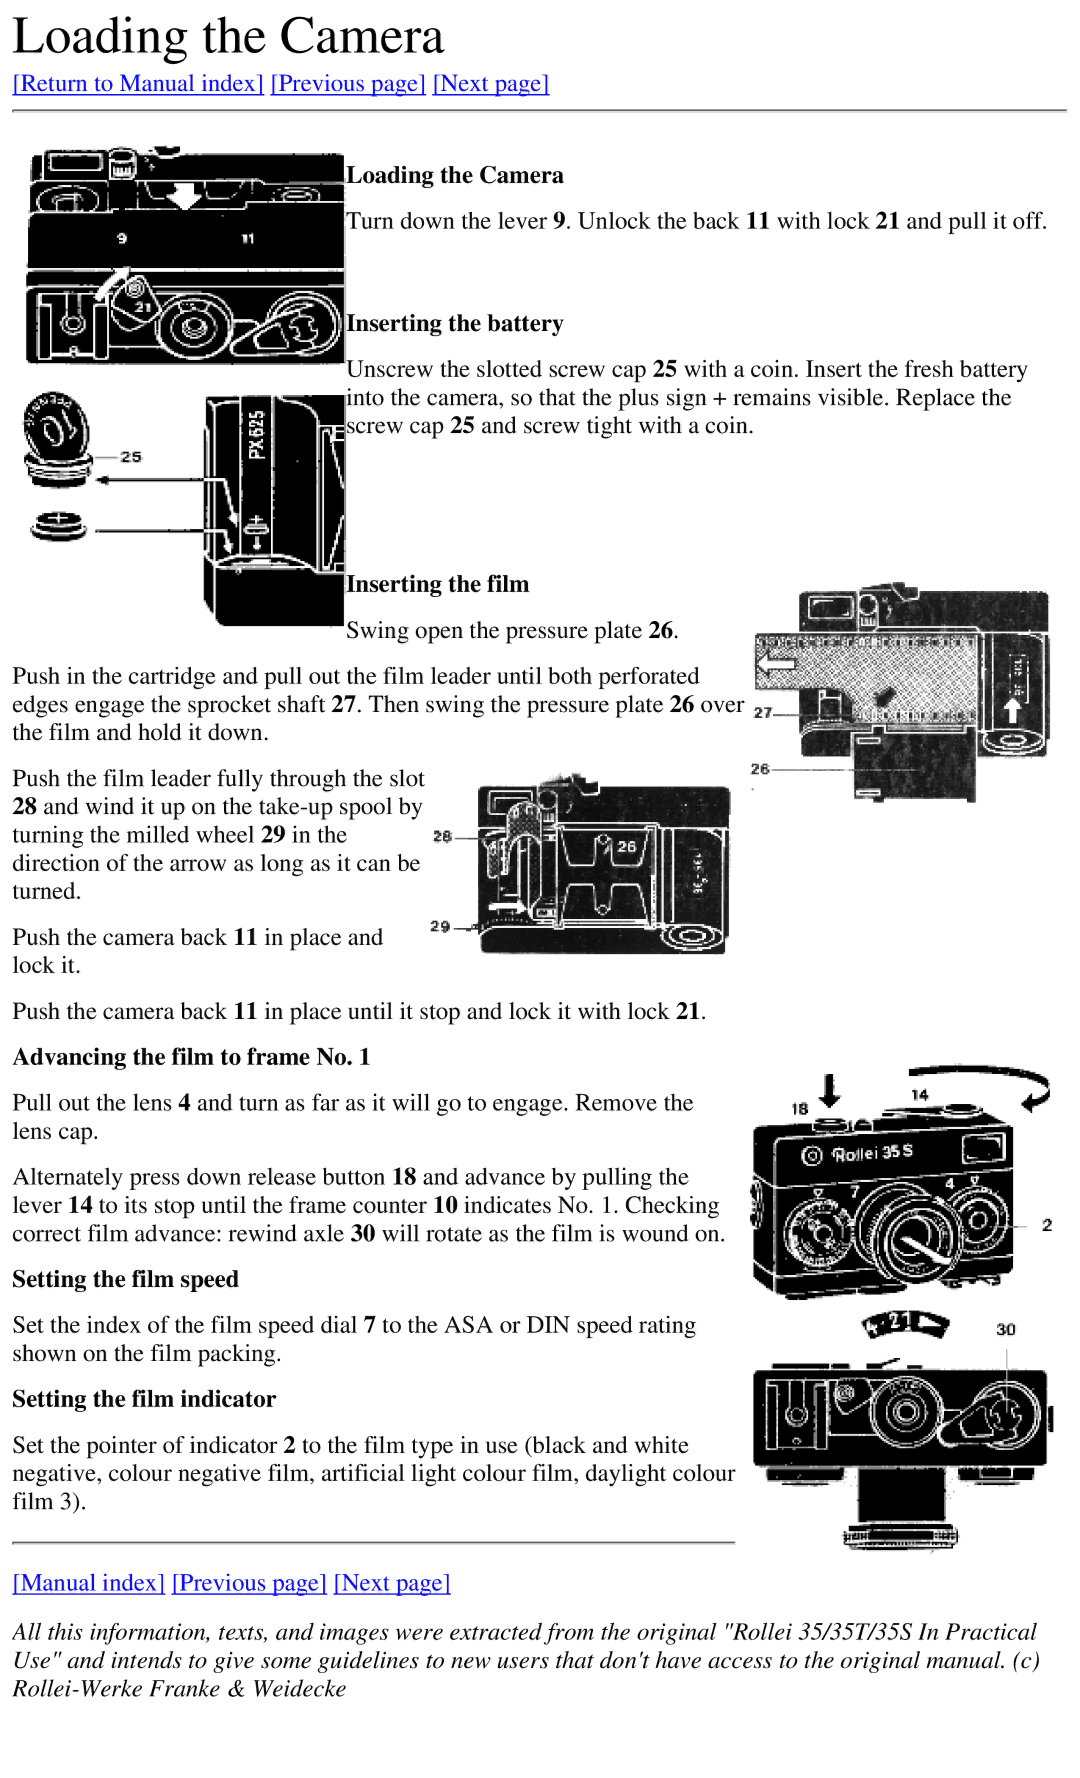
Loading the Camera
Turn down the lever 9. Unlock the back 11 with lock 21 and pull it off.
Inserting the battery
Unscrew the slotted screw cap 25 with a coin. Insert the fresh battery into the camera, so that the plus sign + remains visible. Replace the screw cap 25 and screw tight with a coin.
Inserting the film
Swing open the pressure plate 26.
Push in the cartridge and pull out the film leader until both perforated edges engage the sprocket shaft 27. Then swing the pressure plate 26 over the film and hold it down.
Push the film leader fully through the slot 28 and wind it up on the
Push the camera back 11 in place and lock it.
Push the camera back 11 in place until it stop and lock it with lock 21.
Advancing the film to frame No. 1
Pull out the lens 4 and turn as far as it will go to engage. Remove the lens cap.
Alternately press down release button 18 and advance by pulling the lever 14 to its stop until the frame counter 10 indicates No. 1. Checking correct film advance: rewind axle 30 will rotate as the film is wound on.
Setting the film speed
Set the index of the film speed dial 7 to the ASA or DIN speed rating shown on the film packing.
Setting the film indicator
Set the pointer of indicator 2 to the film type in use (black and white negative, colour negative film, artificial light colour film, daylight colour film 3).
[Manual index] [Previous page] [Next page]
All this information, texts, and images were extracted from the original "Rollei 35/35T/35S In Practical Use" and intends to give some guidelines to new users that don't have access to the original manual. (c)