Rose electronic CATx manual Quick Start guide, Quick Start Guide, Quick Installation Diagram

Models: CATx

1 20
Download 20 pages 51.96 Kb
Page 5
Image 5
QUICK START GUIDE

QUICK START GUIDE

Quick Start guide

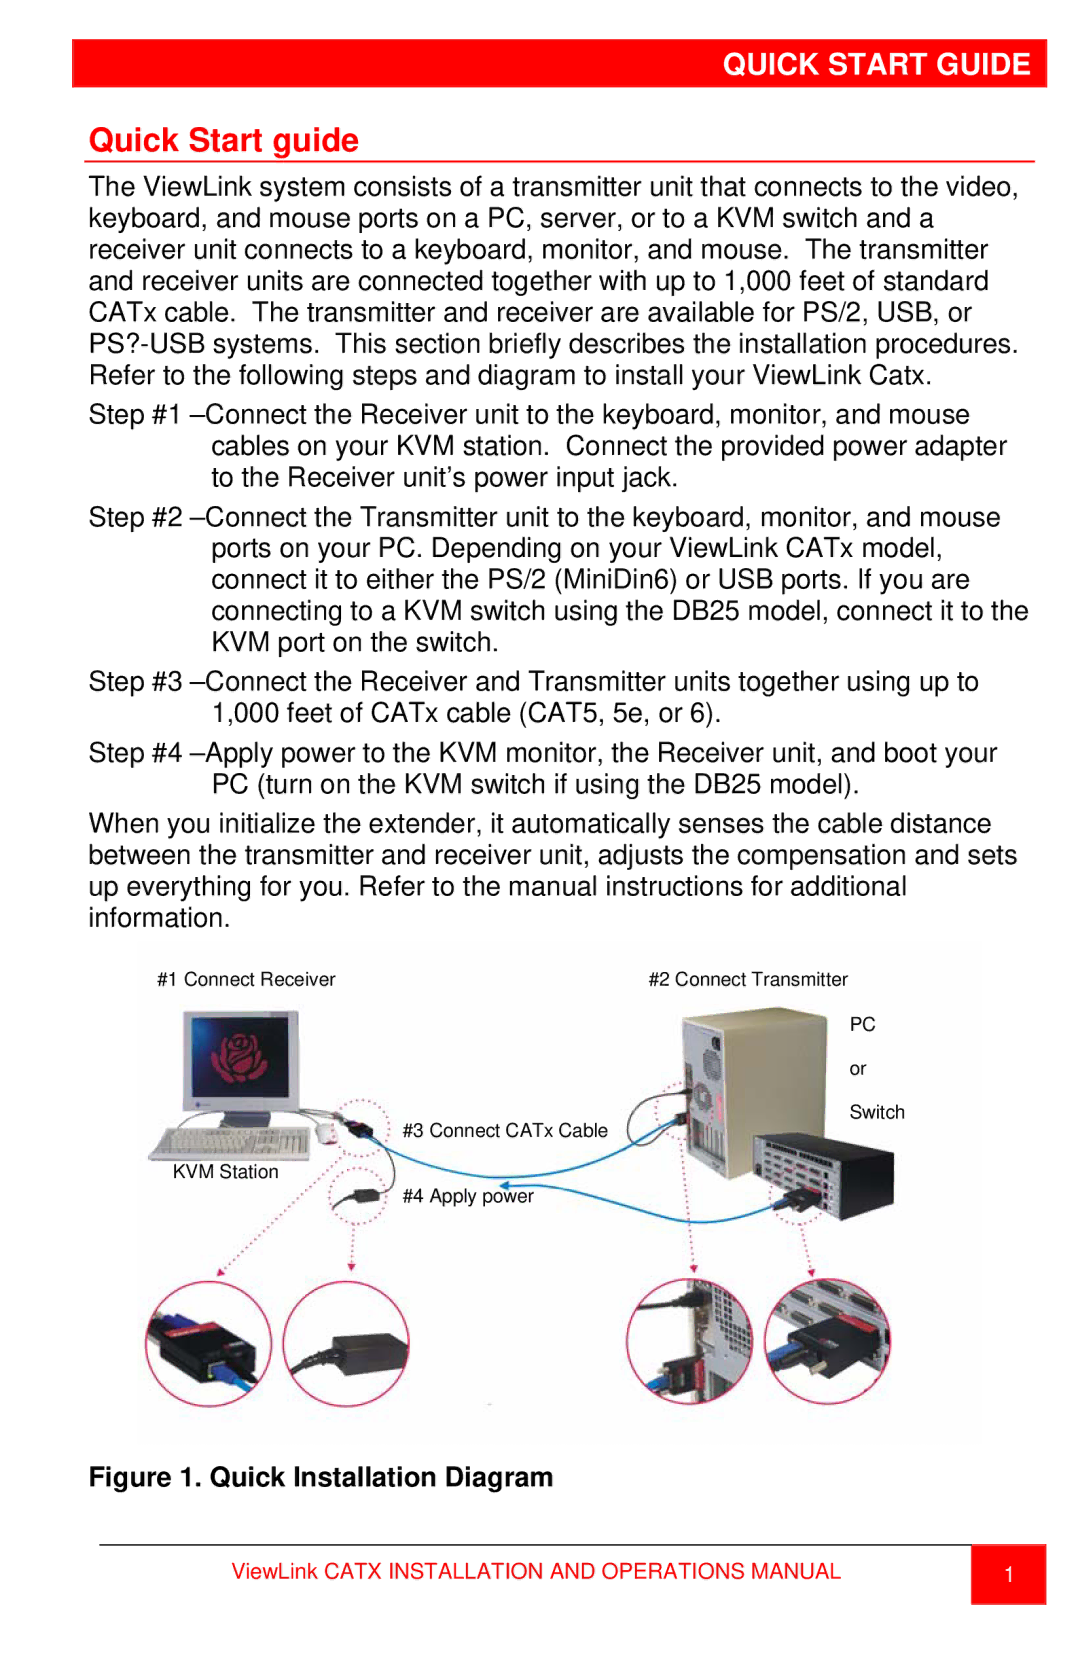
The ViewLink system consists of a transmitter unit that connects to the video, keyboard, and mouse ports on a PC, server, or to a KVM switch and a receiver unit connects to a keyboard, monitor, and mouse. The transmitter and receiver units are connected together with up to 1,000 feet of standard CATx cable. The transmitter and receiver are available for PS/2, USB, or PS?-USB systems. This section briefly describes the installation procedures. Refer to the following steps and diagram to install your ViewLink Catx.

Step #1 –Connect the Receiver unit to the keyboard, monitor, and mouse cables on your KVM station. Connect the provided power adapter to the Receiver unit’s power input jack.

Step #2 –Connect the Transmitter unit to the keyboard, monitor, and mouse ports on your PC. Depending on your ViewLink CATx model, connect it to either the PS/2 (MiniDin6) or USB ports. If you are connecting to a KVM switch using the DB25 model, connect it to the KVM port on the switch.

Step #3 –Connect the Receiver and Transmitter units together using up to 1,000 feet of CATx cable (CAT5, 5e, or 6).

Step #4 –Apply power to the KVM monitor, the Receiver unit, and boot your PC (turn on the KVM switch if using the DB25 model).

When you initialize the extender, it automatically senses the cable distance between the transmitter and receiver unit, adjusts the compensation and sets up everything for you. Refer to the manual instructions for additional information.

#1 Connect Receiver

#2 Connect Transmitter

PC

or

Switch

#3 Connect CATx Cable

KVM Station

#4 Apply power

Figure 1. Quick Installation Diagram

ViewLink CATX INSTALLATION AND OPERATIONS MANUAL

1


Page 5
Image 5
Rose electronic CATx manual Quick Start guide, Quick Start Guide, Quick Installation Diagram