| PC / SUN / Serial/Audio | MINI |
| ||||
|
|
|
|
|
|
|
|
|
|
|
| TWISTED PAIR |
|
|
|
POWER | MOUSE KBD | VIDEO |
| LINK |
|
|
|
| SERIAL | IN OUT |
|
|
|
|
|
| PORT |
|
|
|
|
|
|
|
| MIC |
|
|
|
|
|
|
| Jumper |
|
|
|
|
|
| DAUGHTERBOARD |
|
|
|
|
|
|
| SW1 |
|
|
|
|
|
|
|
| JP3 | JP4 | JP5 |
|
|
|
|
|
|
|
| DIP SWITCH 1 | ||
DAUGHTER BOARD ON SERIAL/AUDIO MODELS ONLY |
|
|
| ||||
Cable length | Jumper Setting | Cable |
| Switch 1 | |||
length |
| Setting | |||||
|
|
|
|
|
| ||
|
|
|
|
|
|
| |
JP3 | JP4 | JP5 |
| OFF | |||
|
|
|
|
| |||
|
|
|
|
|
|
| |
|
|
|
| ON | |||
|
| JP3 | JP4 | JP5 |
| ||
|
|
|
|
| |||
|
|
| N/A |
| N/A | ||
|
| JP3 | JP4 | JP5 |
| ||
|
|
|
|
| |||
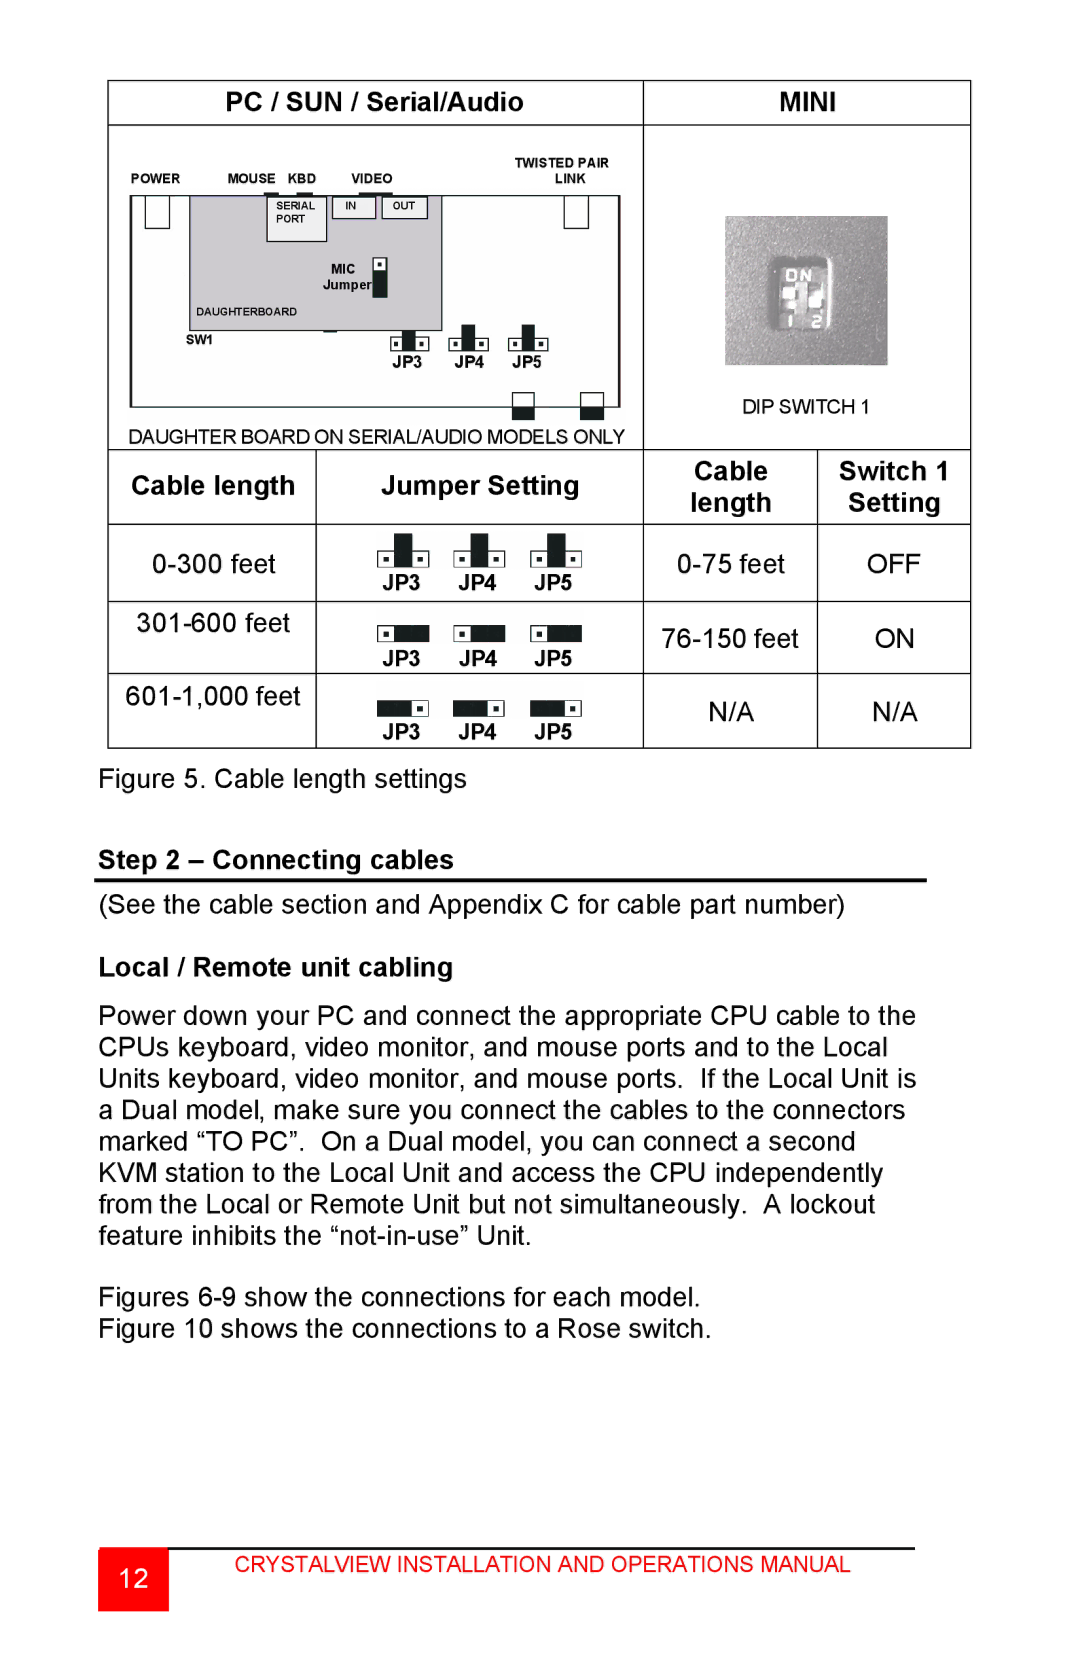
Figure 5. Cable length settings
Step 2 – Connecting cables
(See the cable section and Appendix C for cable part number)
Local / Remote unit cabling
Power down your PC and connect the appropriate CPU cable to the CPUs keyboard, video monitor, and mouse ports and to the Local Units keyboard, video monitor, and mouse ports. If the Local Unit is a Dual model, make sure you connect the cables to the connectors marked “TO PC”. On a Dual model, you can connect a second KVM station to the Local Unit and access the CPU independently from the Local or Remote Unit but not simultaneously. A lockout feature inhibits the
Figures 6-9 show the connections for each model.
Figure 10 shows the connections to a Rose switch.
12
CRYSTALVIEW INSTALLATION AND OPERATIONS MANUAL
