12
Details of the switch settings are provided with the instructions for each configuration option, but here is a summary:
SW1: Used for invisible layer command programming for the CD device.
SW2: Used for invisible layer command programming for the TUN device.
SW3: Used for invisible layer command programming for the AV device.
SW4: Used for invisible layer command programming for the MP3 device.
SW5: In the ON position, enables the ![]() but ton as an additional device key.
but ton as an additional device key.
SW6: In the ON position, enables the ![]()
![]()
![]() button as an additional device key.
button as an additional device key.
SW7: Enables the learning mode in the ON position.
SW8: Enables the SMART programming mode in the ON position.
SW9: Enables (ON) or disables (OFF) the IR sensor on the front of the keypad.
SW10: Enables (ON) or disables (OFF) the backlighting feature.
Disabling Backlighting 
The
vice as well as the ![]()
![]() button when the sound is muted.
button when the sound is muted.
SW10 configures the backlighting mode:
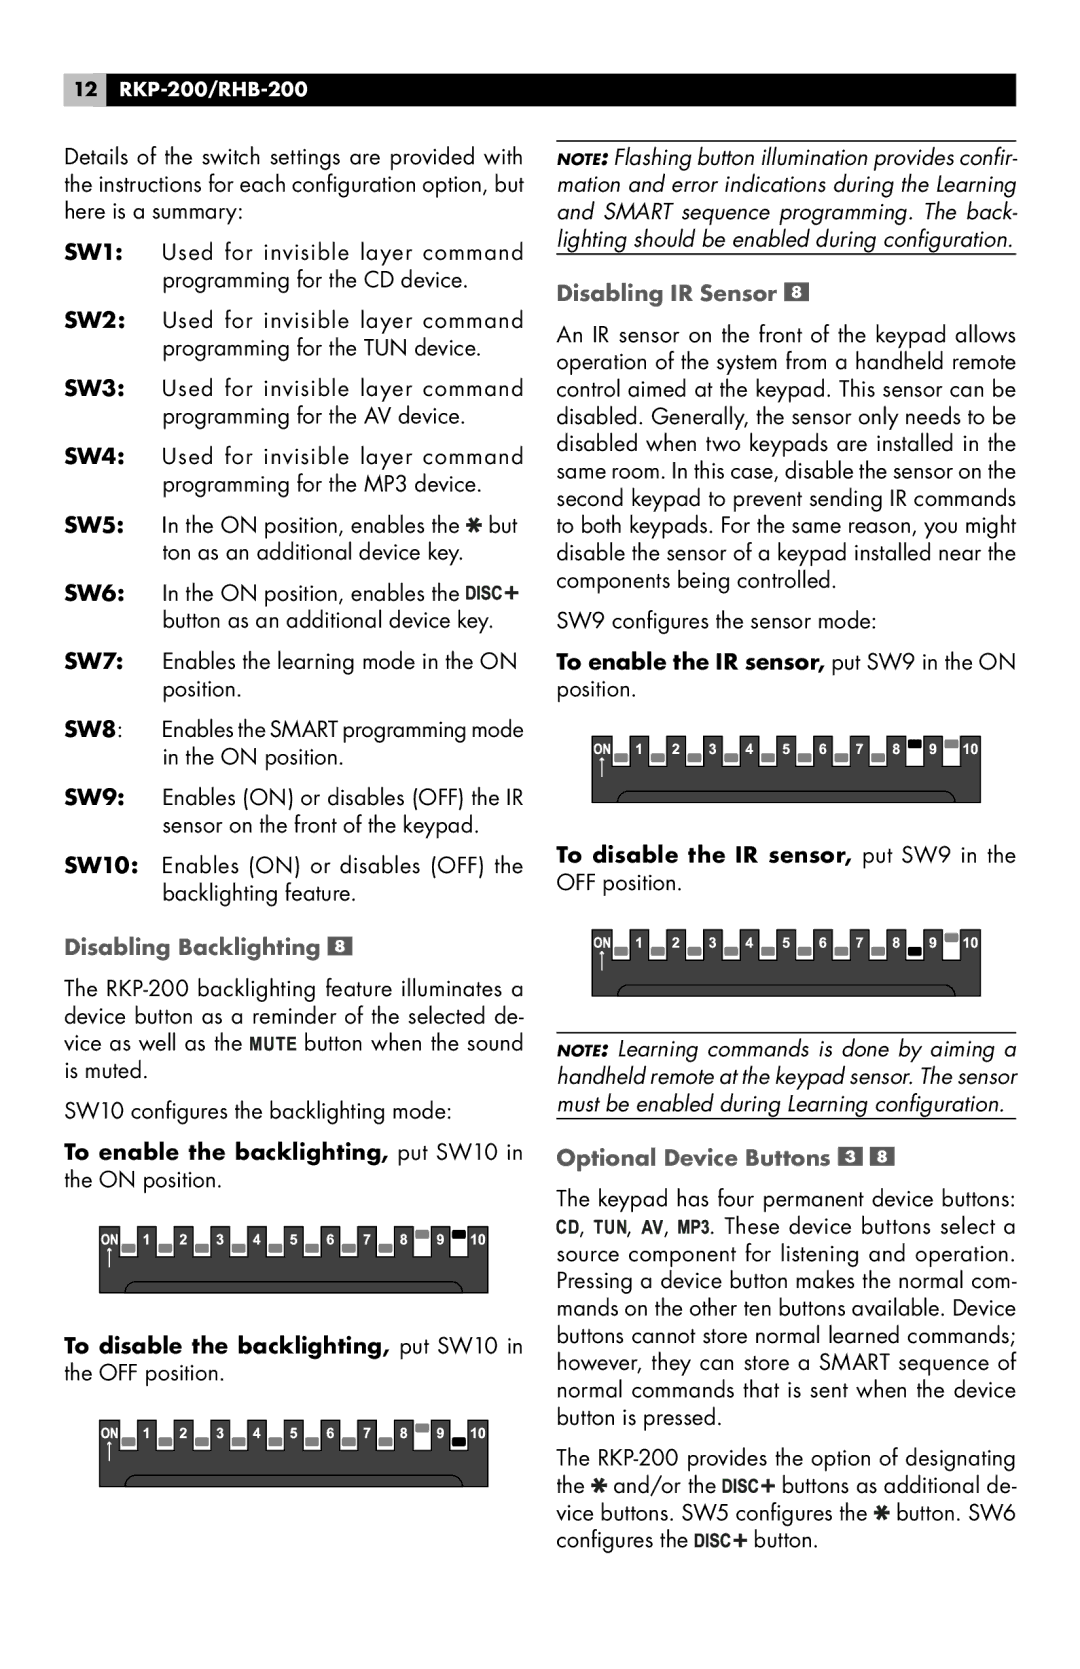
To enable the backlighting, put SW10 in the ON position.
To disable the backlighting, put SW10 in the OFF position.
NOTE: Flashing button illumination provides confir- mation and error indications during the Learning and SMART sequence programming. The back- lighting should be enabled during configuration.
Disabling IR Sensor 
An IR sensor on the front of the keypad allows operation of the system from a handheld remote control aimed at the keypad. This sensor can be disabled. Generally, the sensor only needs to be disabled when two keypads are installed in the same room. In this case, disable the sensor on the second keypad to prevent sending IR commands to both keypads. For the same reason, you might disable the sensor of a keypad installed near the components being controlled.
SW9 configures the sensor mode:
To enable the IR sensor, put SW9 in the ON position.
To disable the IR sensor, put SW9 in the OFF position.
NOTE: Learning commands is done by aiming a handheld remote at the keypad sensor. The sensor must be enabled during Learning configuration.
Optional Device Buttons 

The keypad has four permanent device buttons: ![]() ,
, ![]()
![]() ,
, ![]() ,
, ![]()
![]() . These device buttons select a source component for listening and operation. Pressing a device button makes the normal com- mands on the other ten buttons available. Device buttons cannot store normal learned commands; however, they can store a SMART sequence of normal commands that is sent when the device button is pressed.
. These device buttons select a source component for listening and operation. Pressing a device button makes the normal com- mands on the other ten buttons available. Device buttons cannot store normal learned commands; however, they can store a SMART sequence of normal commands that is sent when the device button is pressed.
The
the ![]() and/or the
and/or the ![]()
![]()
![]() buttons as additional de- vice buttons. SW5 configures the
buttons as additional de- vice buttons. SW5 configures the ![]() button. SW6
button. SW6
configures the ![]()
![]()
![]() button.
button.