16
Programming a SMART Sequence with
Invisible Layer Commands 


To include invisible layer commands in a SMART sequence, substitute the following steps for Step
4 in the preceding instructions:
•Put SW1, SW2, SW3, or SW4 in the ON posi- tion to select the invisible layer where the de- sired command is stored:
•Press the invisible layer command button.
•Return the SW1 – SW4 switch to the OFF po- sition to exit invisible layer mode.
Cloning 

Once you have completed the learning and SMART sequence programming for one keypad, it is easy to transfer that programming to all of the keypads connected to the
To clone a keypad:
1.With the
2.Make sure that all keypads to be programmed are connected properly as shown in Figure 5. You can program two keypads in a single zone as shown by light shaded keypads in the illus- tration.
NOTE: Keypads in the remote zones must not be in Learning or SMART configuration mode.
3.Power on the ![]()
![]() LED on the keypad being cloned flashes once.
LED on the keypad being cloned flashes once.
4.Press the large CLONE button on the front panel of the
pad in ZONE 1. While this keypad is receiv- ing cloned data, the ZONE 1 LED on the front of the
5.Step 5 is then repeated automatically for Zone 2, Zone 3, and Zone 4 as necessary. The entire cloning process can take up to 10 minutes.
6.If an error occurs, all four LEDs on the
Resetting keypads 
Should you want to reset a keypad to its original factory programming, use a small pointed ob- ject to press the reset button on the side of the keypad. This erases all learned commands and SMART sequences.
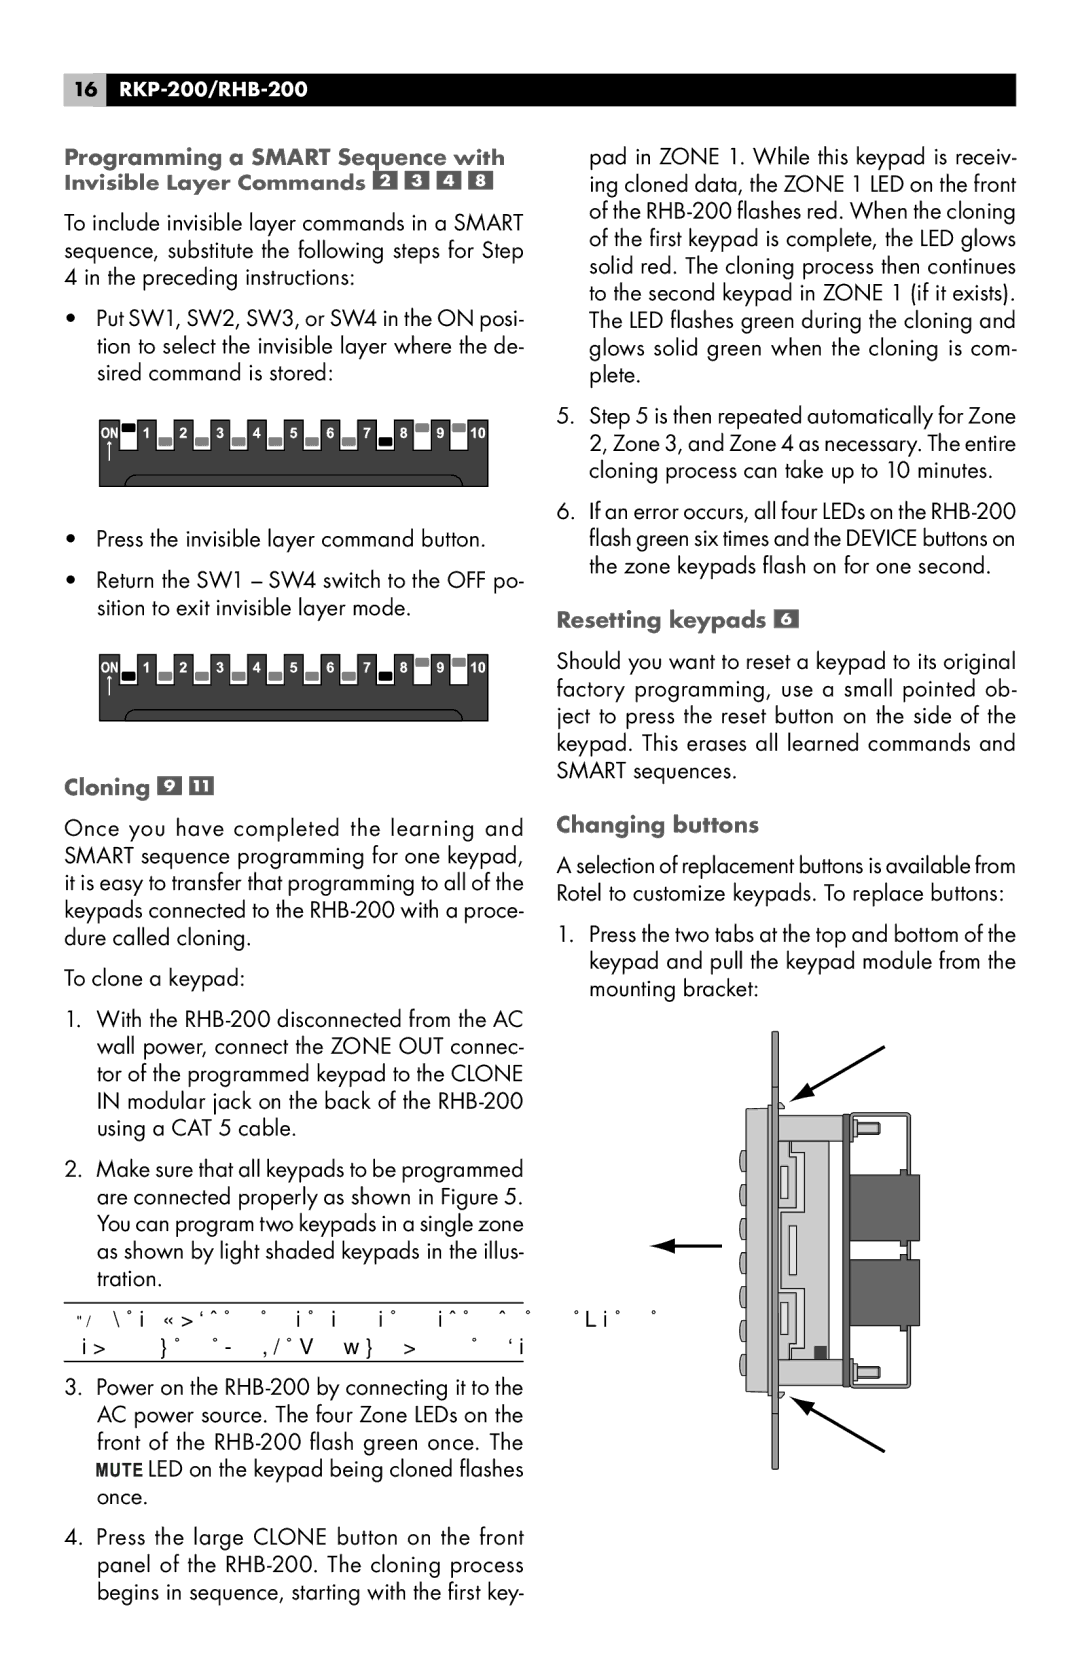
Changing buttons
A selection of replacement buttons is available from Rotel to customize keypads. To replace buttons:
1.Press the two tabs at the top and bottom of the keypad and pull the keypad module from the mounting bracket: