Runco Vivix Pixel for Pixel, PFP-7, PFP-11 manual Installation Menu

Models: Vivix Pixel for Pixel PFP-7 PFP-11

1 34
Download 34 pages 34.65 Kb
Page 18
Image 18

SHARPNESS adjusts the amount of high-frequency detail in the image. This can be adjusted to the preference of the user. Keep in mind that when SHARPNESS is decreased, fine details in the image will become 'soft'; when it is increased, fine details will become sharper but will also make the picture appear 'noisy' if adjusted too high.

LUMA ENHANCE acts as an edge enhancement, especially around black to white transitions in the image. Essentially, this has the same characteristics as sharpness but affects the edges of objects far more that the rest of the image.

FREQUENCIES HIGH/LOW affect the overall range of the LUMA ENHANCE feature. For example, if using a lower-quality video source such as a VCR, the FREQUENCIES should be set to LOW. For a good quality source such as a DVD player, set FREQUENCIES to HIGH. To set FREQUENCIES, press ENTER while LUMA ENHANCE is on-screen.

CHROMA ENHANCE acts as an edge enhancement, especially around color transitions in the image. Essentially, this has the same characteristics as sharpness but affects the edges of objects far more that the rest of the image.

FREQUENCIES HIGH/LOW affect the overall range of the CHROMA ENHANCE feature. For example, if using a lower-quality video source such as a VCR, the FREQUENCIES should be set to LOW. For a good quality source such as a DVD player, set FREQUENCIES to HIGH. To set FREQUENCIES, press ENTER while CHROMA ENHANCE is on-screen.

Installation Menu

The Installation menu is where you can adjust the scan rate and sync type, as well as set the type of screen (4:3 or 16:9), shift the image or set blanking, and even set the level of the 'sidebars'.

When the PFP-7/PFP-11is turned on for the first time, the INSTALLATION item will not appear in the main menu. To enable the INSTALLATION menu, there are two options:

·With the processor ON and no menus on-screen, simultaneously press the ENTER, UP and LEFT buttons (you don't need to hold them down). Release the three buttons and press MENU, ensure INSTALLATION is now on the bottom of the main menu.

·With the remote control, press button 6 (with no menus on-screen).

After pressing '6', press MENU and ensure INSTALLATION is now on the bottom of the main menu.

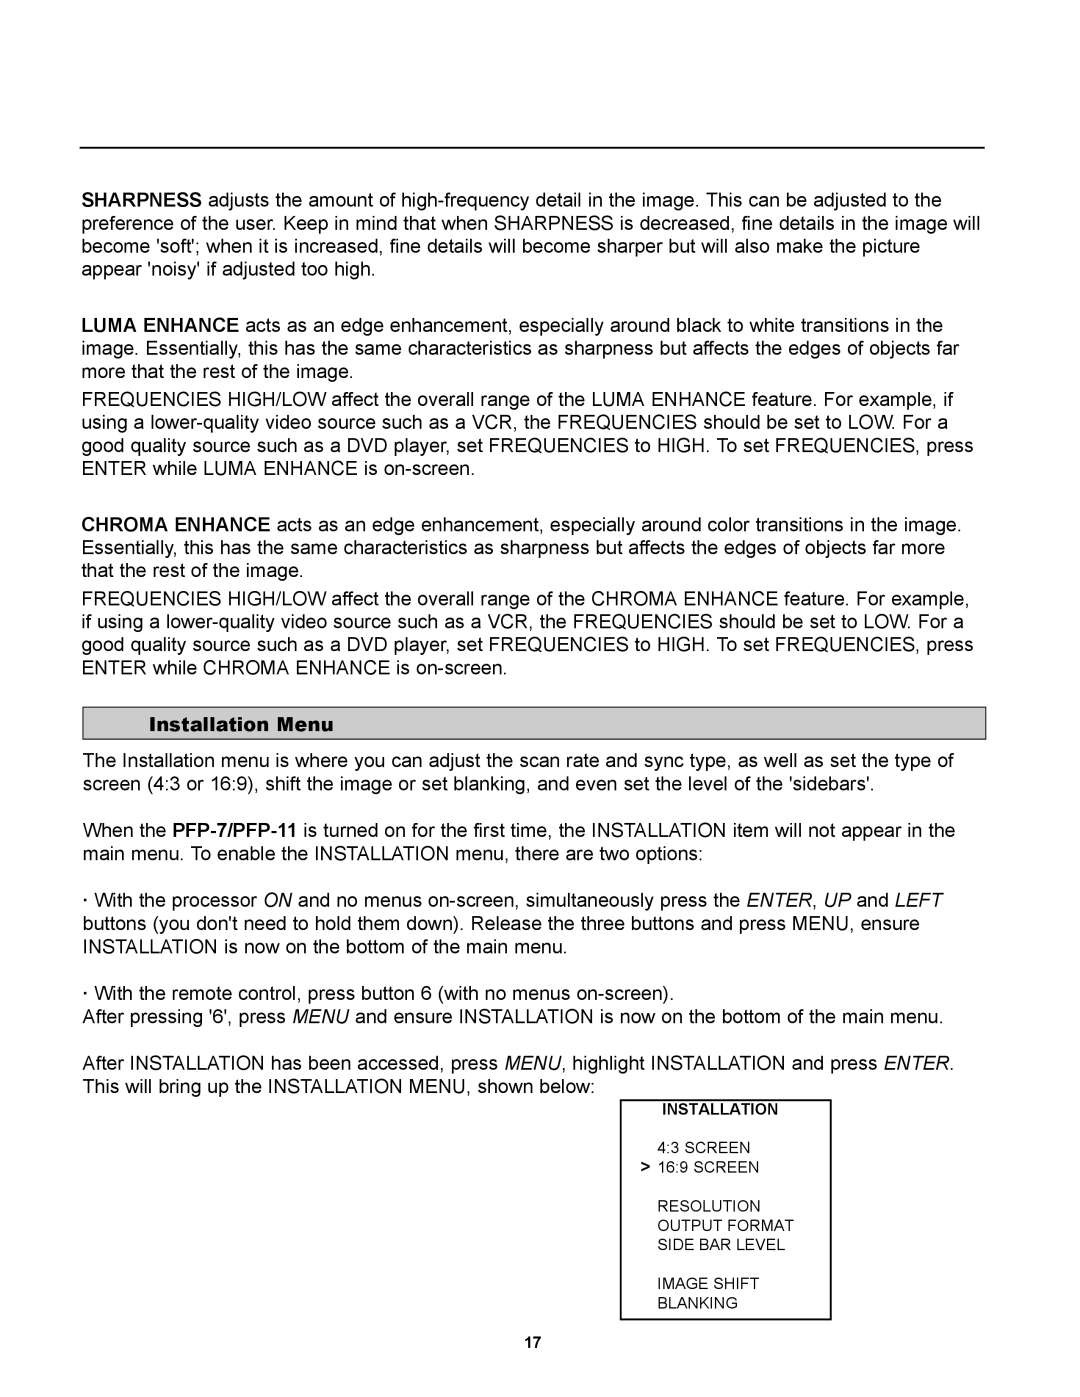
After INSTALLATION has been accessed, press MENU, highlight INSTALLATION and press ENTER. This will bring up the INSTALLATION MENU, shown below:

INSTALLATION

4:3 SCREEN > 16:9 SCREEN

RESOLUTION

OUTPUT FORMAT

SIDE BAR LEVEL

IMAGE SHIFT

BLANKING

17

Page 18
Image 18
Runco Vivix Pixel for Pixel, PFP-7, PFP-11 manual Installation Menu