ASSEMBLY INSTRUCTIONS
INSTALLING THE HARNESS
WARNING: To avoid serious personal injury, never attempt to start the unit when standing and the unit clipped to the shoulder strap.
Always follow the starting procedures as described in the Operation section.
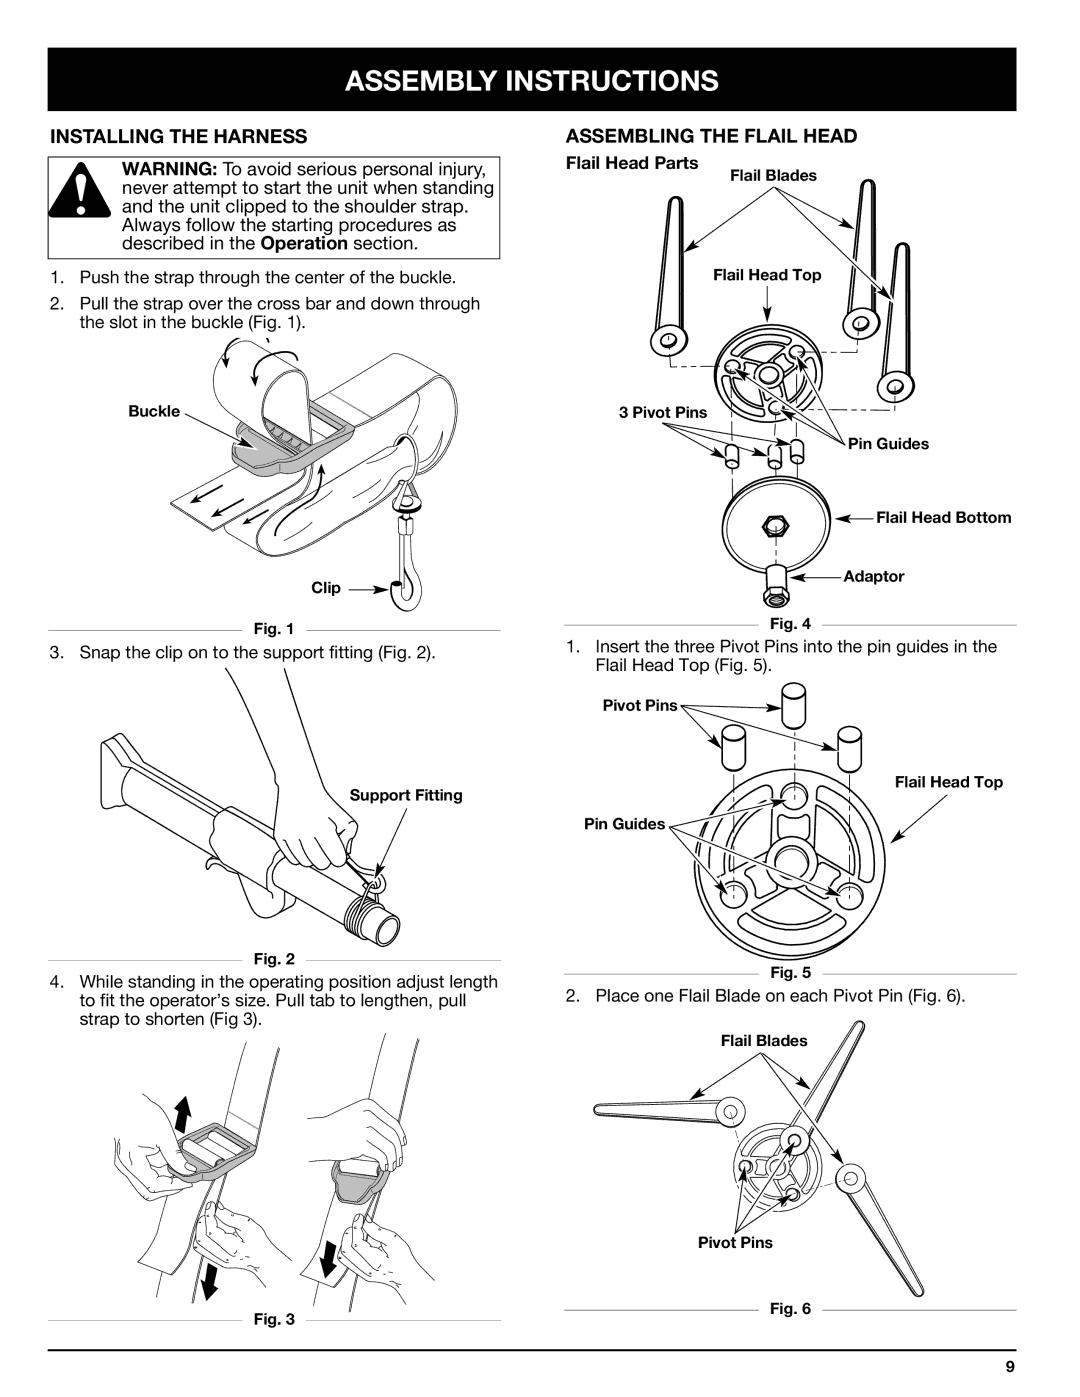
1.Push the strap through the center of the buckle.
2.Pull the strap over the cross bar and down through the slot in the buckle (Fig. 1).
Buckle
Clip
Fig. 1
3. Snap the clip on to the support fitting (Fig. 2).
Support Fitting
Fig. 2
4.While standing in the operating position adjust length to fit the operator’s size. Pull tab to lengthen, pull strap to shorten (Fig 3).
ASSEMBLING THE FLAIL HEAD
Flail Head Parts
Flail Blades
Flail Head Top
3 Pivot Pins
Pin Guides
![]() Flail Head Bottom
Flail Head Bottom
![]() Adaptor
Adaptor
Fig. 4
1.Insert the three Pivot Pins into the pin guides in the Flail Head Top (Fig. 5).
Pivot Pins ![]()
Flail Head Top
Pin Guides ![]()
Fig. 5
2.Place one Flail Blade on each Pivot Pin (Fig. 6).
Flail Blades
Pivot Pins
Fig. 3
Fig. 6
9