OPERATION
T- JOINTS
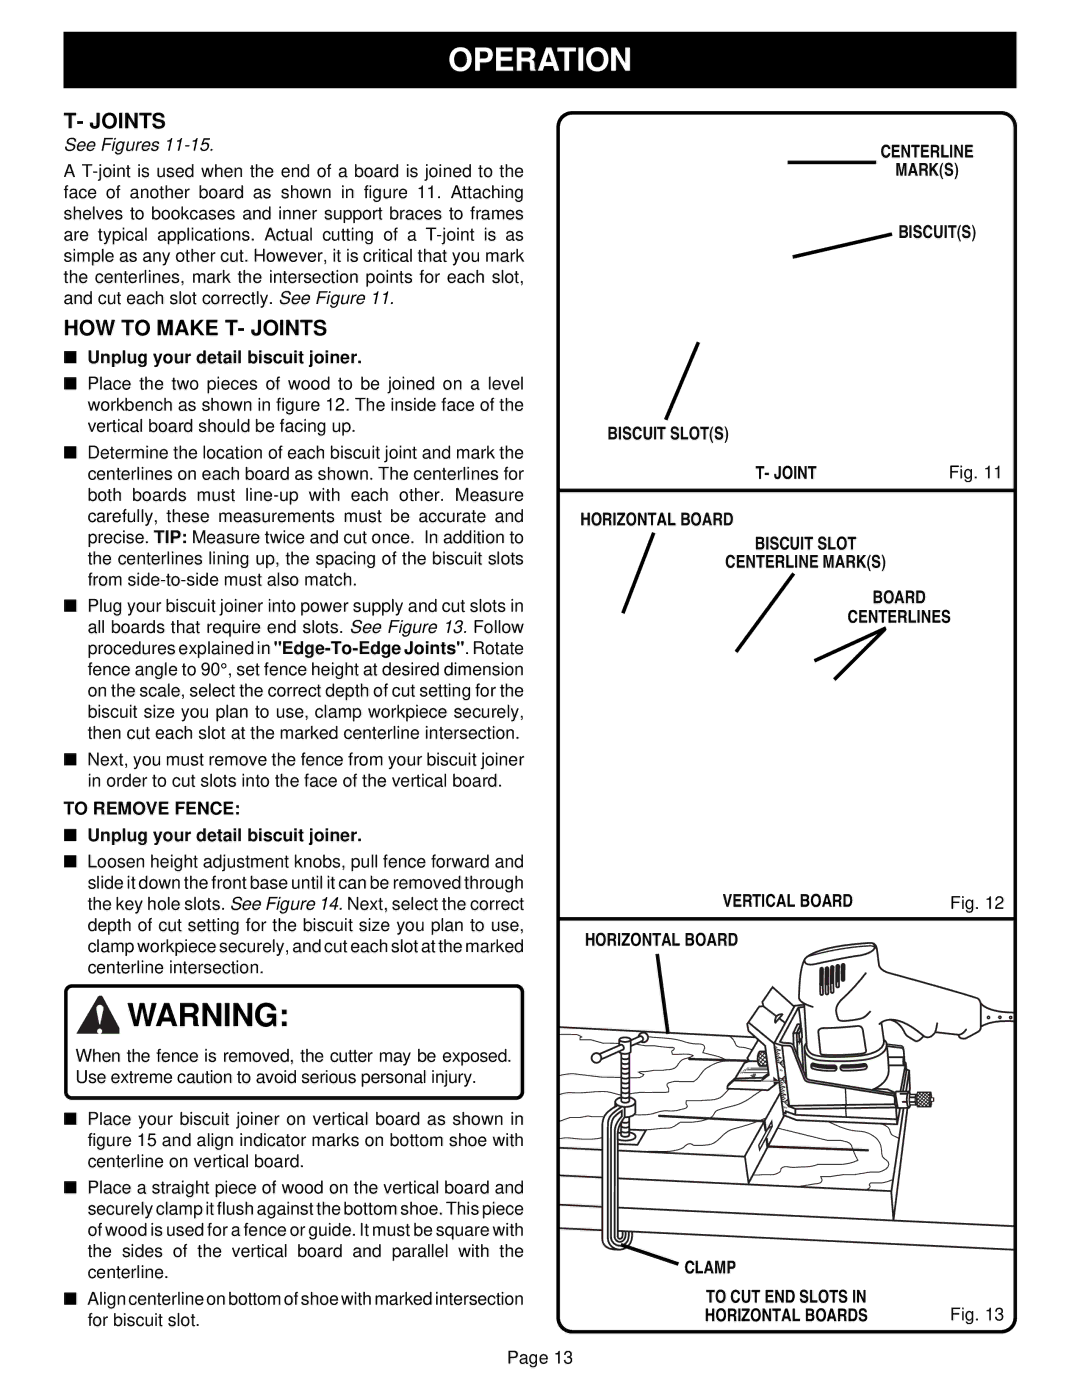
See Figures 11-15.
A
CENTERLINE
MARK(S)
BISCUIT(S)
HOW TO MAKE T- JOINTS
■Unplug your detail biscuit joiner.
■Place the two pieces of wood to be joined on a level workbench as shown in figure 12. The inside face of the vertical board should be facing up.
■Determine the location of each biscuit joint and mark the centerlines on each board as shown. The centerlines for both boards must
■Plug your biscuit joiner into power supply and cut slots in all boards that require end slots. See Figure 13. Follow procedures explained in
■Next, you must remove the fence from your biscuit joiner in order to cut slots into the face of the vertical board.
BISCUIT SLOT(S)
T- JOINT | Fig. 11 |
HORIZONTAL BOARD
BISCUIT SLOT
CENTERLINE MARK(S)
BOARD
CENTERLINES
TO REMOVE FENCE:
■Unplug your detail biscuit joiner.
■Loosen height adjustment knobs, pull fence forward and slide it down the front base until it can be removed through the key hole slots. See Figure 14. Next, select the correct depth of cut setting for the biscuit size you plan to use, clamp workpiece securely, and cut each slot at the marked centerline intersection.
VERTICAL BOARD | Fig. 12 |
HORIZONTAL BOARD
![]() WARNING:
WARNING:
When the fence is removed, the cutter may be exposed. Use extreme caution to avoid serious personal injury.
■Place your biscuit joiner on vertical board as shown in
figure 15 and align indicator marks on bottom shoe with centerline on vertical board.
■Place a straight piece of wood on the vertical board and securely clamp it flush against the bottom shoe. This piece of wood is used for a fence or guide. It must be square with the sides of the vertical board and parallel with the centerline.
■Align centerline on bottom of shoe with marked intersection for biscuit slot.
Page 13
|
| 5 |
| 1 | 16 |
| 45° | |
3 | 2 |
3 4
0 90°
CLAMP |
|
TO CUT END SLOTS IN | Fig. 13 |
HORIZONTAL BOARDS |