FEATURES
![]() WARNING:
WARNING:
Carefully read through this entire operator's manual before using your new planer. Pay close attention to the Safety Rules, Warnings and Cautions. If you use your planer properly and only for what it is intended, you will enjoy years of safe, reliable service.
KNOW YOUR PLANER
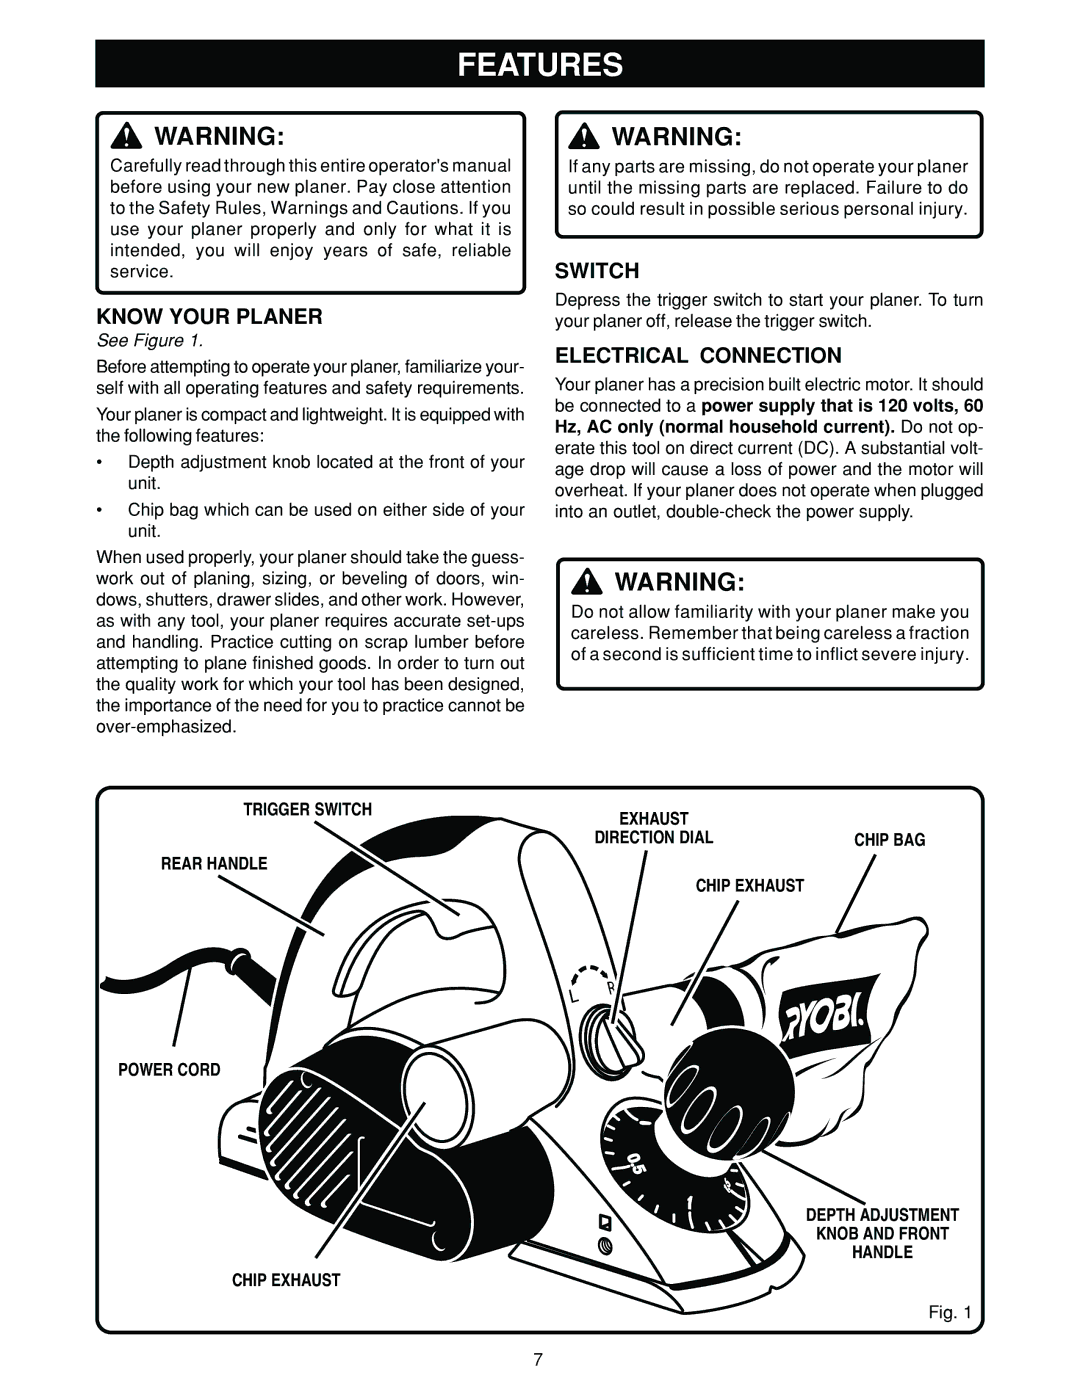
See Figure 1.
Before attempting to operate your planer, familiarize your- self with all operating features and safety requirements.
Your planer is compact and lightweight. It is equipped with the following features:
•Depth adjustment knob located at the front of your unit.
•Chip bag which can be used on either side of your unit.
When used properly, your planer should take the guess- work out of planing, sizing, or beveling of doors, win- dows, shutters, drawer slides, and other work. However, as with any tool, your planer requires accurate
![]() WARNING:
WARNING:
If any parts are missing, do not operate your planer until the missing parts are replaced. Failure to do so could result in possible serious personal injury.
SWITCH
Depress the trigger switch to start your planer. To turn your planer off, release the trigger switch.
ELECTRICAL CONNECTION
Your planer has a precision built electric motor. It should be connected to a power supply that is 120 volts, 60 Hz, AC only (normal household current). Do not op- erate this tool on direct current (DC). A substantial volt- age drop will cause a loss of power and the motor will overheat. If your planer does not operate when plugged into an outlet,
![]() WARNING:
WARNING:
Do not allow familiarity with your planer make you careless. Remember that being careless a fraction of a second is sufficient time to inflict severe injury.
TRIGGER SWITCH | EXHAUST |
|
|
| |
| DIRECTION DIAL | CHIP BAG |
REAR HANDLE
CHIP EXHAUST
POWER CORD
DEPTH ADJUSTMENT
KNOB AND FRONT
HANDLE
CHIP EXHAUST
Fig. 1
7
