OPERATION
WARNING:
If you are changing an accessory immediately after use, be careful not to touch the collet, collet nut, or the accessory with your hands or fingers. You will get burned because of the heat buildup from cutting. Always use the wrench provided.
CAUTION:
To prevent damage to the spindle or spindle lock, always allow motor to come to a complete stop before engaging the spindle lock.
INSTALLING ACCESSORIES
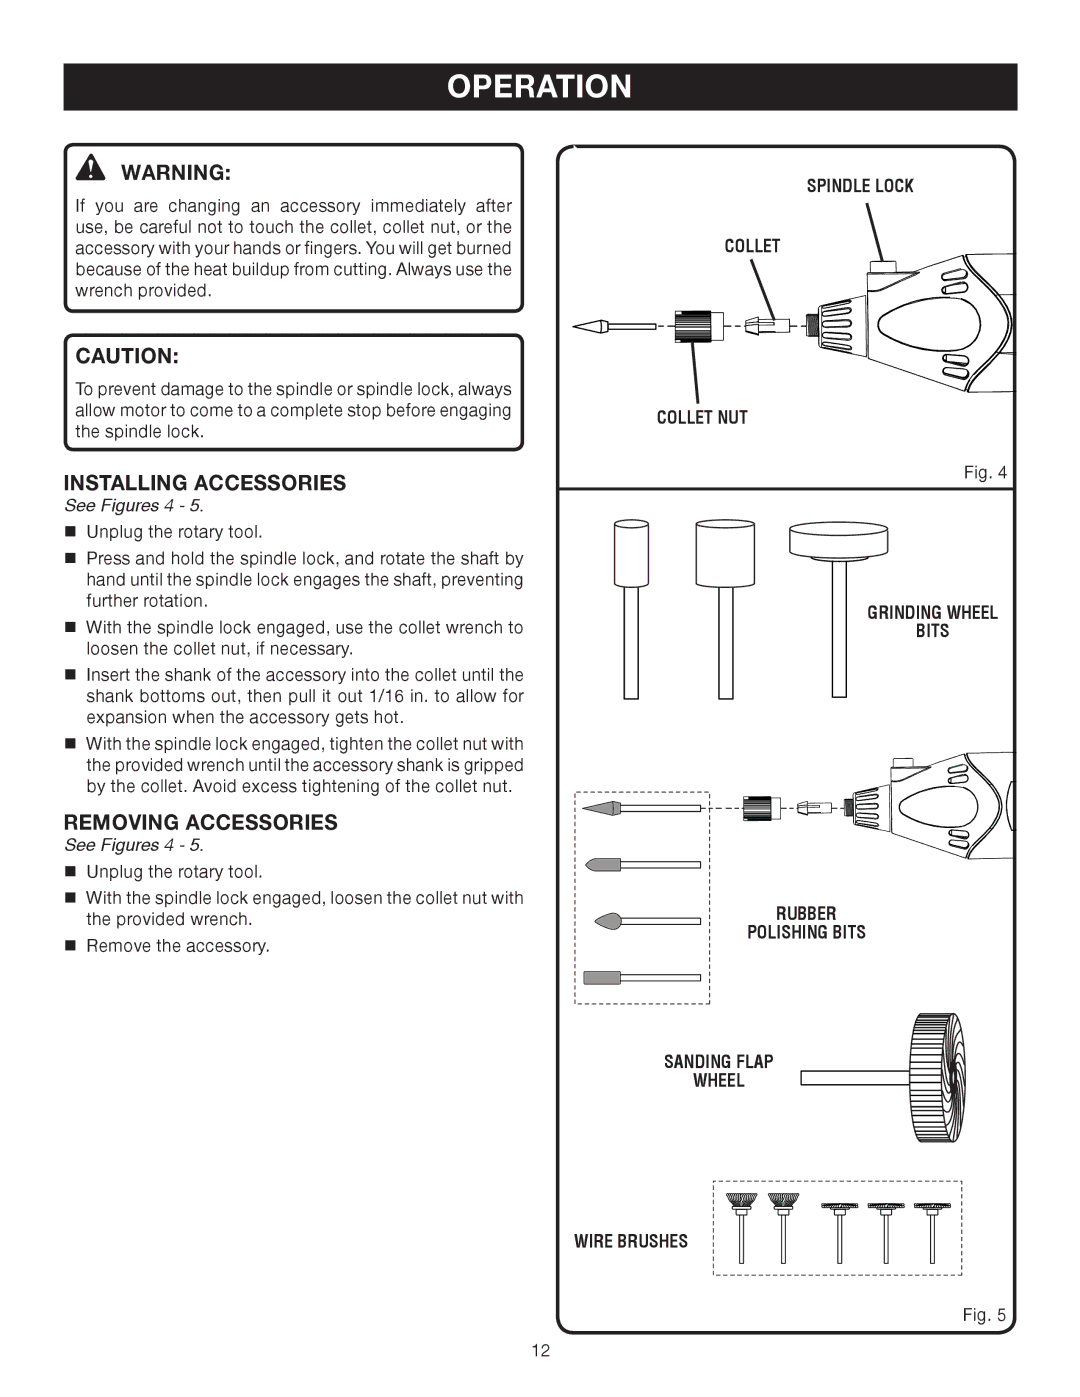
See Figures 4 - 5.
Unplug the rotary tool.
Press and hold the spindle lock, and rotate the shaft by hand until the spindle lock engages the shaft, preventing further rotation.
With the spindle lock engaged, use the collet wrench to loosen the collet nut, if necessary.
Insert the shank of the accessory into the collet until the shank bottoms out, then pull it out 1/16 in. to allow for expansion when the accessory gets hot.
With the spindle lock engaged, tighten the collet nut with the provided wrench until the accessory shank is gripped by the collet. Avoid excess tightening of the collet nut.
REMOVING ACCESSORIES
See Figures 4 - 5.
Unplug the rotary tool.
With the spindle lock engaged, loosen the collet nut with the provided wrench.
Remove the accessory.
SPINDLE LOCK
COLLET
COLLET NUT
Fig. 4
GRINDING WHEEL
BITS
RUBBER
POLISHING BITS
SANDING FLAP
WHEEL
WIRE BRUSHES
Fig. 5
12