ASSEMBLY
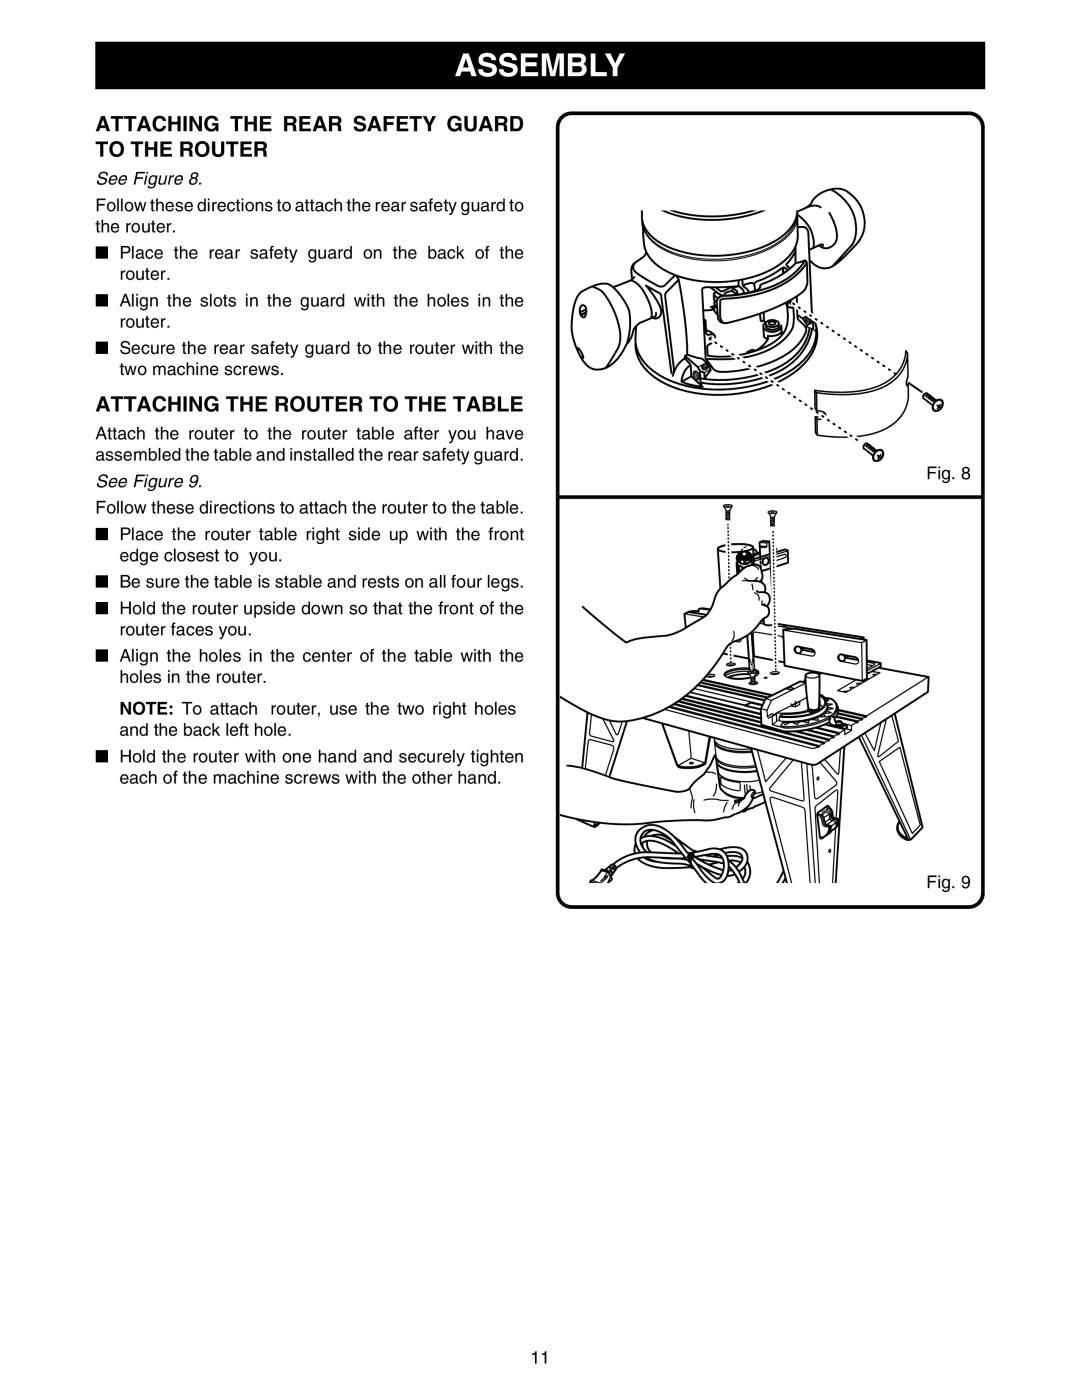
ATTACHING THE REAR SAFETY GUARD
TO THE ROUTER
See Figure 8.
Follow these directions to attach the rear safety guard to the router.
QPlace the rear safety guard on the back of the router.
Q Align the slots in the guard with the holes in the router.
QSecure the rear safety guard to the router with the
two machine screws.
ATTACHING THE ROUTER TO THE TABLE
Attach the router to the router table after you have assembled the table and installed the rear safety guard.
See Figure 9.
Follow these directions to attach the router to the table.
QPlace the router table right side up with the front
edge closest to you.
Q Be sure the table is stable and rests on all four legs.
Q Hold the router upside down so that the front of the router faces you.
Q Align the holes in the center of the table with the holes in the router.
NOTE: To attach router, use the two right holes and the back left hole.
QHold the router with one hand and securely tighten each of the machine screws with the other hand.
Fig. 8
Fig. 9
11