OPERATION
Using fence
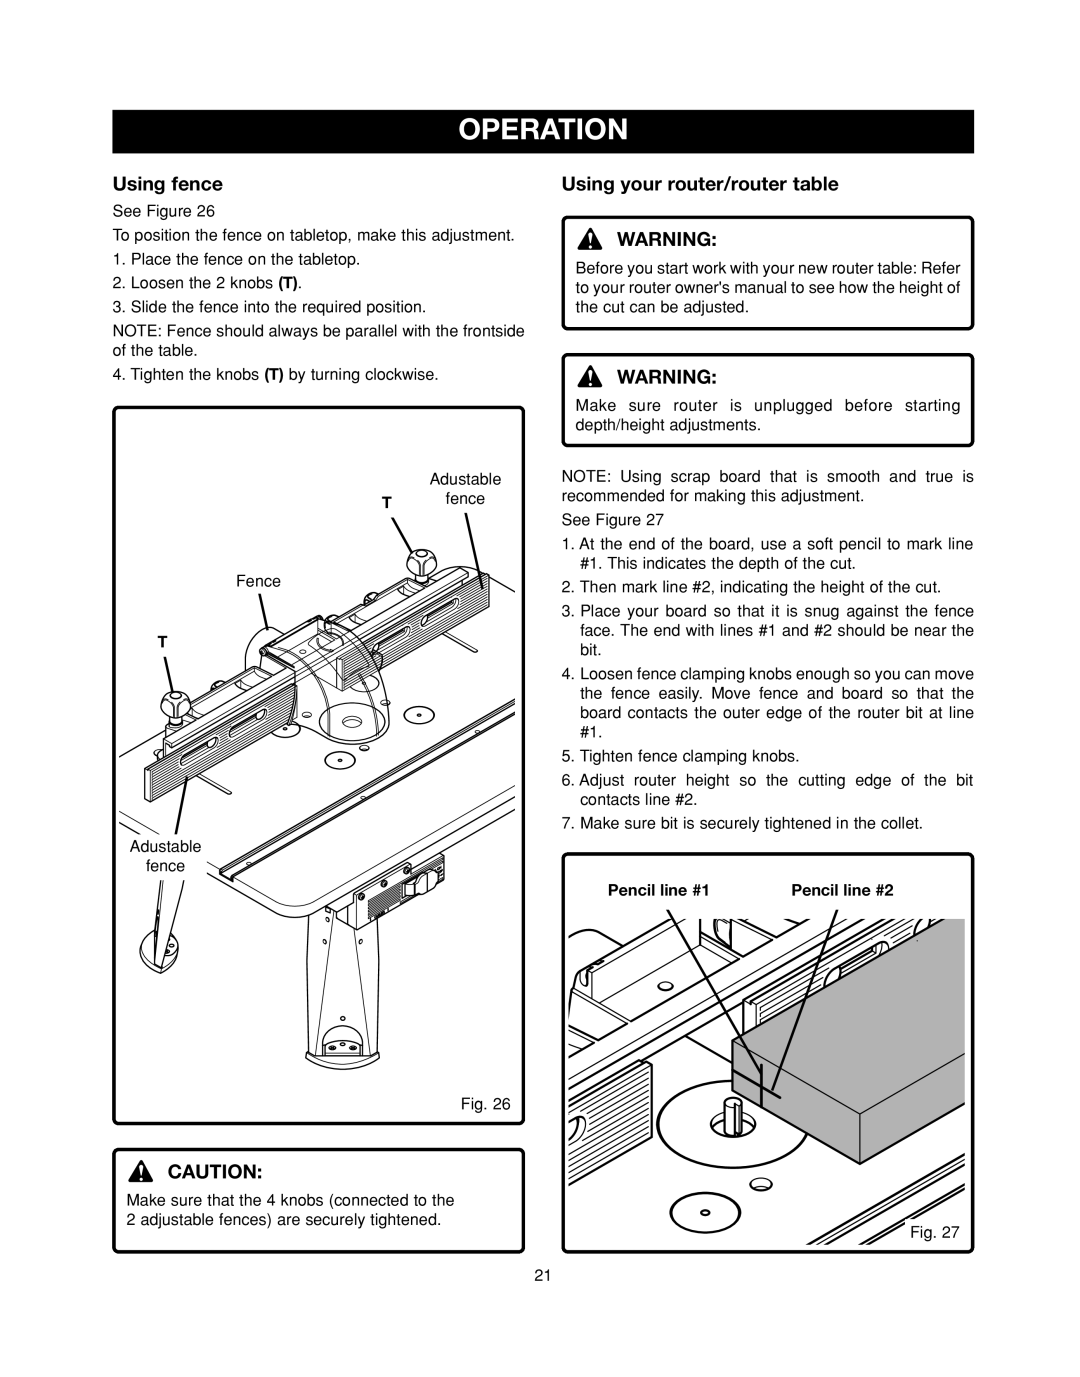
See Figure 26
To position the fence on tabletop, make this adjustment.
1.Place the fence on the tabletop.
2.Loosen the 2 knobs (T).
3.Slide the fence into the required position.
NOTE: Fence should always be parallel with the frontside of the table.
4. Tighten the knobs (T) by turning clockwise.
Using your router/router table
WARNING:
Before you start work with your new router table: Refer to your router owner's manual to see how the height of the cut can be adjusted.
WARNING:
Make sure router is unplugged before starting depth/height adjustments.
Adustable
T fence
Fence
T
Adustable
fence
Fig. 26
CAUTION:
Make sure that the 4 knobs (connected to the 2 adjustable fences) are securely tightened.
NOTE: Using scrap board that is smooth and true is recommended for making this adjustment.
See Figure 27
1.At the end of the board, use a soft pencil to mark line #1. This indicates the depth of the cut.
2.Then mark line #2, indicating the height of the cut.
3.Place your board so that it is snug against the fence face. The end with lines #1 and #2 should be near the bit.
4.Loosen fence clamping knobs enough so you can move the fence easily. Move fence and board so that the board contacts the outer edge of the router bit at line #1.
5.Tighten fence clamping knobs.
6.Adjust router height so the cutting edge of the bit contacts line #2.
7.Make sure bit is securely tightened in the collet.
Pencil line #1 | Pencil line #2 |
Fig. 27
21
