MAINTENANCE
CLEANING THE EXHAUST PORT AND MUFFLER
Depending on the type of fuel used, the type and amount of oil used, and/or your operating conditions, the exhaust port and muffler may become blocked with carbon deposits. If you notice a power loss with your gas powered tool, a qualified service technician will need to remove these deposits to restore performance.
SPARK ARRESTOR
The spark arrestor must be cleaned or replaced every 25 hours or yearly to ensure proper performance of your product. Spark arrestors may be in different locations depending on the model purchased. Please contact your nearest service dealer for the location of the spark arrestor for your model.
Cleaning Instructions:
■Remove the spark arrestor from the muffler.
■If your spark arrestor is made of a fiberglass material, discard and replace.
■If your spark arrestor is made of a metal material follow these cleaning instructions:
1.Spray the spark arrestor with a quality carbon cleaner.
2.Gently clean using a wire brush.
3.Install the new or cleaned spark arrestor and reas- semble completely before use.
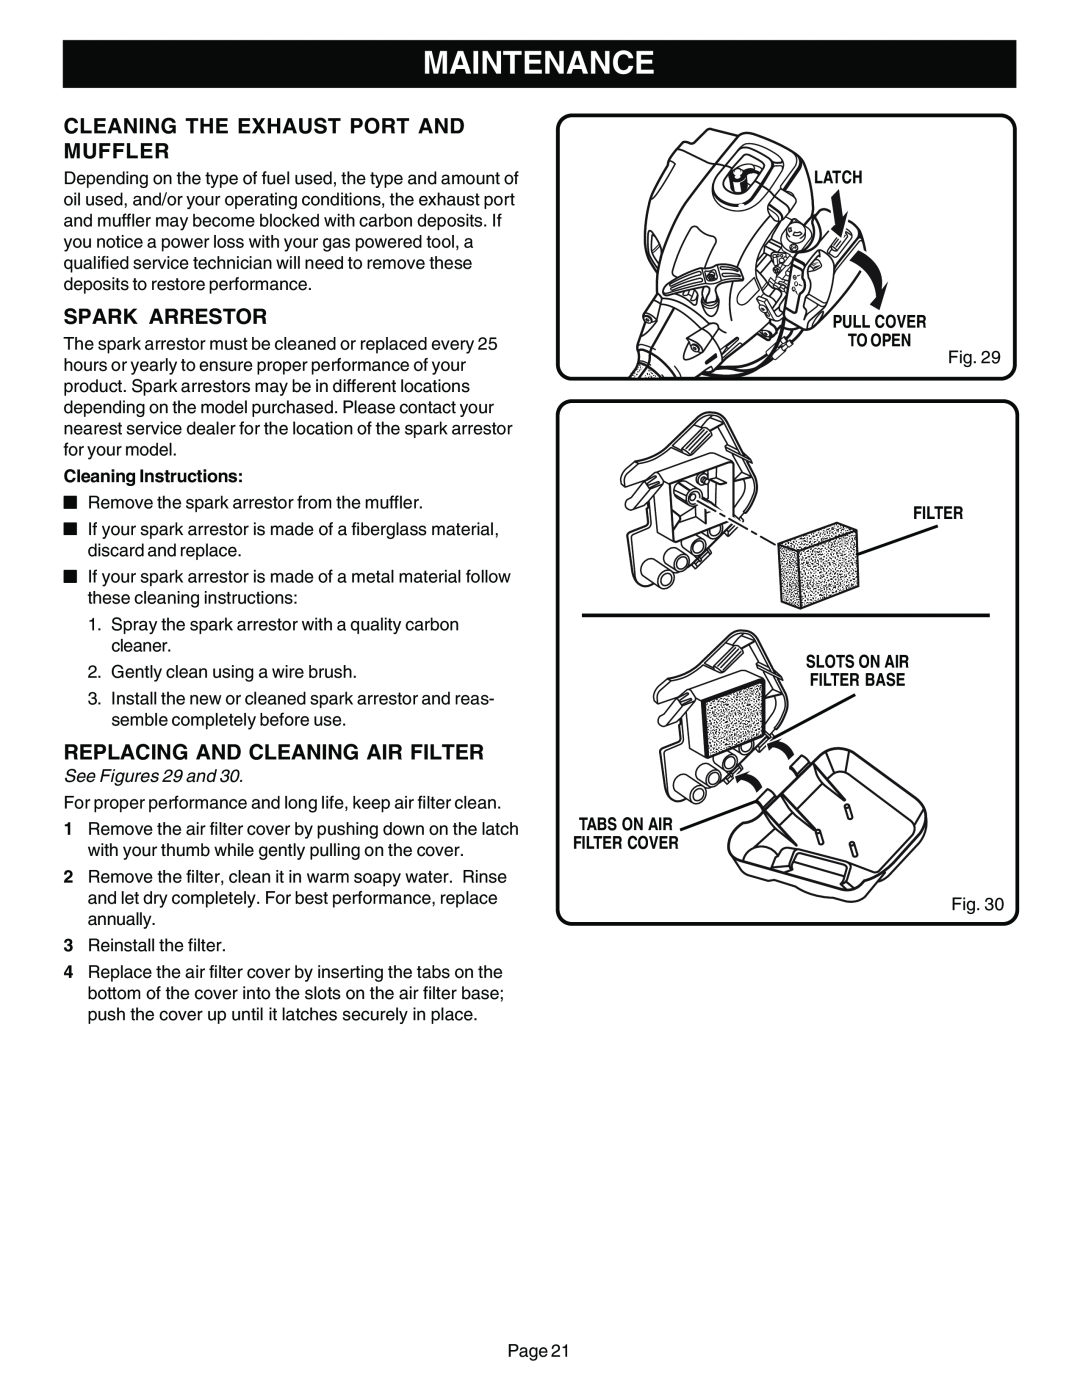
REPLACING AND CLEANING AIR FILTER
See Figures 29 and 30.
For proper performance and long life, keep air filter clean.
1Remove the air filter cover by pushing down on the latch with your thumb while gently pulling on the cover.
2Remove the filter, clean it in warm soapy water. Rinse and let dry completely. For best performance, replace annually.
3Reinstall the filter.
4Replace the air filter cover by inserting the tabs on the bottom of the cover into the slots on the air filter base; push the cover up until it latches securely in place.
LATCH
![]() PULL COVER
PULL COVER
TO OPEN
Fig. 29
FILTER
SLOTS ON AIR
FILTER BASE
TABS ON AIR
FILTER COVER
Fig. 30
Page 21
